• About

Caro's Pretty Things

~ My papercraft blog

Monthly Archives: November 2013

Storage idea: sponge daubers

17 Sunday Nov 2013

Posted by Carolyn in 3D projects, Boxes, Thoughts and comments, Tutorial

≈ 1 Comment

Tags

sponge daubers, Stampin Up, Storage, wood mount case ideas

Hi

Today I want to show you a fabulous idea I got from a fabulous Stampin’ Up! demonstrator in the UK – Sam at pootles.com.uk.   If you haven’t checked out her blog and videos on YouTube you must.  Now.  I insist!  (But please do come back!)

Look at my new (and OK, I admit, extremely anally retentive!) way to store my sponge daubers!

Sponge dauber storage box

I use these little daubers all the time, but spend ages in my drawer hunting for them, and then cleaning them before I use them to get rid of the last hint of colour from the last time I used them.  No more! Inspired by Sam’s blog post I bought a new set and  I now have a lovely little box with a sponge dauber for every colour I own.

The sponges are stored in one of Stampin’ Up!’s wood mount cases (you can now buy the cases in lots of 4 and they are soooooo handy!)

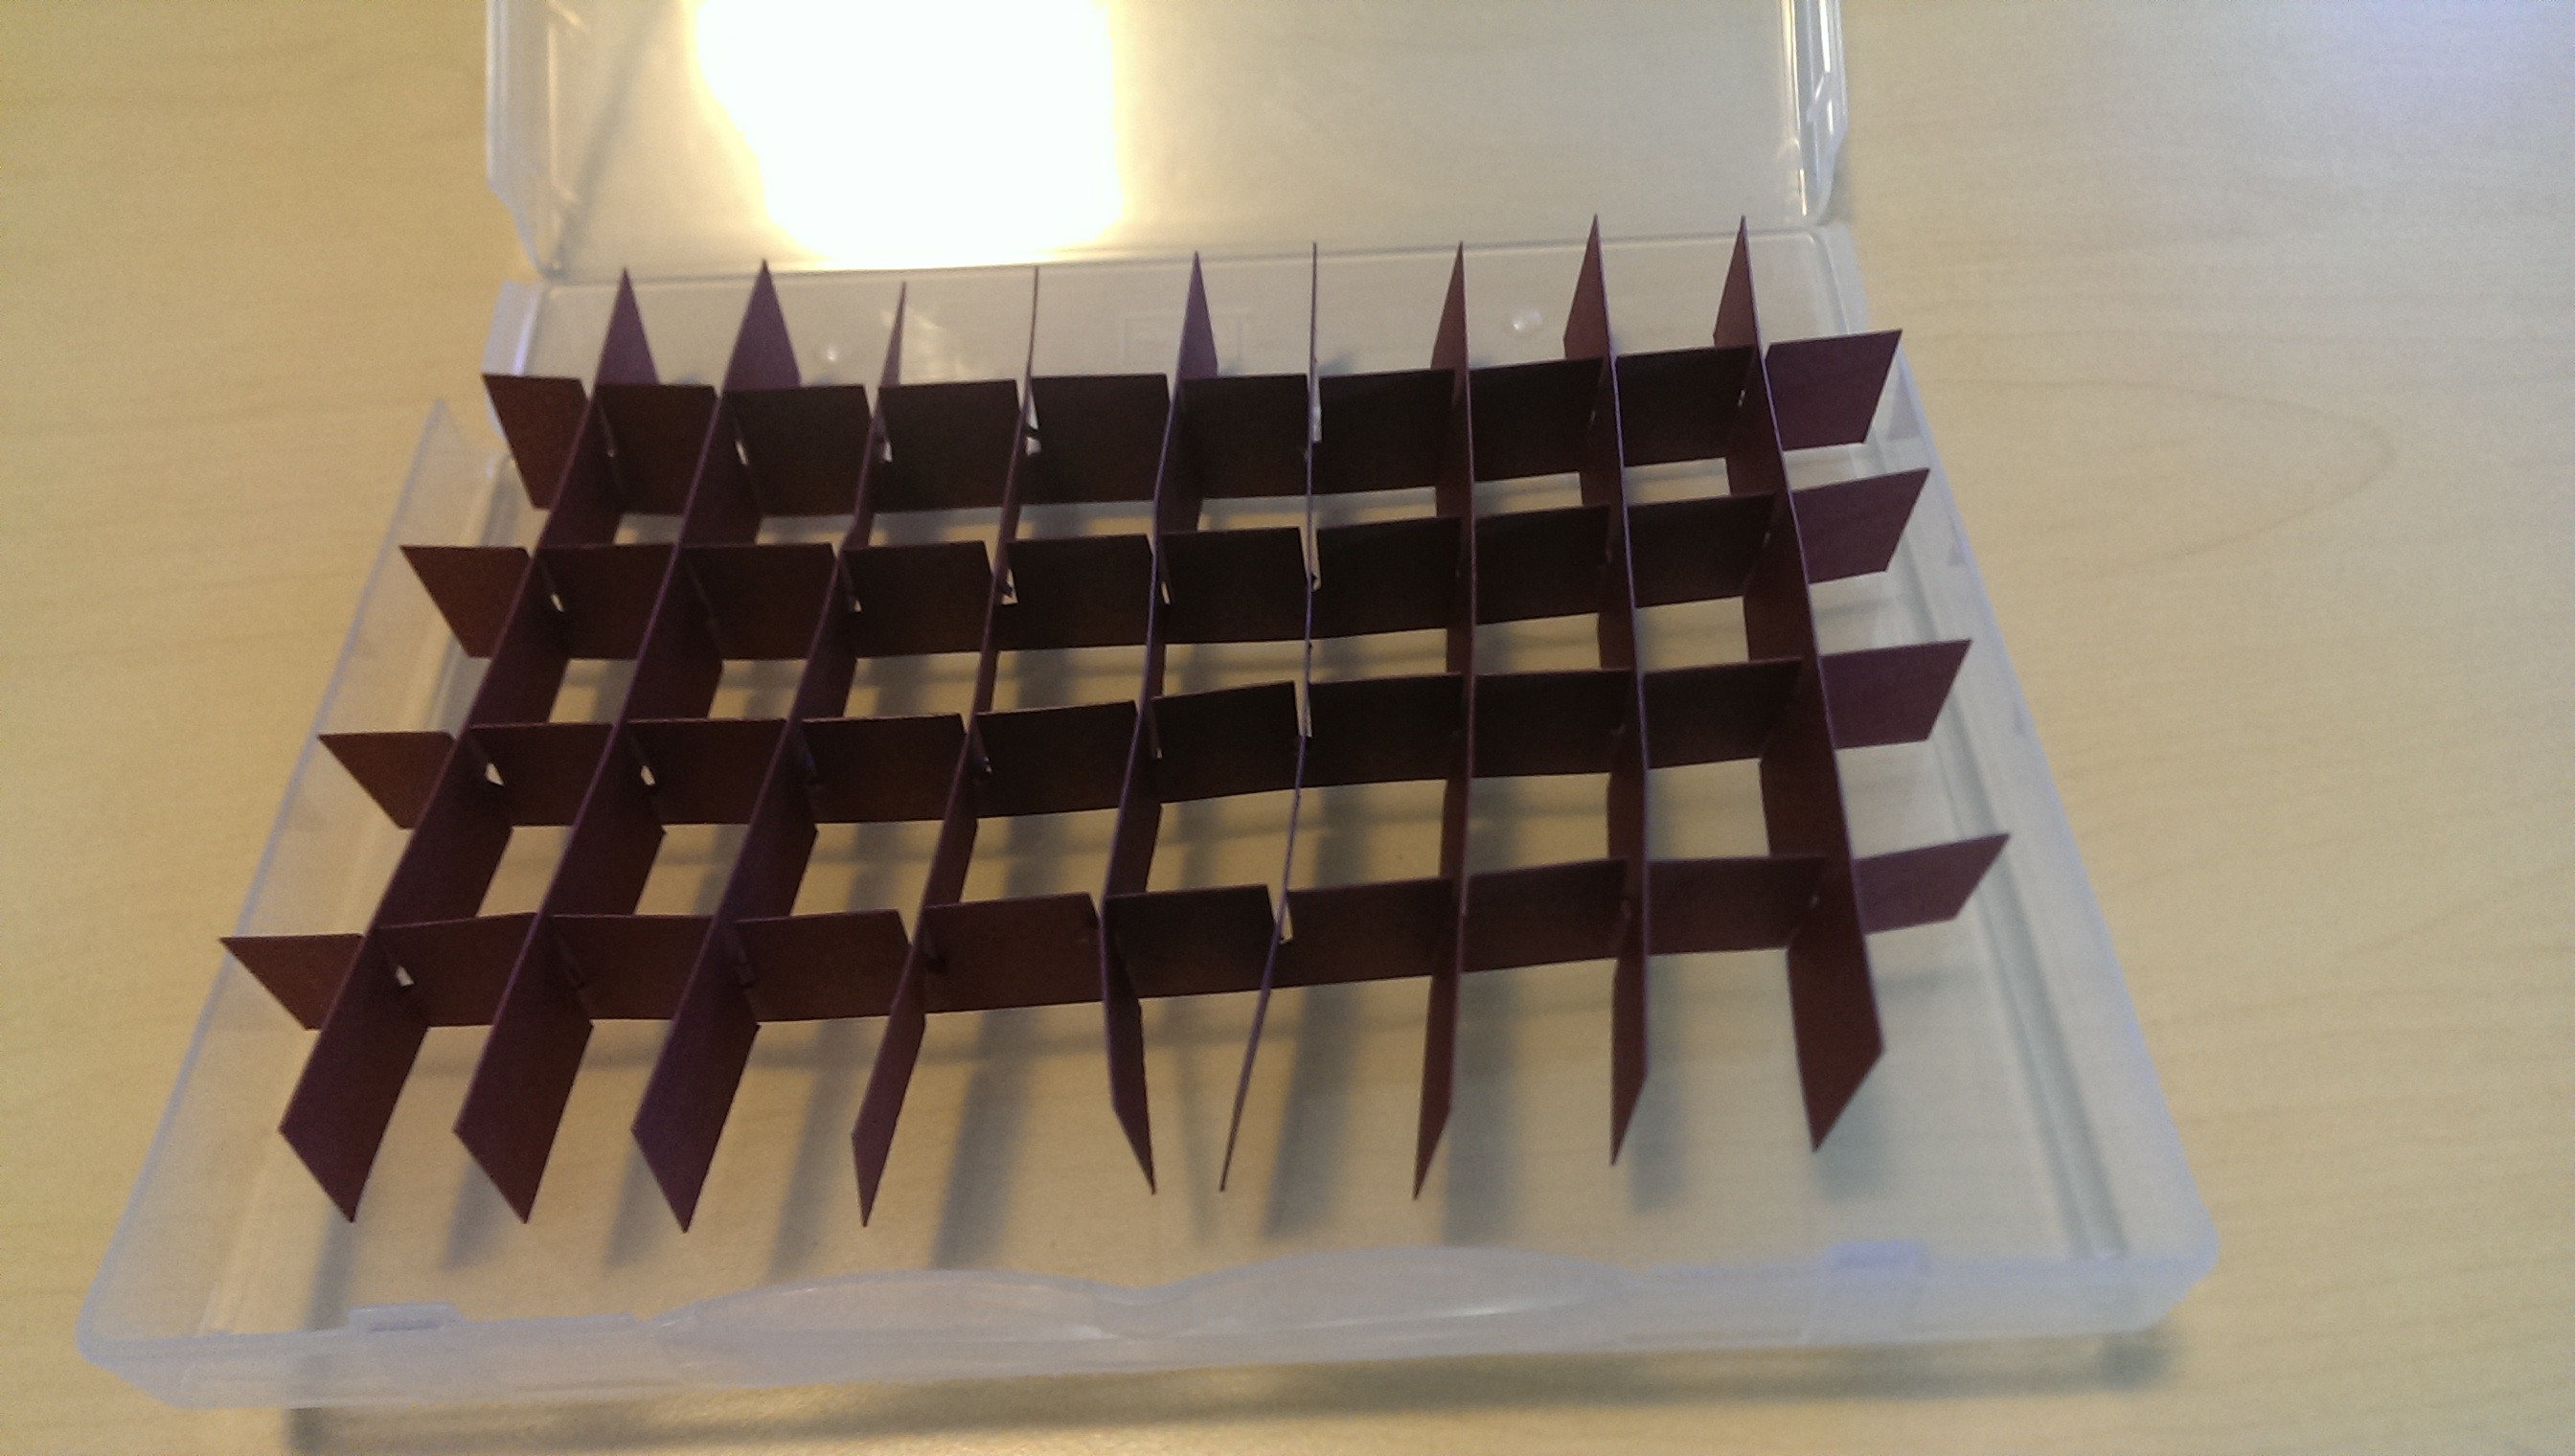
This is my box on the inside:

Wood mount case sponge dauber storage box

Sam at pootles.com.uk has a great video on how to make the inserts for the box.

I ended up changing the dimensions Sam gives for the inserts just ever so slightly for mine.  I used 9 strips of card stock 12.5 cm long and 2 cm wide, notched at 1 inch spaces.  (I know that is a weird switch between metric and imperial, but trust me, it’s easier that way!)   Then I used 4 strips of card stock 17.8cm wide with notches every 1.8 cm.  This gives you 5 rows of 10 spaces each for your sponges.

Card stock inserts for sponge dauber storage

To make the notches I made 2 cuts with my scissors on either side of my pen mark (perhaps 2mm apart) and just removed the tiny bit of paper in the middle.

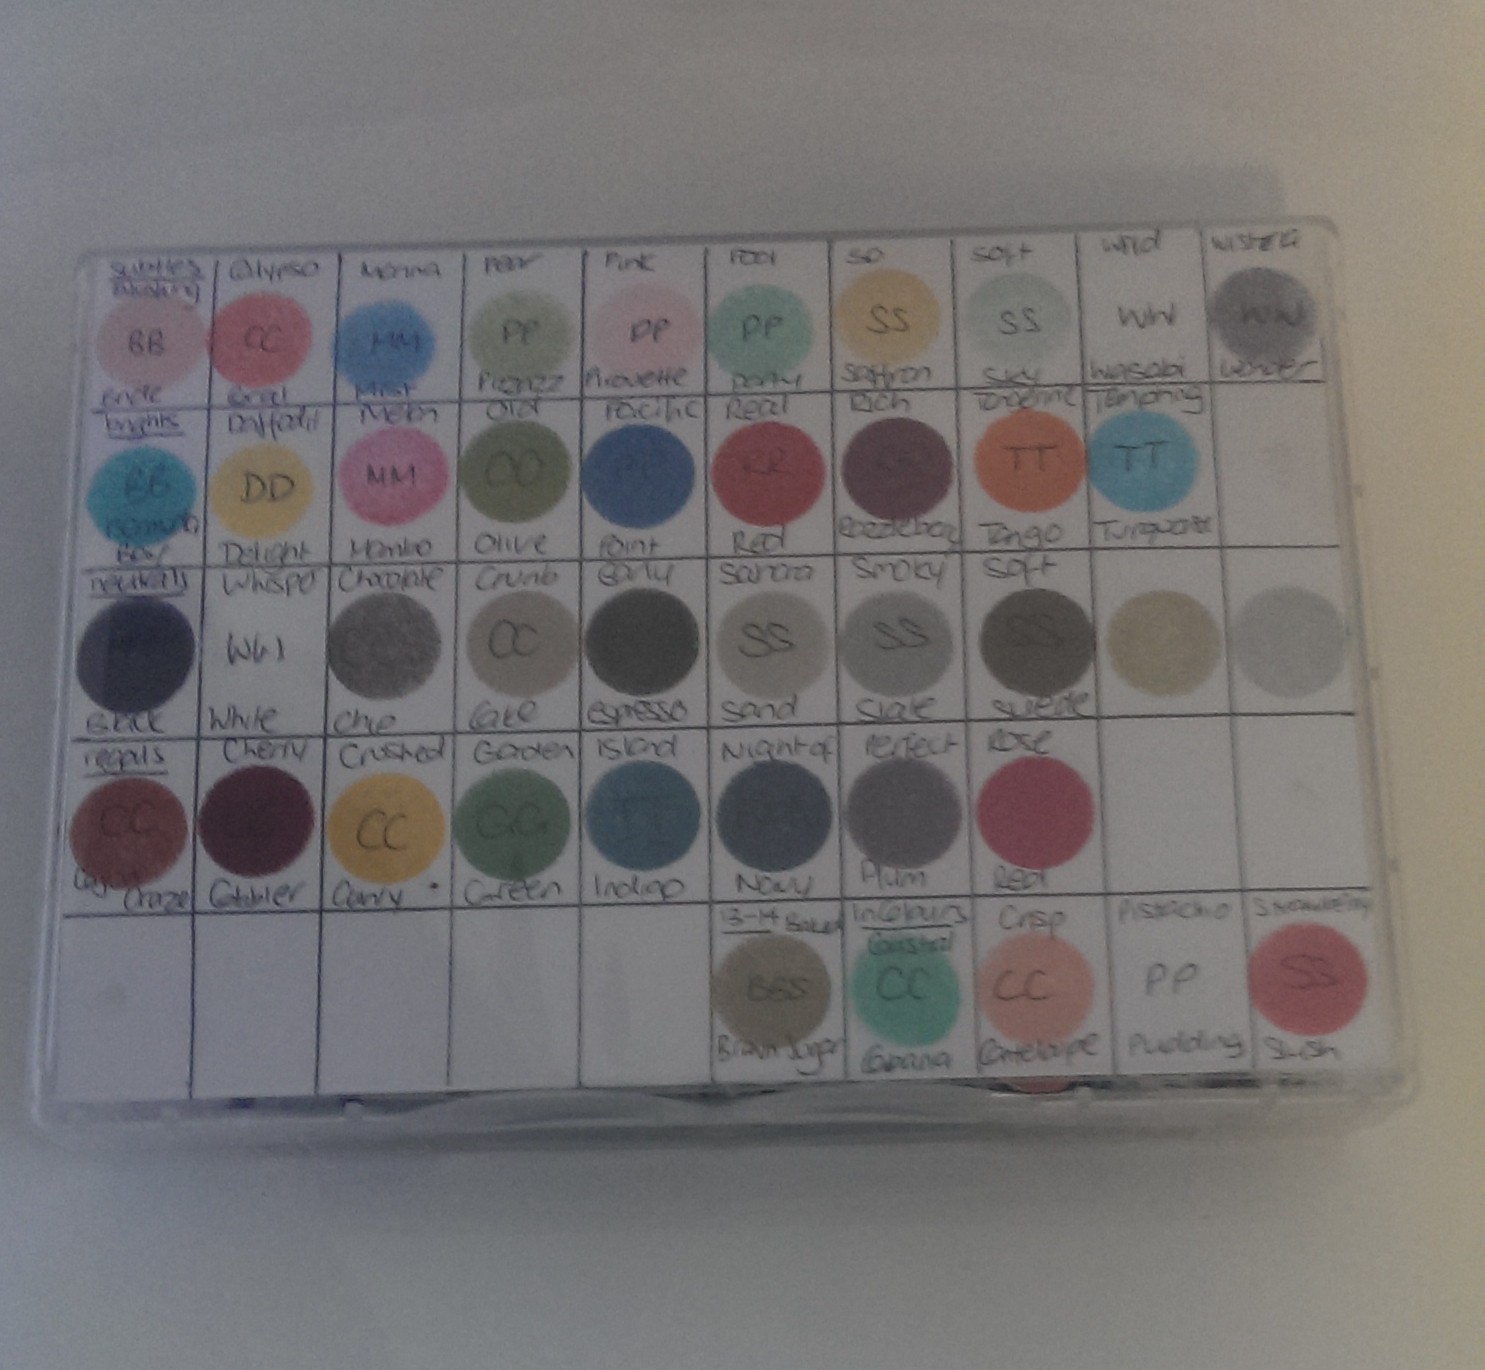
One of the things Sam doesn’t show you in her video is how she got the little circles of colour on the colour chart in her box to show which dauber goes where.    Watching the video, she says it was a very messy process to do – and that I can believe!   So before I made my own box I did some thinking about how I could avoid the mess of inking up all the sponge daubers all at the same time.

I decided to make a 2 sided cover for my box.  A front cover where I could control the mess and dab on one colour at a time, and a blank grid to go on the inside where I will let the daubers ‘do their thing’ over time. (I also took the opportunity to re-arrange and re-ink my ink pads as I opened each one – oh, I was in my own little organisational-nerd heaven this afternoon!)

I cut a piece of white card stock 12.5 x 17.8cm and used my ruler to draw a grid the same dimensions as the notches in the card stock.   I used a few mini glue dots on the blank spaces in my ‘cover’ grid to stick it to the plastic on the cover of the box.

Thanks to Sam for a brilliant idea – and I am so chuffed to have all my daubers so neatly arranged 🙂

Thanks for reading

Caro x

Share this:

  • Pinterest
  • Twitter
  • Facebook
  • Email
  • More
  • Reddit
  • Tumblr

Like this:

Like Loading...

Ben’s birthday card

16 Saturday Nov 2013

Posted by Carolyn in 1 3/4 circle, Cards, Kids cards, Punches, Star, Using up scraps

≈ Leave a comment

Tags

5th birthday, 5th birthday card, Birthday card, Kids cards, name card

Hello!

Today we had a 5th birthday party for a little boy called Ben.   Here’s the birthday card we made this morning:

letter, circle and star kid's birthday card


The colours are Night of Navy, Daffodil Delight and Poppy Parade (now retired, but Real Red would look just as good)

I used the 1 3/4 inch circle punch and a star punch as well as using my Big Shot and an alphabet die set to die cut the letters.

My son – and creative director! – insisted Ben needed ‘jewels’ on the card – so he stuck on 5, for a 5th birthday.  I’m actually quite impressed – he stuck them on really quite straight!

The little birthday boy seemed very chuffed with his card – so job done!   I was actually really pleased with how it turned out – sometimes the simplest cards are the most effective I think?

Thanks for reading.

Caro

Share this:

  • Pinterest
  • Twitter
  • Facebook
  • Email
  • More
  • Reddit
  • Tumblr

Like this:

Like Loading...

Apothecary Art thank you cards

15 Friday Nov 2013

Posted by Carolyn in Big Shot, Cards, Labels collection, Thank you

≈ Leave a comment

Tags

Apothecary Art, embossing, thank you cards

Hello – thanks for dropping by Caro’s Pretty Things!

I have been very lucky to have many people in my life I need to say thank you to recently.  So I sat down the other day to make a few thank you cards.   I wanted to do something a little out of my comfort zone and try and make some cards that would convey a little of how grateful I am to the recipients.

I used the largest image from the Apothecary Art stamp set cut out with my Labels framelits, and my embossing powders with VersaMark ink to make the stamped images really ‘pop’ off the page.

Here are the cards, I hope you enjoy.

Caro

Melon Mambo:


Apothecary Art thank you card - Melon Mambo

(I used the thank you greeting from the Simply Sketched stamp set and the tag is from the Designer Frames embossing folder)

Basic black:

Black embossed Apothecary Art card


Here’s a close up of the embossing:

Black embossing powder

Simple ribbon card front (stamping on the inside):


Simple black and white card


Black embossed Apothecary Art card


Chocolate chip and gold ink (with First Edition DSP):

Gold embossed Apothecary Art card

Share this:

  • Pinterest
  • Twitter
  • Facebook
  • Email
  • More
  • Reddit
  • Tumblr

Like this:

Like Loading...

Winter Frost non-Christmas cards – Papillon Potpourri

14 Thursday Nov 2013

Posted by Carolyn in Birthday, Cards, General occasion

≈ Leave a comment

Tags

Butterfly card, butterfly craft, embossing, embossing powder, Express Yourself, Papillon Potpourri, Stampin Up, Winter Frost

Hello

Yesterday I showed you a 30th birthday card I made using the Winter Frost DSP. Today I wanted to show you two similar cards using the Papillon Potpourri set and my silver embossing powder:

Embossed Papillon Potpourri

Coastal Cabanna Winter Frost Papillon Potpourri silver embossed butterflyThe butterfly looks amazing with the silver embossing.  It’s a bit hard to capture in a photo but a close up might help:

Silver embossed Papillon Potpourri butterflyThe second card has an embossed message ‘Always thinking of you’ (from 2013 hostess set ‘Express Yourself’) on the bottom left:

Embossed Express Yourself

I learnt a tip when doing this embossing.  Make sure you emboss and THEN stick your paper to your card.    I decided to emboss this message after I’d already made the card and the heat gun made the glue come a bit unstuck which I had to go back and fix.  Lesson learned!

As I said yesterday, I really only bought this DSP to give myself a challenge by working with colours outside of my comfort zone (and it’s a bargain, a stack of 48 sheets, 24 each of 2 double-sided designs for $11.95)  As it turns out though, I absolutely LOVE these cards and can’t wait to try more using this paper.    I still can’t imagine using it for Christmas cards though!

I hope you enjoy.  Thanks for reading.

Caro x


Share this:

  • Pinterest
  • Twitter
  • Facebook
  • Email
  • More
  • Reddit
  • Tumblr

Like this:

Like Loading...

Winter Frost 30th birthday card

13 Wednesday Nov 2013

Posted by Carolyn in Birthday, Cards, Framelits, Labels collection

≈ Leave a comment

Tags

30th birthday cards, Memorable Moments, Winter Frost

Hi

I have been looking at lots of Christmas cards on the internet using Stampin’ Up!’s Winter Frost designer series paper.  It is gorgeous paper and the cards are beautiful – but for some reason it doesn’t really scream ‘Christmas’ to me.   The paper also uses colours that are usually a bit out of my comfort zone.   So I set myself a challenge of using the paper for some non-Christmas cards.

Today I wanted to show you a card I made for a good friend’s 30th birthday.

Winter Frost & Memorable Moments 30th birthday cardThe card is Smoky Slate with Winter Frost DSP in Smoky Slate, Coastal Cabana and Pool Party.   The ribbon is some I saved from the wrapping on a present I was given.

The label and stamping uses the Memorable Moments stamp set, which has to be one of the most versatile sets in the current catalogue.   The outline of the label perfectly matches the Labels Framelits dies.   Here’s a close up of the label:

Memorable Moments 30th birthday

Stay tuned and I’ll show you some other non-Christmas cards I made with Winter Frost.

Thanks for reading

Caro x


Share this:

  • Pinterest
  • Twitter
  • Facebook
  • Email
  • More
  • Reddit
  • Tumblr

Like this:

Like Loading...

Post card birthday card

11 Monday Nov 2013

Posted by Carolyn in Birthday, Cards, Curly label, Masculine, Modern Label, Punches

≈ Leave a comment

Tags

Post Card, Priority Mail, Stampin Up, teenage boy cards

Hello

I needed to make a card for a teenage boy on the weekend.  Always a slightly daunting thought. I have lots of stamps that are suitable for babies and young children, and teenage girls are covered – but I find teenage boy cards a bit of a challenge.

Here’s what I came up with:

Stampin Up post card stampI used Stampin’ Up’s post card background stamp as well as stamps from last year’s hostess set ‘Priority Mail’ for the happy birthday stamp and special delivery.  The card is Island Indigo with Crushed Curry details.

I added another post card on the inside of the card as a space to write a message.

Stampin Up post card stamp - card insertWhat do you think?  I’m not quite convinced it really worked, but I hope he likes it anyway!

Thanks for reading

Caro x


Share this:

  • Pinterest
  • Twitter
  • Facebook
  • Email
  • More
  • Reddit
  • Tumblr

Like this:

Like Loading...

Magic colour tool!

08 Friday Nov 2013

Posted by Carolyn in Thoughts and comments

≈ Leave a comment

Tags

colour combinations, Melon Mambo, My Create Ink

Hi

Just a quick post for a Friday afternoon.  I’m just waiting on a client to email me back on something and then I can be done for the week.   So what to do while waiting? Browse stamping sites on the web of course!

I just wanted to share a site I just found – http://www.mycreateink.com/

It is a magic little tool for Stampin’ Up! colours.    You can make your own colour schemes based on the colours you own to see how they look, or get some ideas of which colours go with the ink pads you own.  For example, if you have a piece of Melon Mambo card stock on your desk, you can select Melon Mambo and click on ‘Search’ – and the magic little website will bring up colour combinations that go with Melon Mambo.

My Create Ink - Melon Mambo

You can also select colours only within certain Stampin’ Up! colour families or In Colour collections – or click on ‘Surprise Me’ and you’ll get a completely random colour combination to play with.

I’m so impressed – we should never be stuck for inspiration of what colours to mix together again!

Have a great weekend.

Caro x

Share this:

  • Pinterest
  • Twitter
  • Facebook
  • Email
  • More
  • Reddit
  • Tumblr

Like this:

Like Loading...

For you flower – and matching envelope

07 Thursday Nov 2013

Posted by Carolyn in 1 3/4 inch scallop circle, 1 3/8 circle, Birthday, Cards, General occasion, Kids cards, Punches

≈ Leave a comment

Tags

best of 25 years, cards, For You flower, Stampin Up

Hello

For those of you that follow Stampin’ Up!, you would know that it is their 25th anniversary this year.  As part of their birthday celebrations, they are bringing back some of the most popular stamps from the past 25 years.    I am very pleased with the November stamps, as they include one of my favourite stamps from the past few years – the one I call the For You flower (I’m not sure if it has a real name!).

Here is a card I made last year using this stamp:

For You flower card


One of the reasons I love this stamp so much is that it coordinates with the scallop punch and the 1 3/8 ” circle punch.

When I found this card, I also realised I had some left overs of the stripy paper.   And ta da – I made a matching envelope with my brand spanking envelope board punch!!!

Envelope with Envelope Board PunchI can’t tell you how excited I am by this envelope board punch.   I have been checking the blogosphere and already have lots of ideas I want to try out – oh, and making envelopes with it of course!

Thanks for reading

Caro x


Share this:

  • Pinterest
  • Twitter
  • Facebook
  • Email
  • More
  • Reddit
  • Tumblr

Like this:

Like Loading...

Carolyn Dalton

Independent Stampin Up! Demonstrator

Recent Posts

  • Pretty butterfly birthday card 
  • Adding an extra touch to a homemade envelope
  • Quick and easy masculine card 
  • Quick and easy kids card
  • Butterfly soap card

Archives

  • March 2016
  • February 2016
  • January 2016
  • December 2015
  • November 2015
  • October 2015
  • September 2015
  • August 2015
  • July 2015
  • June 2015
  • May 2015
  • April 2015
  • September 2014
  • July 2014
  • April 2014
  • March 2014
  • February 2014
  • November 2013
  • October 2013
  • September 2013
  • August 2013
  • July 2013
  • June 2013
  • May 2013
  • May 2012

Categories

  • 1 1/4 inch circle
  • 1 3/4 circle
  • 1 3/4 inch scallop circle
  • 1 3/8 circle
  • 1 inch circle
  • 1 inch square
  • 2 3/8 inch scallop punch
  • 3/4 inch circle
  • 3D / pop up
  • 3D projects
  • Anniversary
  • Baby cards
  • Beautiful Butterflies
  • Big Shot
  • Bird Builder
  • Birthday
  • Bitty Butterfly
  • Blossom
  • Blossom Builder
  • Boho Blossoms
  • Boxes
  • Butterfly (retired)
  • Candy Wrapper
  • Card sets
  • Cards
  • Chalk Talk
  • Christmas
  • Circle Thinlits
  • Circle treat cups
  • Circles #2
  • Corner rounder
  • Cupcake Builder
  • Cupcakes and other tasty treats
  • Curly label
  • Decorative Label
  • Dies
  • Elegant Butterly
  • Embossing folders
  • Envelopes
  • Extra Large Oval
  • Fancy Flower
  • Framelits
  • Full heart
  • General occasion
  • Gift bags
  • Gift bow
  • Gift card holders
  • Gift tags & wrapping
  • Home decorating
  • Horizontal Slot
  • Invitations
  • Jewellery tag
  • Kids cards
  • Kids craft ideas
  • Kids party
  • Labels collection
  • Large Oval
  • Love notes
  • Masculine
  • Mini scallop
  • Modern Label
  • Music Notes
  • Notebooks
  • Owl
  • Perfect Polka Dots
  • Petite curly label
  • Pinwheel die
  • Punches
  • Scallop circle
  • Scallop edge
  • Scallop envelope
  • Scallop oval
  • Scallop Tag Topper
  • Small Heart
  • Square Lattice
  • Star
  • Sweet treat cups
  • Tag
  • Tasteful Trim
  • Thank you
  • Thoughts and comments
  • Top Note
  • Tutorial
  • Uncategorized
  • Using up scraps
  • Washi tape
  • Wedding cards
  • Wheels
  • Wildflower Meadow
  • Word Window

Pinterest

Follow Me on Pinterest

Follow me on Twitter

My Tweets

Enter your email address to follow this blog and receive notifications of new posts by email.

Join 38 other followers

Blog at WordPress.com.

Cancel
loading Cancel
Post was not sent - check your email addresses!
Email check failed, please try again
Sorry, your blog cannot share posts by email.
Privacy & Cookies: This site uses cookies. By continuing to use this website, you agree to their use.
To find out more, including how to control cookies, see here: Cookie Policy
%d bloggers like this: