• About

Caro's Pretty Things

~ My papercraft blog

Category Archives: 1 inch circle

Homemade advent calendar

28 Saturday Nov 2015

Posted by Carolyn in 1 1/4 inch circle, 1 inch circle, 3D projects, Home decorating, Star, Tutorial, Washi tape

≈ 2 Comments

Tags

advent calendar, christmas craft, homemade advent calendar

I am ridiculously excited to show you what I’ve been working on over the past few days – an advent calendar!

  
I’ve just hung it on my wall after extracting solemn promises from Mr 6 that it will not be touched before 1 December! 

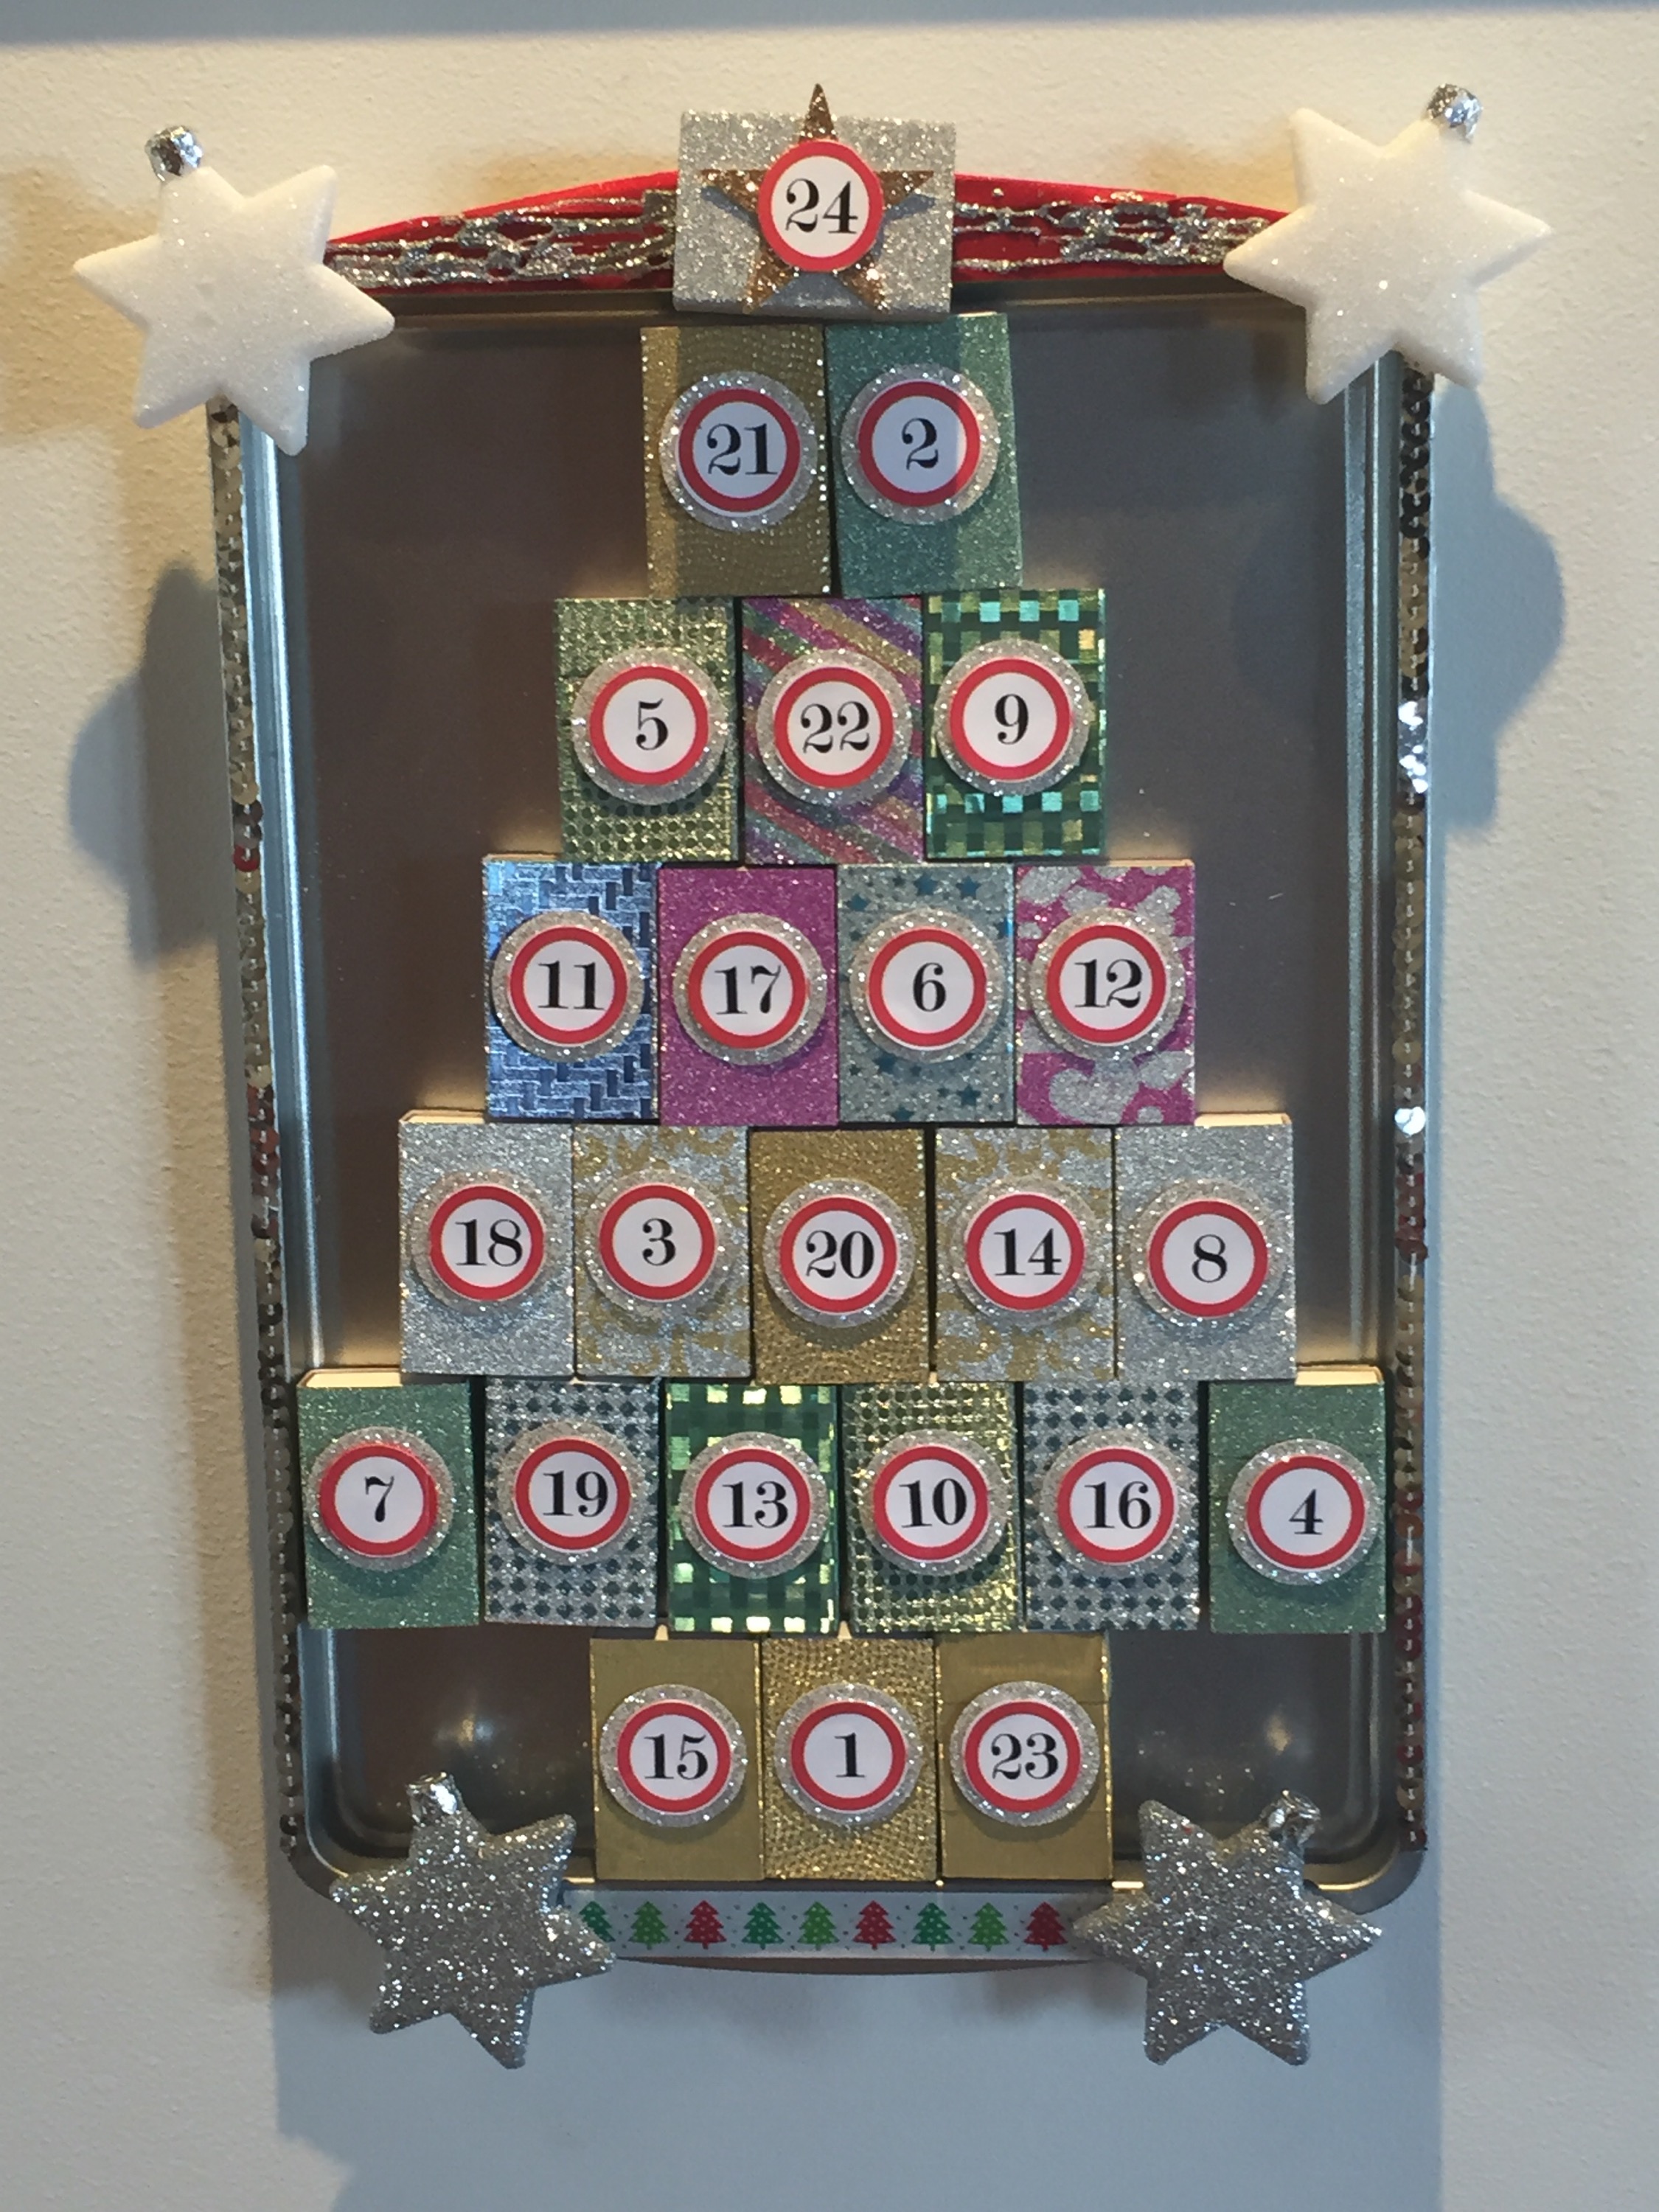
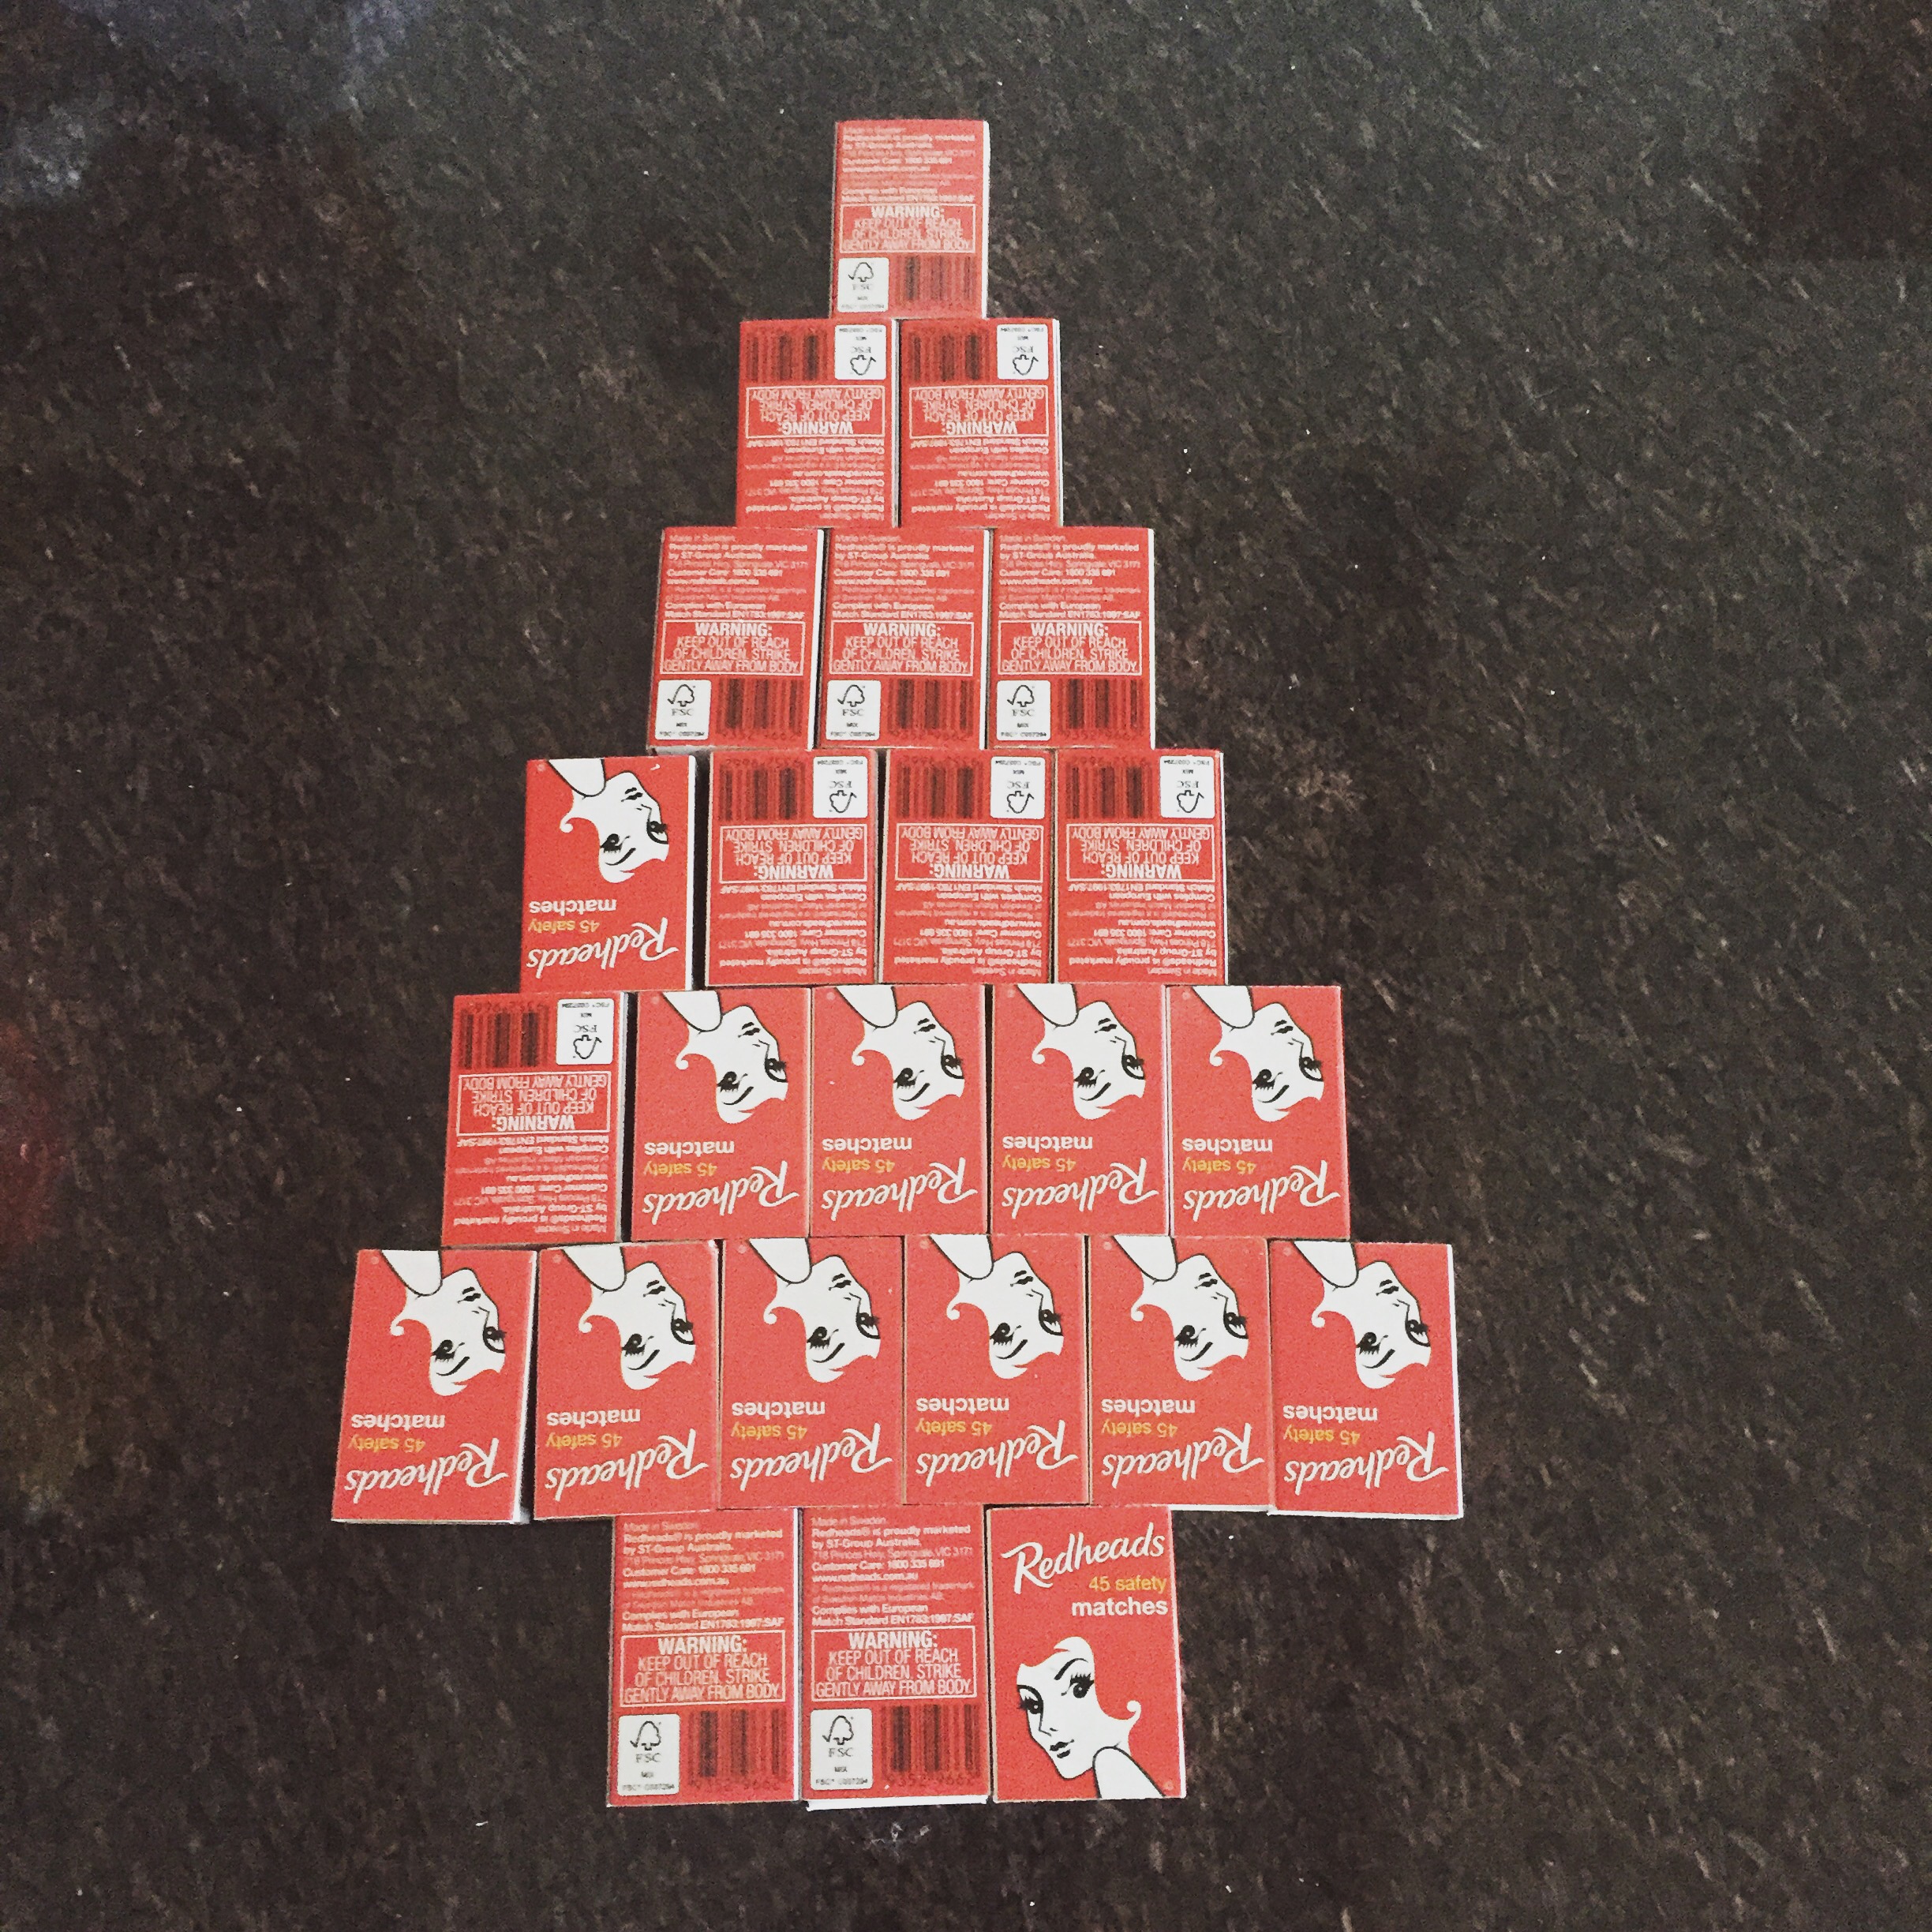
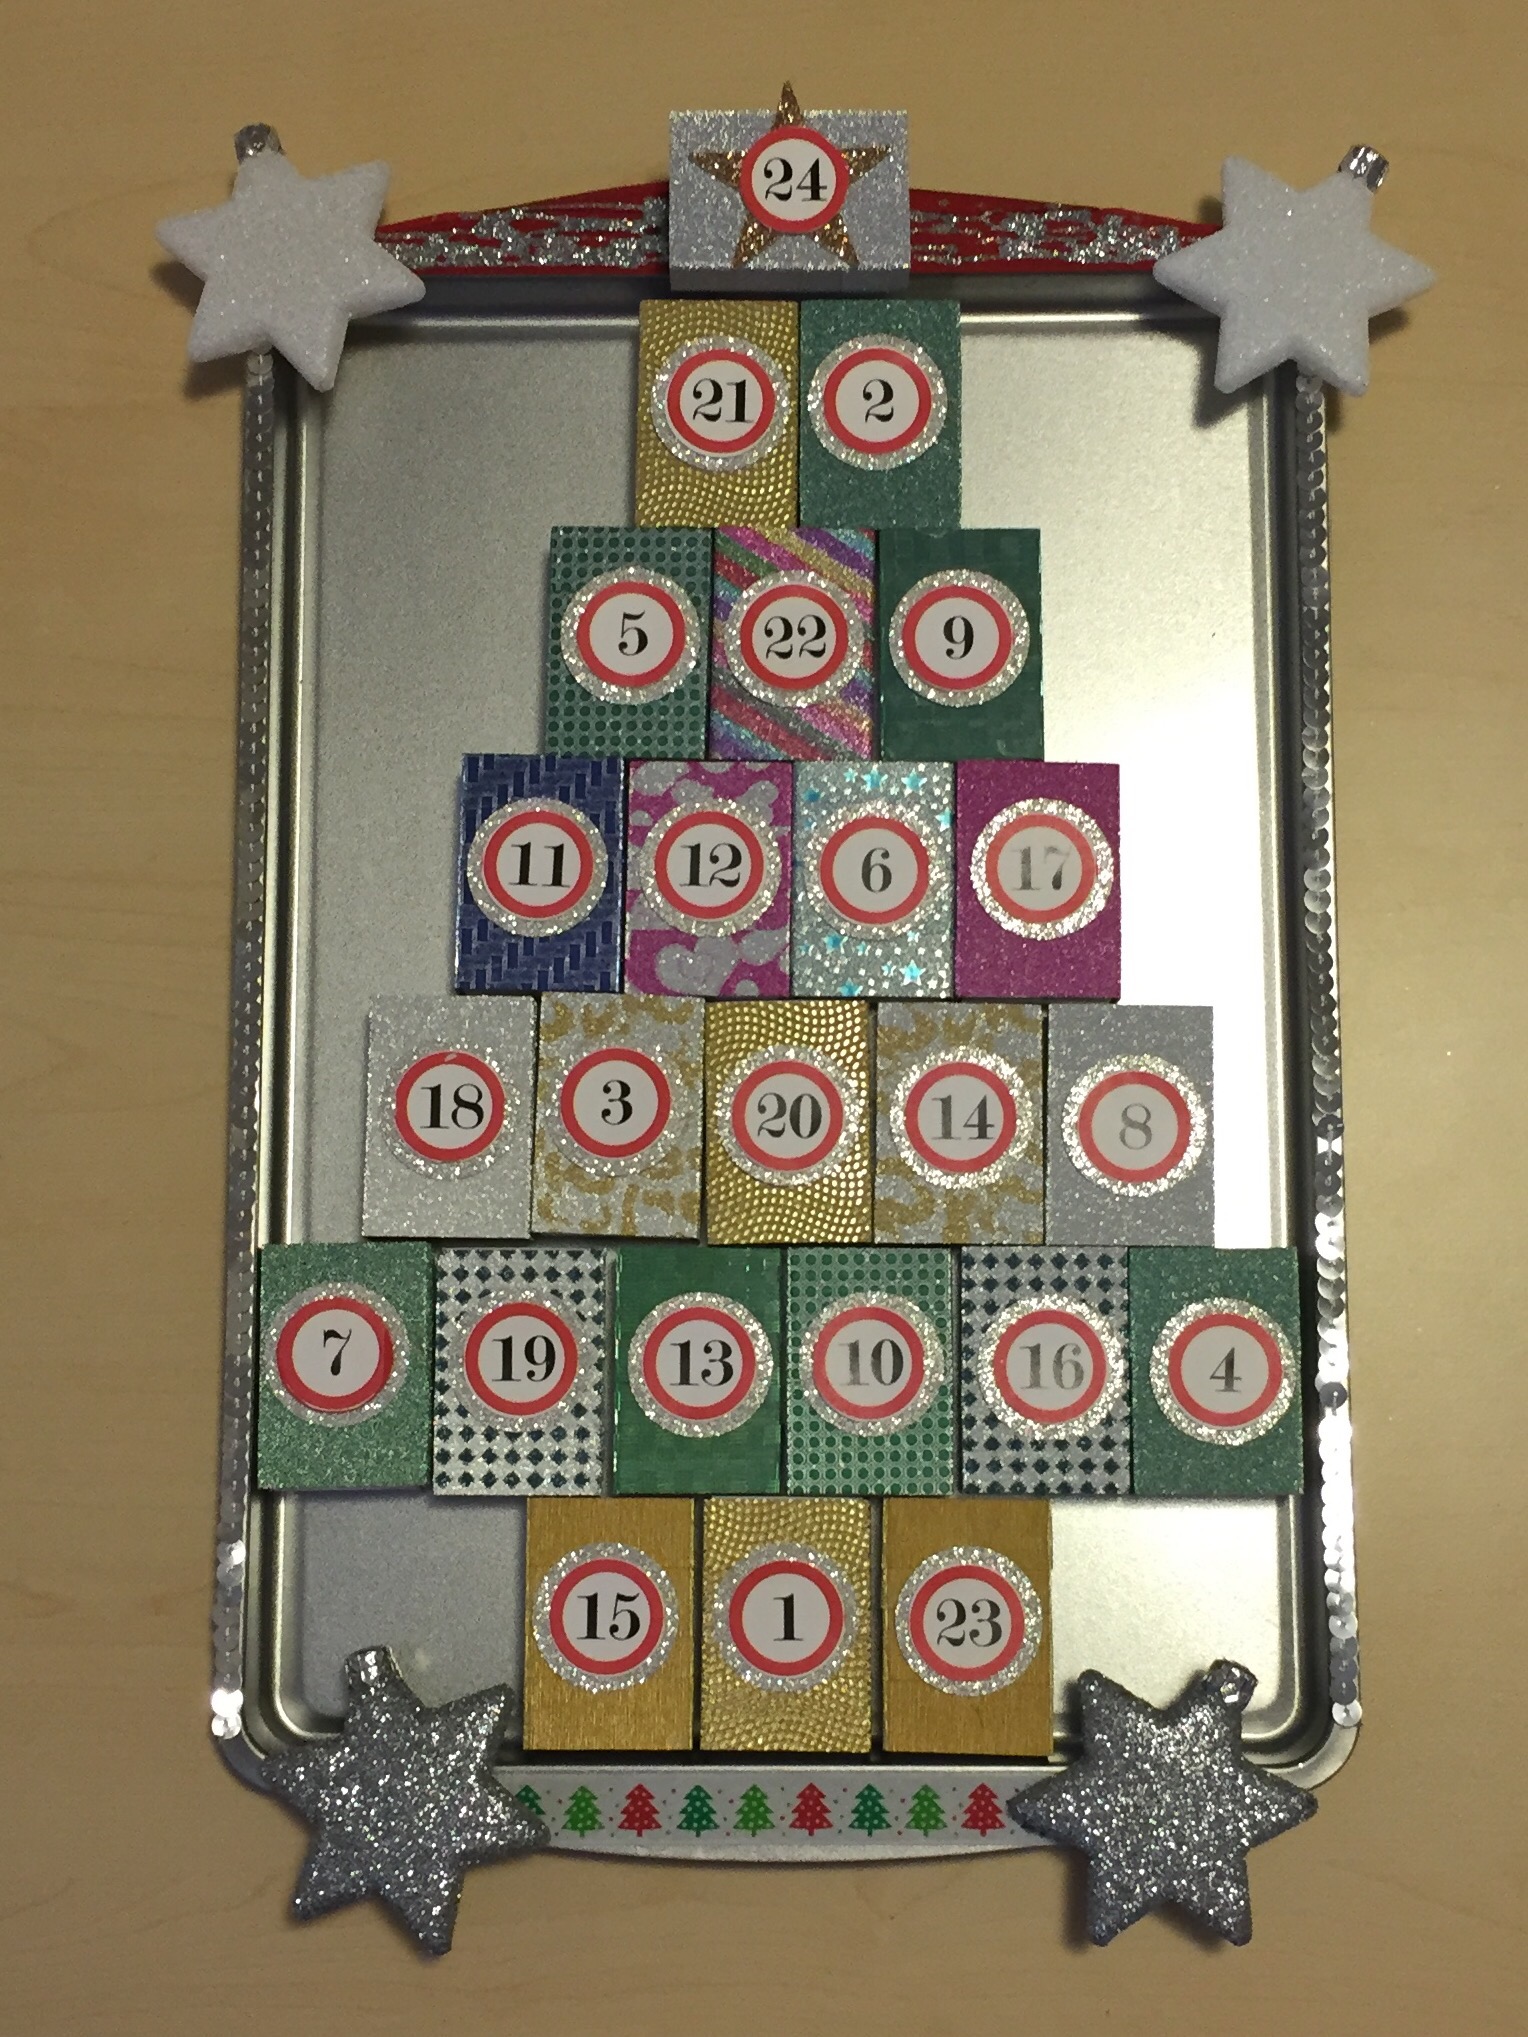
This is made with match boxes, a baking tray, magnets and glitter Washi tape to cover the boxes.  I also grabbed a few Christmas decorations to stick on the edge.  (And nothing but super glue worked to stick those suckers onto the metal!)

Here are some photos of how I put it all together:


The Washi tape is a Selley’s pack I bought at Costco. 
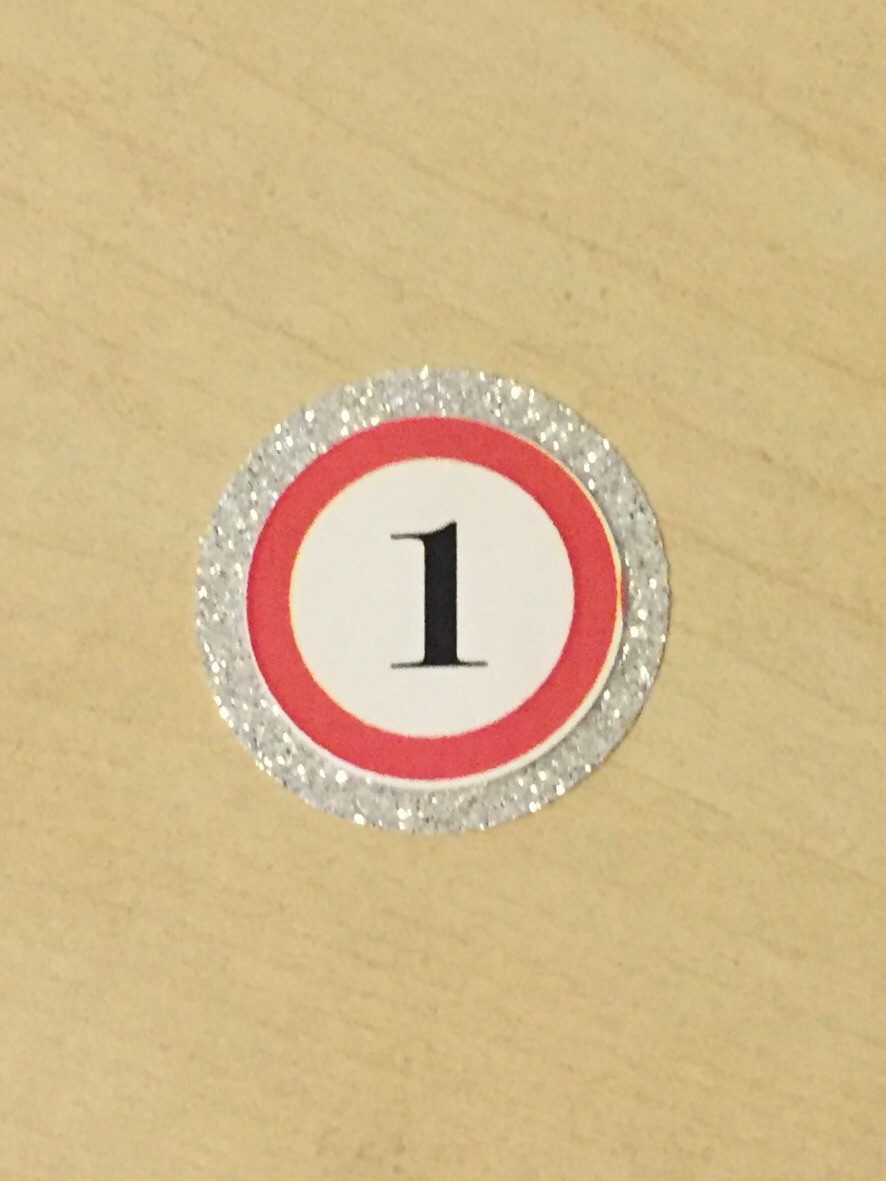
The numbers are a free download from http://justsomethingimade.com/2009/10/simple-spool-advent-calendars/.  

They work with a 1 inch circle punch.   I also used Stampin’ Up!’s glitter sheets and my  1 1/4 inch circle and star punches as backgrounds for the numbers. 

I stuck magnets on the back of each box so they would stick to the baking tray. 

I also used sticky strip to run sequins along the side edges of the tray and some Washi tape and glitter glue for the top and bottom. 

I stuck it to the wall using 3M removable hanging strips. 

So there you have it – my glittery, sparkly home made advent calendar.  Anyone got any ideas for what to do with hundreds of spare matches? 😉 

Thanks for reading. 

Caro

Share this:

  • Pinterest
  • Twitter
  • Facebook
  • Email
  • More
  • Reddit
  • Tumblr

Like this:

Like Loading...

Olaf birthday card (from Frozen)

01 Tuesday Jul 2014

Posted by Carolyn in 1 1/4 inch circle, 1 3/8 circle, 1 inch circle, Bird Builder, Birthday, Cards, Cupcake Builder, Jewellery tag, Kids cards, Kids party, Modern Label, Owl, Punches, Tutorial, Word Window

≈ Leave a comment

Tags

Birthday card, Coastal Cabana, Dazzling Details, Frozen crafts, kids birthday, Kids cards, Olaf, Olaf the Snowman, punch art, stampinup, Winter Frost

Hello

Sorry I haven’t posted to my blog in a while.  I’ve been pretty busy with not much time for crafting.   I finally got a chance to make some stuff recently though, so I will show you a few things over the next little while.

It is my little boy’s 5th birthday today (where did that time go?!?) and, like seemingly most children, he is currently quite obsessed with the movie Frozen.   So I decided to tackle Olaf the snowman for his birthday card.   Here is the end result:

Olaf the Snowman card (Frozen)


The card background is on Coastal Cabana card stock with some (retired) Winter Frost designer series paper.  I used my dazzling details glitter to add some sparkly snowflakes in the background.  I wrote the greeting (“I like warm hugs” with my Coastal Cabana Stampin’ Write marker and punched it out with the word window punch.  I used the modern label punch to do the background, also in Coastal Cabana.  I put a couple of dots of dazzling details glitter on either side of the greeting for some extra sparkle.

Here’s how I made Olaf (all pieces punched from Whisper White unless otherwise specified):

The base of the snowman – 1 3/4 inch circle punch, with approximately 1/2 cm cut off the bottom

The middle of the snowman – 1 3/8 inch circle punch, with approximately 1/4 cm cut off the bottom

Head – the large oval punch

Feet – the two large circles from the owl builder punch

Buttons – the middle sized circles from the owl builder punch (Basic Black)

Arms – 2 x branches from the bird builder punch (Chocolate Chip).  I thought about trimming the leaves down to make the arms look slightly more twig like, but I decided that was far too much effort!)

Mouth – oval punch (cut off about 1/3 from the top)

Teeth – the base of the jewellery tag punch (retired).  If you don’t have this punch you could easily cut a small rectangle freehand.

Nose – I punched a 1 inch circle punch and then cut it down to an oval freehand

Nose – the candle from the cupcake builder punch (I also thought about using the candle from the same punch, I think either would work) (Tangerine Tango)

Eyes – I glued on some goggly eyes with some mini glue dots.

I drew on the eyebrows with a black texta and have since been informed by Mr 5 that I should have drawn on his hair as well.   Feedback was noted, hair has now been drawn on (although I don’t have a picture of that!).

Apart from the minor criticism about my attention to hair detail, Olaf was received with much excitement today!

Thanks for reading, and I’ll try not to be so long between posts next time

Caro x


Share this:

  • Pinterest
  • Twitter
  • Facebook
  • Email
  • More
  • Reddit
  • Tumblr

Like this:

Like Loading...

Sweet Sorbet and Scallop Tag Topper punch gift wrapping

18 Tuesday Mar 2014

Posted by Carolyn in 1 inch circle, Big Shot, Blossom, Circle Thinlits, Dies, Gift tags & wrapping, Scallop Tag Topper, Using up scraps

≈ Leave a comment

Tags

gift card, gift wrapping, gift wrapping ideas, Mixed Bunch, Scallop tag punch, Scallop Tag Topper punch, Stampin Up, Sweet Sorbet

Hello

Yesterday I showed you a card I made for my Mum’s birthday using the Circle Thinlits die and the Sweet Sorbet Designer Series Paper (DSP).

Sweet Sorbet Circle Thinlits 'flip' cardToday I want to show you how I wrapped her gift.    I first wrapped it in ordinary brown paper, then stuck a leftover piece of Sweet Sorbet DSP on the top.

Sweet Sorbet DSP gift wrappingI made a gift tag from the Stampin’ Up! Scallop Tag Topper punch (Pistachio Pudding) – using the same Mixed Bunch embellishment as the birthday card.

Scallop Tag Topper punch, Mixed Bunch flower, with Blossom and 1" circle punch

(Looking at that now, I think next time I’d round the two bottom corners?)

A little Crisp Cantaloupe ribbon and the present was done!

Sweet Sorbet gift wrapping with Scallop Tag Topper gift tag

The gift and card looked really beautiful together 🙂

Sweet Sorbet card and matching gift wrap and gift tag

I hope Mum enjoys her present even half as much as I enjoyed wrapping it!

Thanks for reading

Caro x

Share this:

  • Pinterest
  • Twitter
  • Facebook
  • Email
  • More
  • Reddit
  • Tumblr

Like this:

Like Loading...

Sweet Sorbet Circle Thinlit card

17 Monday Mar 2014

Posted by Carolyn in 1 inch circle, Big Shot, Birthday, Blossom, Cards, Circle Thinlits, Circles #2, Dies, General occasion

≈ 3 Comments

Tags

blossom punch, card base, cards, Circle Thinlits, Crisp Cantaloupe, DSP, flip cards, Mixed Bunch, Pistachio Pudding, Stampin Up, Sweet Sorbet

Hello

I’m really excited to show you today’s card.  I wanted to make a special card for my Mum’s birthday and I’m really pleased how it turned out.   It is my favourite card I’ve made in a long time – and I finally got to play with my Circle Thinlits die which was an added bonus!

Sweet Sorbet Circle Thinlits 'flip' card

(I bought Mum the Circle Thinlits die as her birthday present so wanted to make the card with my die so she’d see an example of her present in action!)

The card base is die cut from Pistachio Pudding and I’ve used the Sweet Sorbet DSP you can get for free from Stampin’ Up! during Sale-A-Bration.   I followed the instructions on Sara’s Crafting & Stamping Studio blog to die cut the DSP layers – thanks Sara!

I cut 2 Whisper White circles from the Circles #2 originals die (largest circle) to stick on the circle ‘flip’ part.   I sponged around the edge in Crisp Cantaloupe to bring out the colours in the DSP.

Inside of Sweet Sorbet 'flip' card

The flower on the front of the card was stamped in Crisp Cantaloupe from the Mixed Bunch stamp set , and punched out with the Blossom Punch.   I used Pistachio Pudding to stamp the flower centre (also from the Mixed Blossom set) and punched it out with the 1 inch circle punch.  I stuck the layers onto the card with Stampin’ Dimensionals and added a pearl for added effect.

Mixed Blossom flower


I really loved how this card turned out.   I think I see a few more flip cards in my future!

Thanks for reading – and happy birthday Mum!

Caro x

Share this:

  • Pinterest
  • Twitter
  • Facebook
  • Email
  • More
  • Reddit
  • Tumblr

Like this:

Like Loading...

A quick Quintessential flower card

25 Saturday May 2013

Posted by Carolyn in 1 inch circle, 2 3/8 inch scallop punch, Cards, Embossing folders, Mini scallop, Perfect Polka Dots

≈ 1 Comment

Tags

cards, Quintessential flower

I needed to make a birthday card very quickly the other day so I thought I’d show you what I came up with.    It was so easy to make this card I made a few at a time.  I just used various shades of pink C6 cards and added some Whisper White (10cm x 14.2cm) which I’d embossed with my Perfect Polka Dots embossing folder.

photo

I stamped a bunch of images from the Stampin’ Up! quintessential flower stamp –  in Pretty in Pink, Blushing Bride (retired but about to return!), Rose Red and Melon Mambo.

I then punched out at least one colour each of the various flowers/circles in the image using my 2 3/8 scallop punch, 1 3/4 scallop punch, mini scallop punch and 1 inch circle punch.      Then just mix n match, layering up with Snail glue and dimensionals.    I popped a Glimmer brad and some pink pearls I found at a $2 dollar shop in the centre, but you could also use pearls and rhinestones.

Here’s a close up of some of the flowers.    I think they would also work really well on gift tags or even stuck directly onto a gift wrapped present.

IMG_1357

photo-2

Looking at these pictures I think next time I use this flower I am going to have to put some bling in those little dots around the edge of the widest flower!

I hope you enjoy.

Share this:

  • Pinterest
  • Twitter
  • Facebook
  • Email
  • More
  • Reddit
  • Tumblr

Like this:

Like Loading...

Using up some scrap paper

21 Tuesday May 2013

Posted by Carolyn in 1 inch circle, Blossom, Cards, Gift tags & wrapping, Love notes, Uncategorized

≈ 2 Comments

Tags

3/4 circle punch, blossom punch, cards, gift cards, love notes

If you’re anything like me, you probably have a ton of left over paper lying around that is too pretty to throw away, but you’re also not quite sure what to do with?

I’ve recently started donating some of my extra paper to my son’s daycare – the kids love using it in their craft and I’m sure they get more happiness out of using it than having it stashed away in my stash!

I’ve also started hunting around for ways to use up small bits of paper in my crafting.    One really simple idea is these small gift cards made out of some scrap paper and the Stampin Up blossom punch.

Blossomflower1

I made a 7 cm x 7 cm card in Whisper White and punched a blossom shape out of some retired Stampin Up designer series paper (DSP).   I then used my 3/4 inch circle punch and a spare button I had lying around to make the centre of a flower.

Another variation is to us a scrap of DSP (I used 6 cm x 6 cm) and overlay with a white punched blossom image.    A small circle of DSP in the middle (3/4 or 1 inch punches work best) and you’re done.  You could add a button or another punched flower in the middle to give it some extra dimension.

Blossomflower2

Very simple, but I think they are quite effective.  What do you think?

Blossomflowersgroup

I’ll try to always put the ‘ingredients’ for any cards at the bottom of a post.  If you would like to buy any of the products I use on the blog, please email me at caroprettythings@gmail.com

Thanks for reading 🙂

Ingredients:

Whisper White card stock

DSP (retired)

Blossom Punch (item no 125603 Stampin Up! Annual Catalogue p185)

3/4 inch circle punch (item no 119873, catalogue p184)

Share this:

  • Pinterest
  • Twitter
  • Facebook
  • Email
  • More
  • Reddit
  • Tumblr

Like this:

Like Loading...

Carolyn Dalton

Independent Stampin Up! Demonstrator

Recent Posts

  • Pretty butterfly birthday card 
  • Adding an extra touch to a homemade envelope
  • Quick and easy masculine card 
  • Quick and easy kids card
  • Butterfly soap card

Archives

  • March 2016
  • February 2016
  • January 2016
  • December 2015
  • November 2015
  • October 2015
  • September 2015
  • August 2015
  • July 2015
  • June 2015
  • May 2015
  • April 2015
  • September 2014
  • July 2014
  • April 2014
  • March 2014
  • February 2014
  • November 2013
  • October 2013
  • September 2013
  • August 2013
  • July 2013
  • June 2013
  • May 2013
  • May 2012

Categories

  • 1 1/4 inch circle
  • 1 3/4 circle
  • 1 3/4 inch scallop circle
  • 1 3/8 circle
  • 1 inch circle
  • 1 inch square
  • 2 3/8 inch scallop punch
  • 3/4 inch circle
  • 3D / pop up
  • 3D projects
  • Anniversary
  • Baby cards
  • Beautiful Butterflies
  • Big Shot
  • Bird Builder
  • Birthday
  • Bitty Butterfly
  • Blossom
  • Blossom Builder
  • Boho Blossoms
  • Boxes
  • Butterfly (retired)
  • Candy Wrapper
  • Card sets
  • Cards
  • Chalk Talk
  • Christmas
  • Circle Thinlits
  • Circle treat cups
  • Circles #2
  • Corner rounder
  • Cupcake Builder
  • Cupcakes and other tasty treats
  • Curly label
  • Decorative Label
  • Dies
  • Elegant Butterly
  • Embossing folders
  • Envelopes
  • Extra Large Oval
  • Fancy Flower
  • Framelits
  • Full heart
  • General occasion
  • Gift bags
  • Gift bow
  • Gift card holders
  • Gift tags & wrapping
  • Home decorating
  • Horizontal Slot
  • Invitations
  • Jewellery tag
  • Kids cards
  • Kids craft ideas
  • Kids party
  • Labels collection
  • Large Oval
  • Love notes
  • Masculine
  • Mini scallop
  • Modern Label
  • Music Notes
  • Notebooks
  • Owl
  • Perfect Polka Dots
  • Petite curly label
  • Pinwheel die
  • Punches
  • Scallop circle
  • Scallop edge
  • Scallop envelope
  • Scallop oval
  • Scallop Tag Topper
  • Small Heart
  • Square Lattice
  • Star
  • Sweet treat cups
  • Tag
  • Tasteful Trim
  • Thank you
  • Thoughts and comments
  • Top Note
  • Tutorial
  • Uncategorized
  • Using up scraps
  • Washi tape
  • Wedding cards
  • Wheels
  • Wildflower Meadow
  • Word Window

Pinterest

Follow Me on Pinterest

Follow me on Twitter

My Tweets

Enter your email address to follow this blog and receive notifications of new posts by email.

Join 37 other subscribers

Blog at WordPress.com.

Privacy & Cookies: This site uses cookies. By continuing to use this website, you agree to their use.
To find out more, including how to control cookies, see here: Cookie Policy
  • Follow Following
    • Caro's Pretty Things
    • Join 26 other followers
    • Already have a WordPress.com account? Log in now.
    • Caro's Pretty Things
    • Customize
    • Follow Following
    • Sign up
    • Log in
    • Report this content
    • View site in Reader
    • Manage subscriptions
    • Collapse this bar
 

Loading Comments...
 

    %d bloggers like this: