• About

Caro's Pretty Things

~ My papercraft blog

Category Archives: Dies

Pretty butterfly birthday card 

20 Sunday Mar 2016

Posted by Carolyn in Beautiful Butterflies, Big Shot, Birthday, Dies, General occasion

≈ 2 Comments

Tags

butterfly thinlits, feminine birthday card

Hi!

I wanted to show you the card I made for my Mum’s 70th birthday. 

  
I picked some card stock and matching pretty paper for the base.  I added a paper doily and a punched white circle in the centre, then added a die cut butterfly.  Then added extra detail with stick on pearls. 


I was very happy with how it turned out, and the birthday girl seemed to like it!

Thanks for reading 🙂

Caro x

Share this:

  • Pinterest
  • Twitter
  • Facebook
  • Email
  • More
  • Reddit
  • Tumblr

Like this:

Like Loading...

Simple thank you cards

04 Tuesday Aug 2015

Posted by Carolyn in Dies, Kids cards, Kids party, Thank you, Top Note

≈ Leave a comment

Tags

birthday thankyou, Stampin Up, thankyou cards, top note die

I needed to whip up some simple thank you cards for all the generous people who gave my son such amazing birthday presents. And they needed to be very simple and quick to make!

Voila!

  
The backing is an A4 sheet cut into fours, with some white shapes cut from the top note die. Simple stamping of an owl stamp and a thank you greeting and we’re done! 

Now to get organised enough to write them!

Thanks for dropping by. 

Caro x

Share this:

  • Pinterest
  • Twitter
  • Facebook
  • Email
  • More
  • Reddit
  • Tumblr

Like this:

Like Loading...

Ninjago party invitations

07 Sunday Jun 2015

Posted by Carolyn in Bird Builder, Chalk Talk, Dies, Framelits, Invitations, Kids cards, Kids craft ideas, Kids party, Owl

≈ 2 Comments

Tags

Kai, kids party, Ninjago invitation, Ninjago party, Ninjago punch art, party invitations

We’ve spent this afternoon making birthday invitations for my son’s upcoming birthday party.  He decided on Ninjago invitations (for those not up with small boys, that is a type of Lego based on ninjas!) His favourite Ninjago is Kai “the red guy”. 

 
I had a grand vision for how these might look, but then had to tone it down to match the vision of the birthday boy.  Which is after all the point (allegedly!!)

I was planning on using the top note die to get a nice curve on the yellow mask top and bottom, making the eye brows from the branch of the bird punch as the eye brows, and layering black and white circles from the owl punch for the eyes.   However small boy was most insistent that we should draw the eyes and eyebrows ourselves, and it turns out that dropping liquid paper onto the eye balls to make the whites of the eyes is super fun when you’re 5!!

So, here they are in all their glory. Perhaps not as glossy as I’d planned, but made with love by the birthday boy 🙂 


Next challenge: Ninjago cup cakes for the big day.  Red icing anyone? 😉

Thanks for reading. 

Caro

Btw I cut the yellow strips with one of the labels from chalk talk framelits.   I was very happy with the pretty rounded edges but he decided they should all be chopped off!


Share this:

  • Pinterest
  • Twitter
  • Facebook
  • Email
  • More
  • Reddit
  • Tumblr

Like this:

Like Loading...

Sweet Sorbet and Scallop Tag Topper punch gift wrapping

18 Tuesday Mar 2014

Posted by Carolyn in 1 inch circle, Big Shot, Blossom, Circle Thinlits, Dies, Gift tags & wrapping, Scallop Tag Topper, Using up scraps

≈ Leave a comment

Tags

gift card, gift wrapping, gift wrapping ideas, Mixed Bunch, Scallop tag punch, Scallop Tag Topper punch, Stampin Up, Sweet Sorbet

Hello

Yesterday I showed you a card I made for my Mum’s birthday using the Circle Thinlits die and the Sweet Sorbet Designer Series Paper (DSP).

Sweet Sorbet Circle Thinlits 'flip' cardToday I want to show you how I wrapped her gift.    I first wrapped it in ordinary brown paper, then stuck a leftover piece of Sweet Sorbet DSP on the top.

Sweet Sorbet DSP gift wrappingI made a gift tag from the Stampin’ Up! Scallop Tag Topper punch (Pistachio Pudding) – using the same Mixed Bunch embellishment as the birthday card.

Scallop Tag Topper punch, Mixed Bunch flower, with Blossom and 1" circle punch

(Looking at that now, I think next time I’d round the two bottom corners?)

A little Crisp Cantaloupe ribbon and the present was done!

Sweet Sorbet gift wrapping with Scallop Tag Topper gift tag

The gift and card looked really beautiful together 🙂

Sweet Sorbet card and matching gift wrap and gift tag

I hope Mum enjoys her present even half as much as I enjoyed wrapping it!

Thanks for reading

Caro x

Share this:

  • Pinterest
  • Twitter
  • Facebook
  • Email
  • More
  • Reddit
  • Tumblr

Like this:

Like Loading...

Sweet Sorbet Circle Thinlit card

17 Monday Mar 2014

Posted by Carolyn in 1 inch circle, Big Shot, Birthday, Blossom, Cards, Circle Thinlits, Circles #2, Dies, General occasion

≈ 3 Comments

Tags

blossom punch, card base, cards, Circle Thinlits, Crisp Cantaloupe, DSP, flip cards, Mixed Bunch, Pistachio Pudding, Stampin Up, Sweet Sorbet

Hello

I’m really excited to show you today’s card.  I wanted to make a special card for my Mum’s birthday and I’m really pleased how it turned out.   It is my favourite card I’ve made in a long time – and I finally got to play with my Circle Thinlits die which was an added bonus!

Sweet Sorbet Circle Thinlits 'flip' card

(I bought Mum the Circle Thinlits die as her birthday present so wanted to make the card with my die so she’d see an example of her present in action!)

The card base is die cut from Pistachio Pudding and I’ve used the Sweet Sorbet DSP you can get for free from Stampin’ Up! during Sale-A-Bration.   I followed the instructions on Sara’s Crafting & Stamping Studio blog to die cut the DSP layers – thanks Sara!

I cut 2 Whisper White circles from the Circles #2 originals die (largest circle) to stick on the circle ‘flip’ part.   I sponged around the edge in Crisp Cantaloupe to bring out the colours in the DSP.

Inside of Sweet Sorbet 'flip' card

The flower on the front of the card was stamped in Crisp Cantaloupe from the Mixed Bunch stamp set , and punched out with the Blossom Punch.   I used Pistachio Pudding to stamp the flower centre (also from the Mixed Blossom set) and punched it out with the 1 inch circle punch.  I stuck the layers onto the card with Stampin’ Dimensionals and added a pearl for added effect.

Mixed Blossom flower


I really loved how this card turned out.   I think I see a few more flip cards in my future!

Thanks for reading – and happy birthday Mum!

Caro x

Share this:

  • Pinterest
  • Twitter
  • Facebook
  • Email
  • More
  • Reddit
  • Tumblr

Like this:

Like Loading...

Easter Bunny treat boxes

04 Tuesday Mar 2014

Posted by Carolyn in 1 1/4 inch circle, 3/4 inch circle, 3D projects, Big Shot, Boxes, Candy Wrapper, Dies, Extra Large Oval, Gift bags, Home decorating, Kids party, Punches, Small Heart, Word Window

≈ Leave a comment

Tags

Candy Wrapper die, Easter, Easter Bunny, Easter craft, Easter crafts, Easter decorations, Easter gifts, Gift box, little Easter gift, Stampin Up

Hello

Given we’re starting to head towards thinking about Easter crafts I thought I would show you some pictures of some little Easter gift boxes I made last year for our Easter brunch.

Candy wrapper Bigz die easter treatsThese are made with the Stampin’ Up! Candy Wrapper Bigz Die which is retired from the current catalogue, but thankfully making a return at a whopping discount in the current Clearance Rack *.

Here is a close up of one:

Easter Bunny gift box

The eyes are made with circle punches, the nose is an upside down small heart punch, and the ears are made from the extra large oval punch and the word window punch (cut off). I drew on the whiskers but you could probably be fancy and use twine.

These looked so cute on the table and lots of mini eggs fitted beautifully inside.

I hope that kick starts you thinking of some cute Easter craft!  Thanks for reading.

Caro x

*As always, please let me know if you’d like to purchase any of the Stampin’ Up! products you see on my blog, or any of the other products in the catalogue for that matter 🙂

Share this:

  • Pinterest
  • Twitter
  • Facebook
  • Email
  • More
  • Reddit
  • Tumblr

Like this:

Like Loading...

“Scribble scrabble” butterflies

02 Sunday Mar 2014

Posted by Carolyn in Beautiful Butterflies, Big Shot, Bitty Butterfly, Butterfly (retired), Dies, Elegant Butterly, Kids craft ideas, Punches, Using up scraps

≈ Leave a comment

Tags

Beautiful Butterflies, butterflies, kids craft, kids craft ideas, Stampin Up

Hello

One of the things that my little boy loves to do is make a “scribble scrabble” – a piece of paper where you scribble colours all over it to make a pretty picture.

Scribble scrabbleHe loves making them, and sometimes we use them as wrapping paper or the background for a card.

The other day it occurred to me that they would make gorgeous butterflies, so I got out my Beautiful Butterflies die and the Big Shot, as well as my butterfly punches and set him loose.   He adores being allowed to play with “Mummy’s precious toy” (AKA my Big Shot!).

Scribble scrabble butterfly IMG_2682

Scribble scrabble butterfly

Beautiful butterflies


This next photo shows you how to make the largest butterflies from the Beautiful Butterflies die – fold a piece of paper in half and line the fold up along the edge of the ‘half’ butterflies on the die.  This way you get 6 butterflies out of one run through the Big Shot.

Beautiful Butterflies negative image


This is his ‘art work’ after spending a happy half hour with his butterflies and a glue stick.

Scribble scrabble butterfly artYou could use the same technique to make gorgeous butterflies for grown up cards and decorations.

Thanks for reading

Caro x


Share this:

  • Pinterest
  • Twitter
  • Facebook
  • Email
  • More
  • Reddit
  • Tumblr

Like this:

Like Loading...

Scallop envelope gift box

25 Sunday Aug 2013

Posted by Carolyn in 3D projects, Boxes, Dies, Gift tags & wrapping, Scallop envelope, Tutorial

≈ Leave a comment

Tags

gift boxes, scallop envelope die

Today I wanted to show you a little gift box I made for a present.   Anyone who has been reading this blog lately would know we recently had a Christmas in July (in August!) party at our house.    We had a Secret Santa and one of the recipients loves orange (he says it’s his signature colour!).     I found some orange travel toiletries and wanted to make a little box to present them in.

I made this little box using the Stampin’ Up! scallop envelope die.

20130815_155308

You will need 4 pieces cut from the scallop envelope die to make the box.  You will also need one piece of card stock for the base of the box measuring 8 cm x 8 cm.

Step 1: identify the ‘outside’ and ‘inside’ of your box.  I like to use the scalloped edge on the outside.  If you’d like to do the same, fold each piece at the score lines like this:

20130815_153249

Step 2: cut one side flap from each envelope.   It doesn’t matter which side you choose – just make sure that you choose the same side on each piece!

20130815_153433-1

Step 3: stick a row of sticky strip (double sided tape) along the outside of the remaining flaps, like this:

20130815_153631

Step 4:  stick the 4 pieces together to make a long row, as shown. I could only fit 3 in the picture but you need to stick all 4 together in a row.  I also like to glue down the scallop edges, but I have also made the box leaving them as ‘flaps’.

20130815_153919

Step 5: fold in the base flaps to make the bottom of the box and stick the remaining sides together.   Glue the square of card stock to the base for extra strength.  I also glued some ribbon around the top for extra decoration.

20130815_154647

This is also a great sized box for storing things on your desk.  Post it notes fit really well!

If you don’t have the scallop envelope die you could try making a box using 4 of a normal envelope template.  There are lots of printable templates available on the web.

Thanks for reading!

Caro

PS: I know I have seen tutorials on the web for this box but I can’t recall where I saw them first so apologies for not crediting (please ping me if you know and I’ll happily edit this post!)

Share this:

  • Pinterest
  • Twitter
  • Facebook
  • Email
  • More
  • Reddit
  • Tumblr

Like this:

Like Loading...

Rudolph sweet treats

22 Thursday Aug 2013

Posted by Carolyn in 1 3/4 circle, Big Shot, Dies, Sweet treat cups, Tasteful Trim, Top Note, Tutorial

≈ 2 Comments

Tags

Christmas in July, Rudolph the Red Nosed Reindeer, sweet treat cups

You’ll have seen from my last few posts I may have gone a little overboard on the decorations for our Christmas in July (in August) weekend?     I have another type to share with you today!

As part of my “research” I came across this  Rudolph ornament by Marie Shaughnessy using Stampin’ Up’s sweet treat cups.   My husband also bought me some red heart shaped lollies during the week, which got me thinking of red noses and Rudolph and what I could do.

I ended up making a table centre piece of Rudolph’s in a vase, with lollies for each guest to eat:

photo-4Here’s a closer look:

photo-1

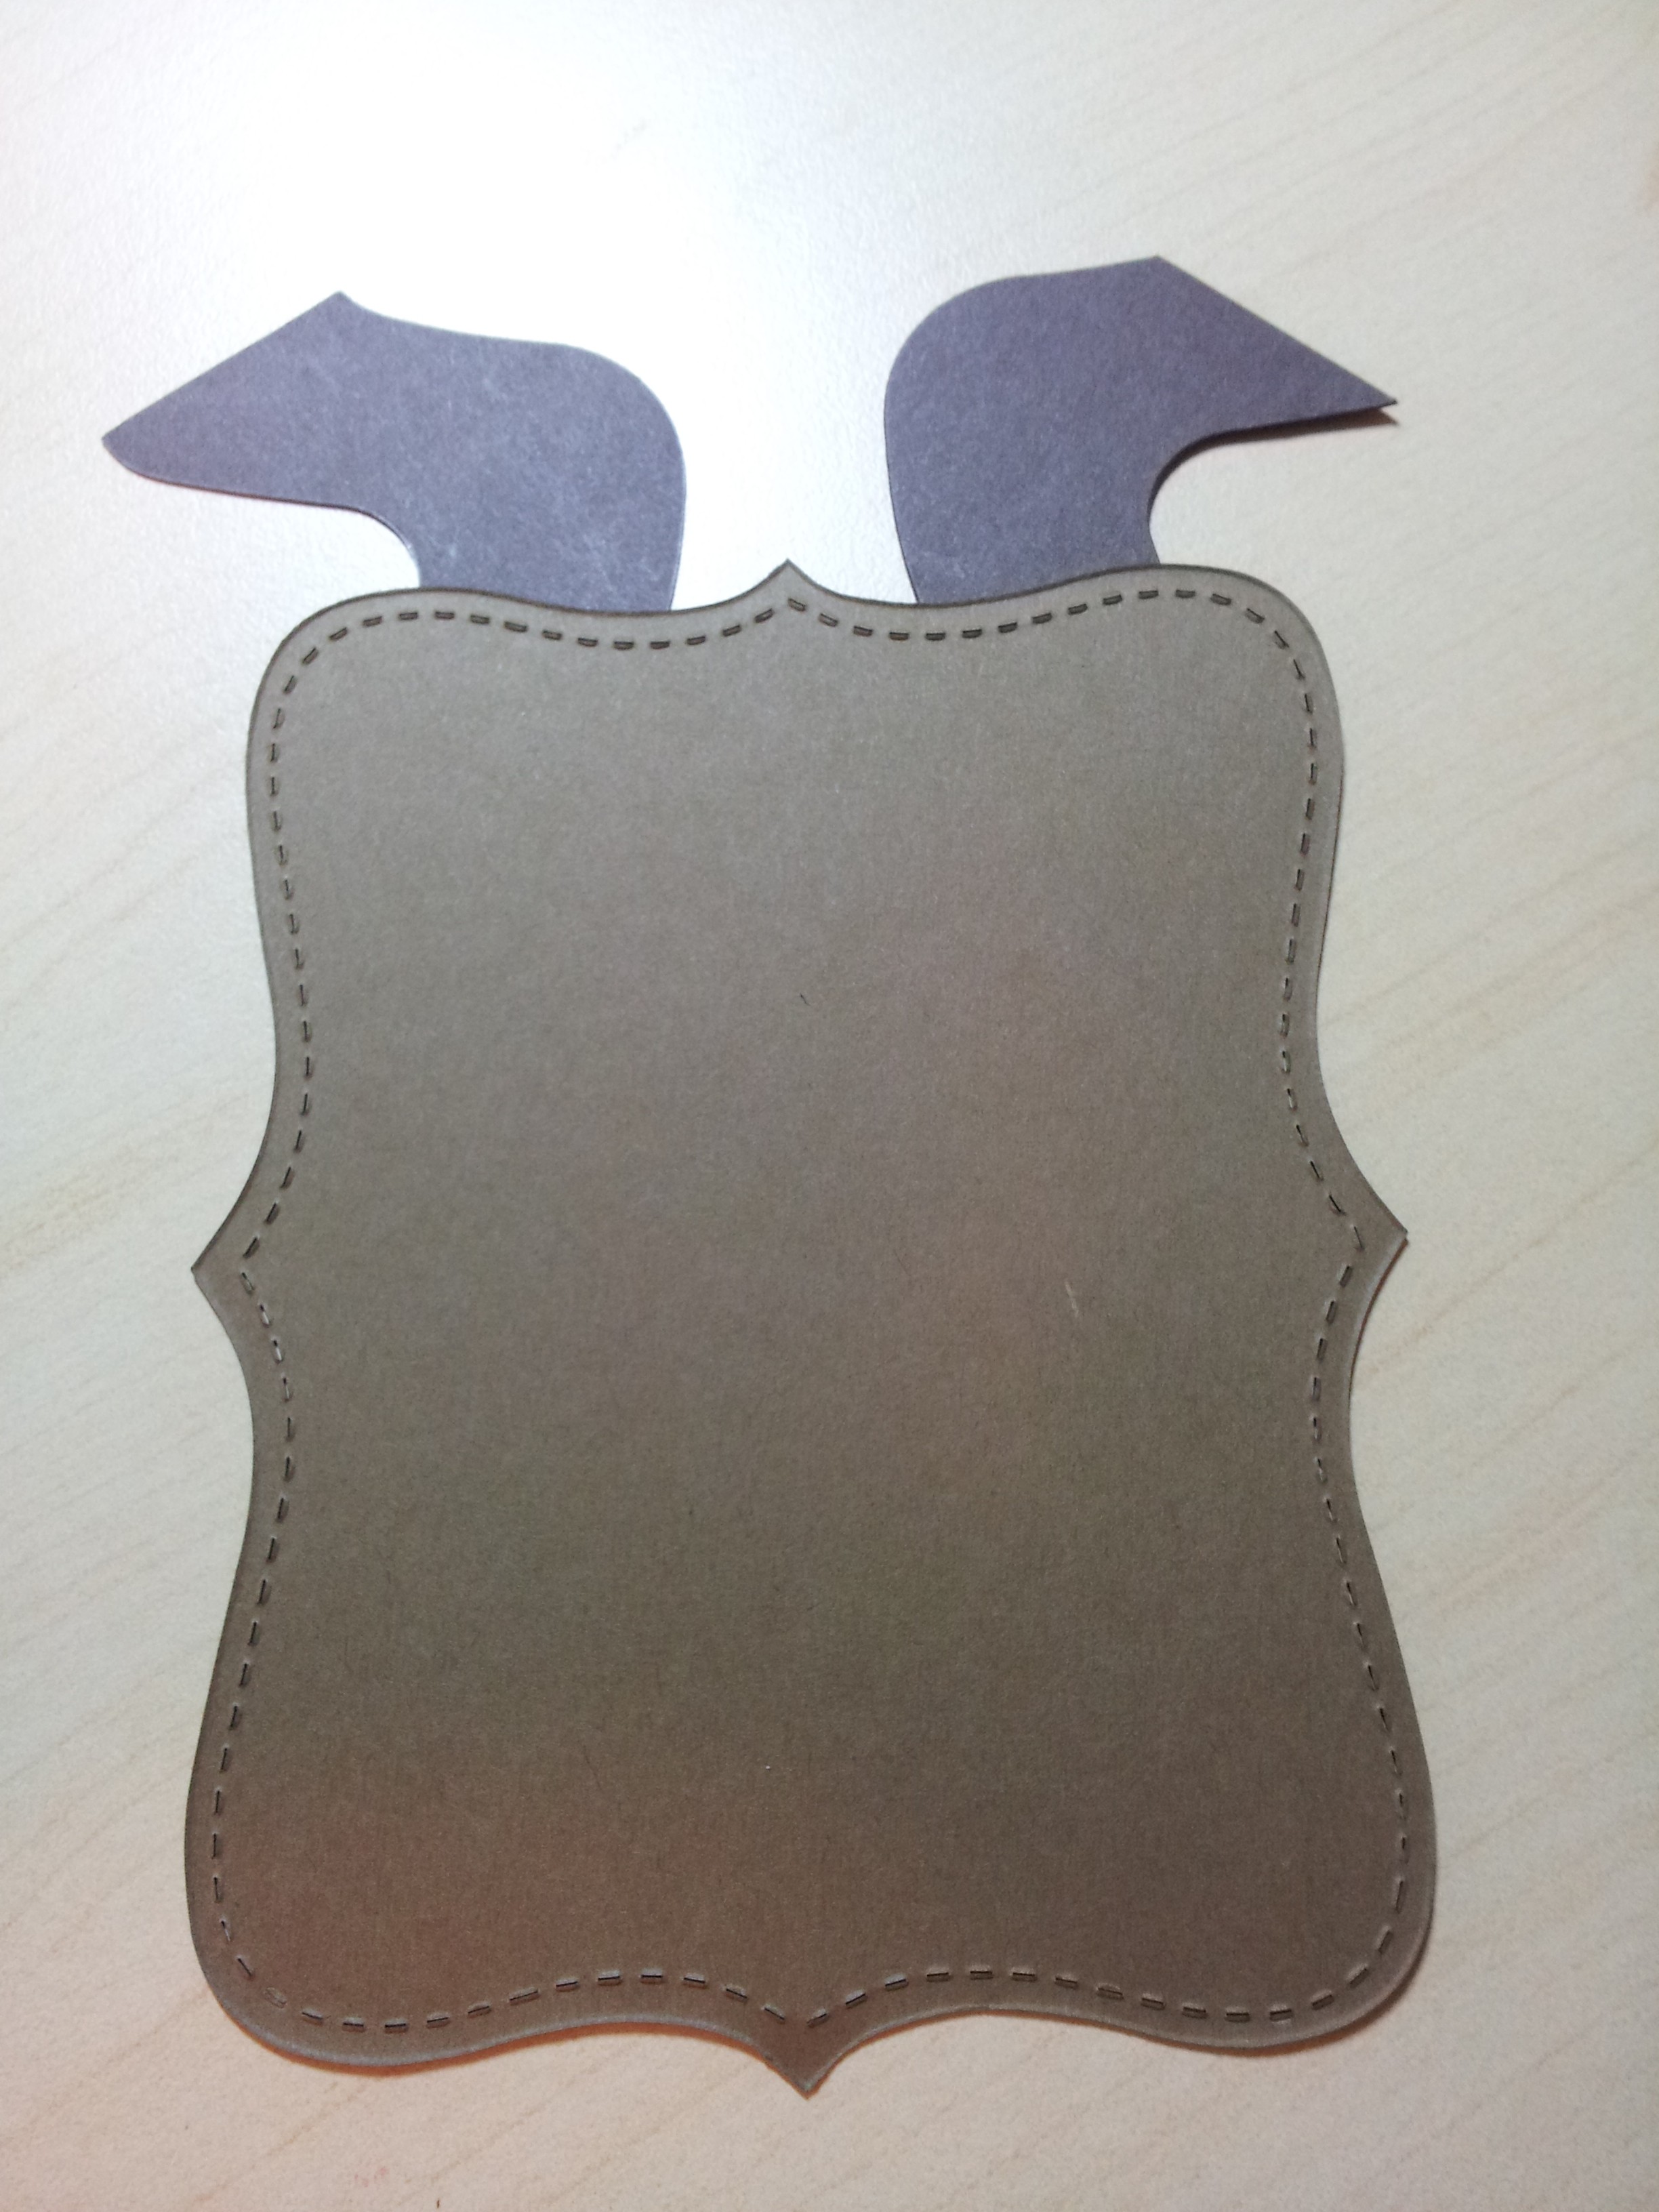
The faces were made of a Top Note die cut out of Soft Suede card stock.  I cut 2 for each Rudolph.

I was hunting around for things that could work as antlers and thought about using my Tasteful Trim die.   When I cut it out however, I actually thought that the spaces between the cut out trim might actually work better as reindeer antlers than the trim itself!

20130815_173041

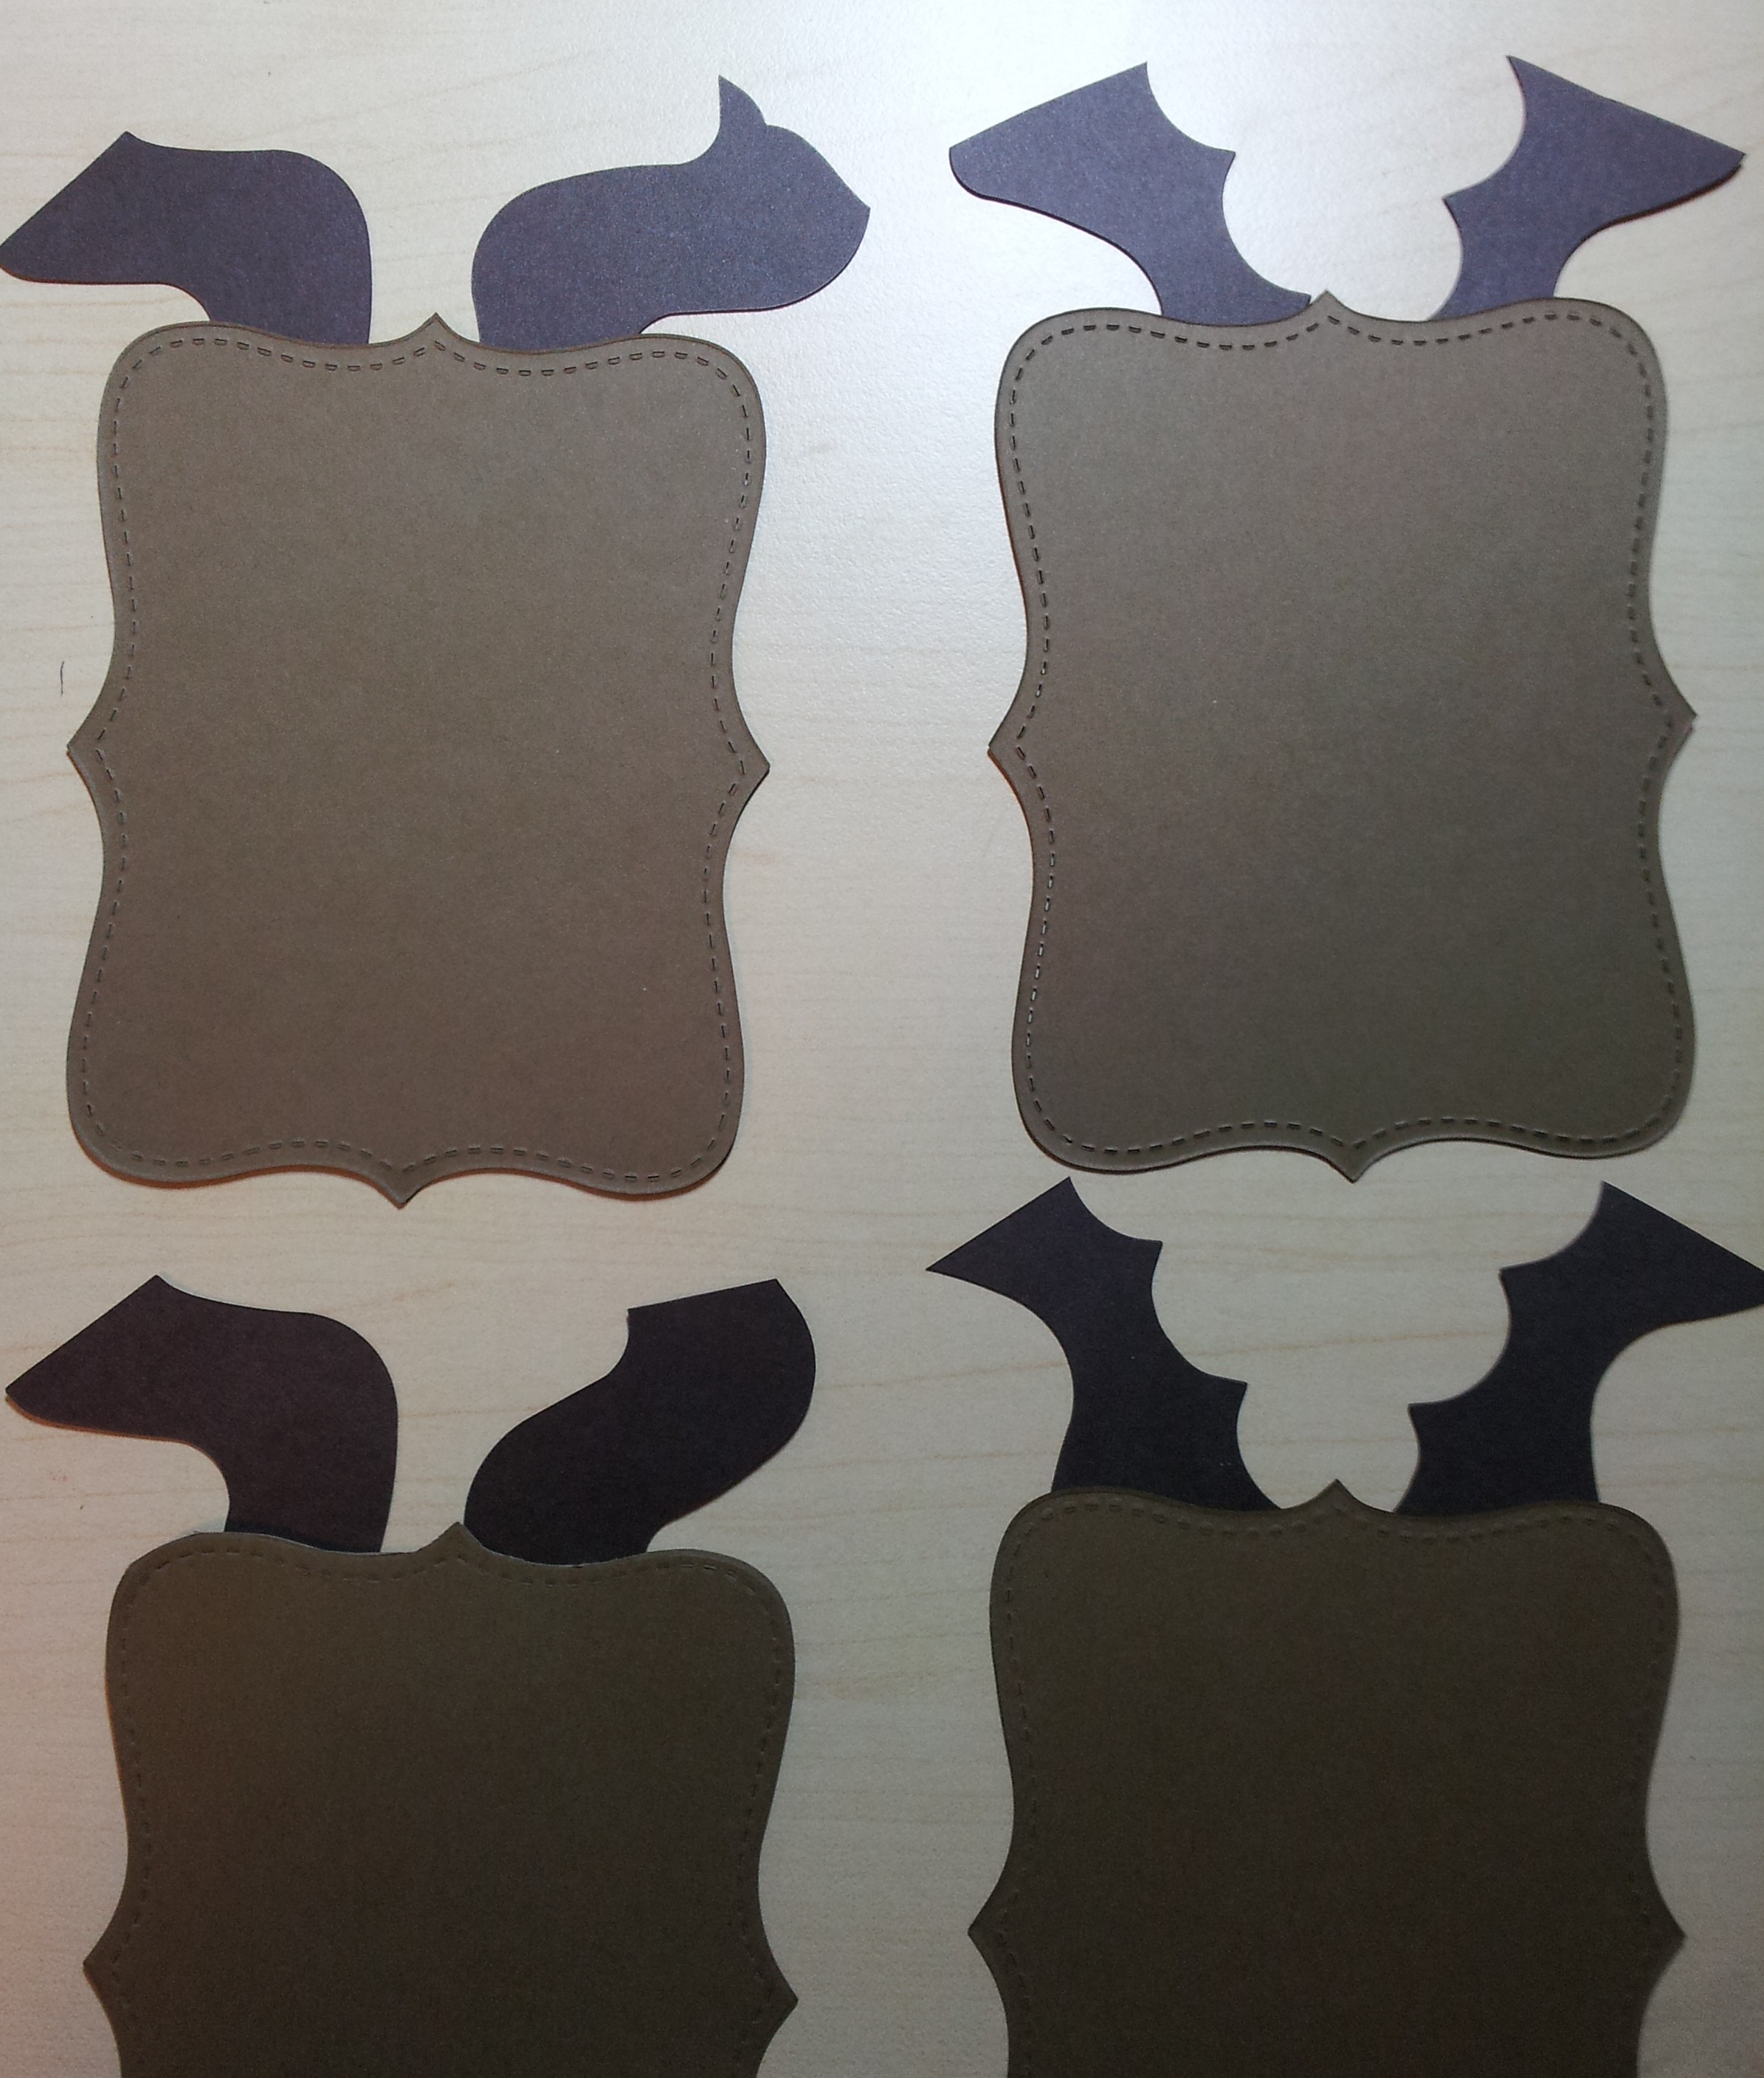
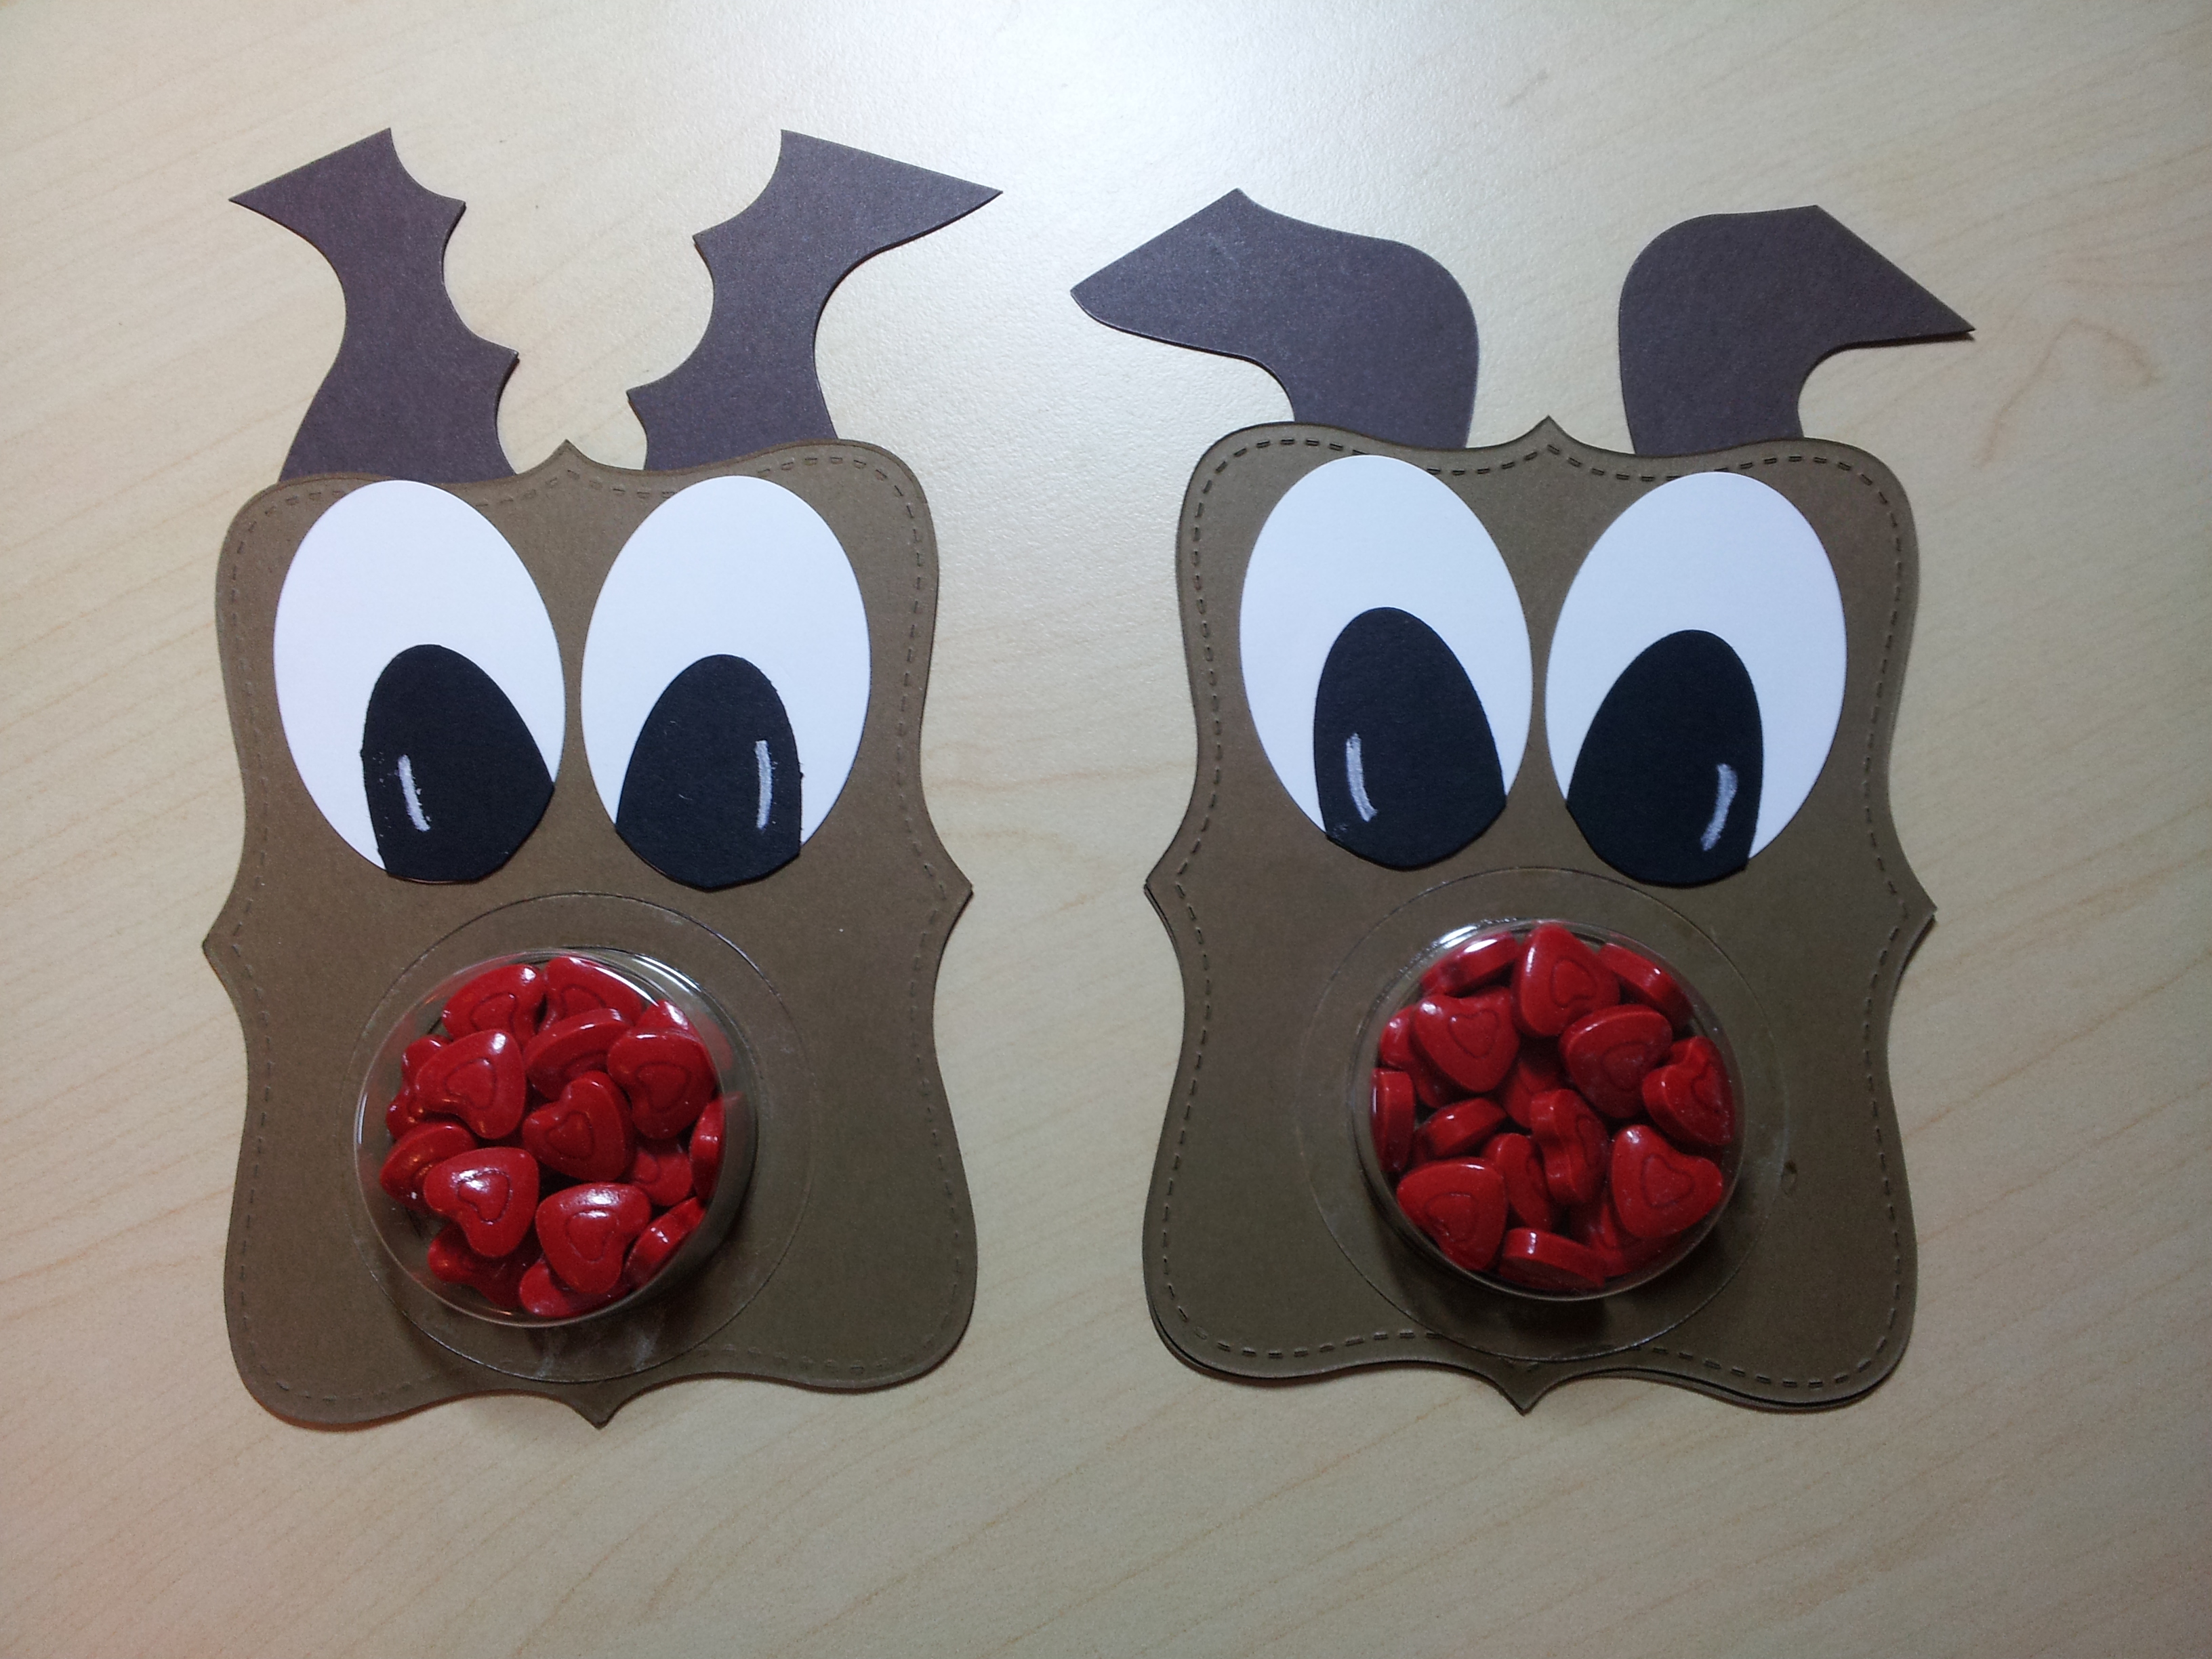
I cut up little bits of the trim and stuck them to the back of the card piece I was using for the front of the face:

20130815_181941

They all looked a little different.  I think the one on the bottom left probably looked the closest to real antlers?

20130815_173150

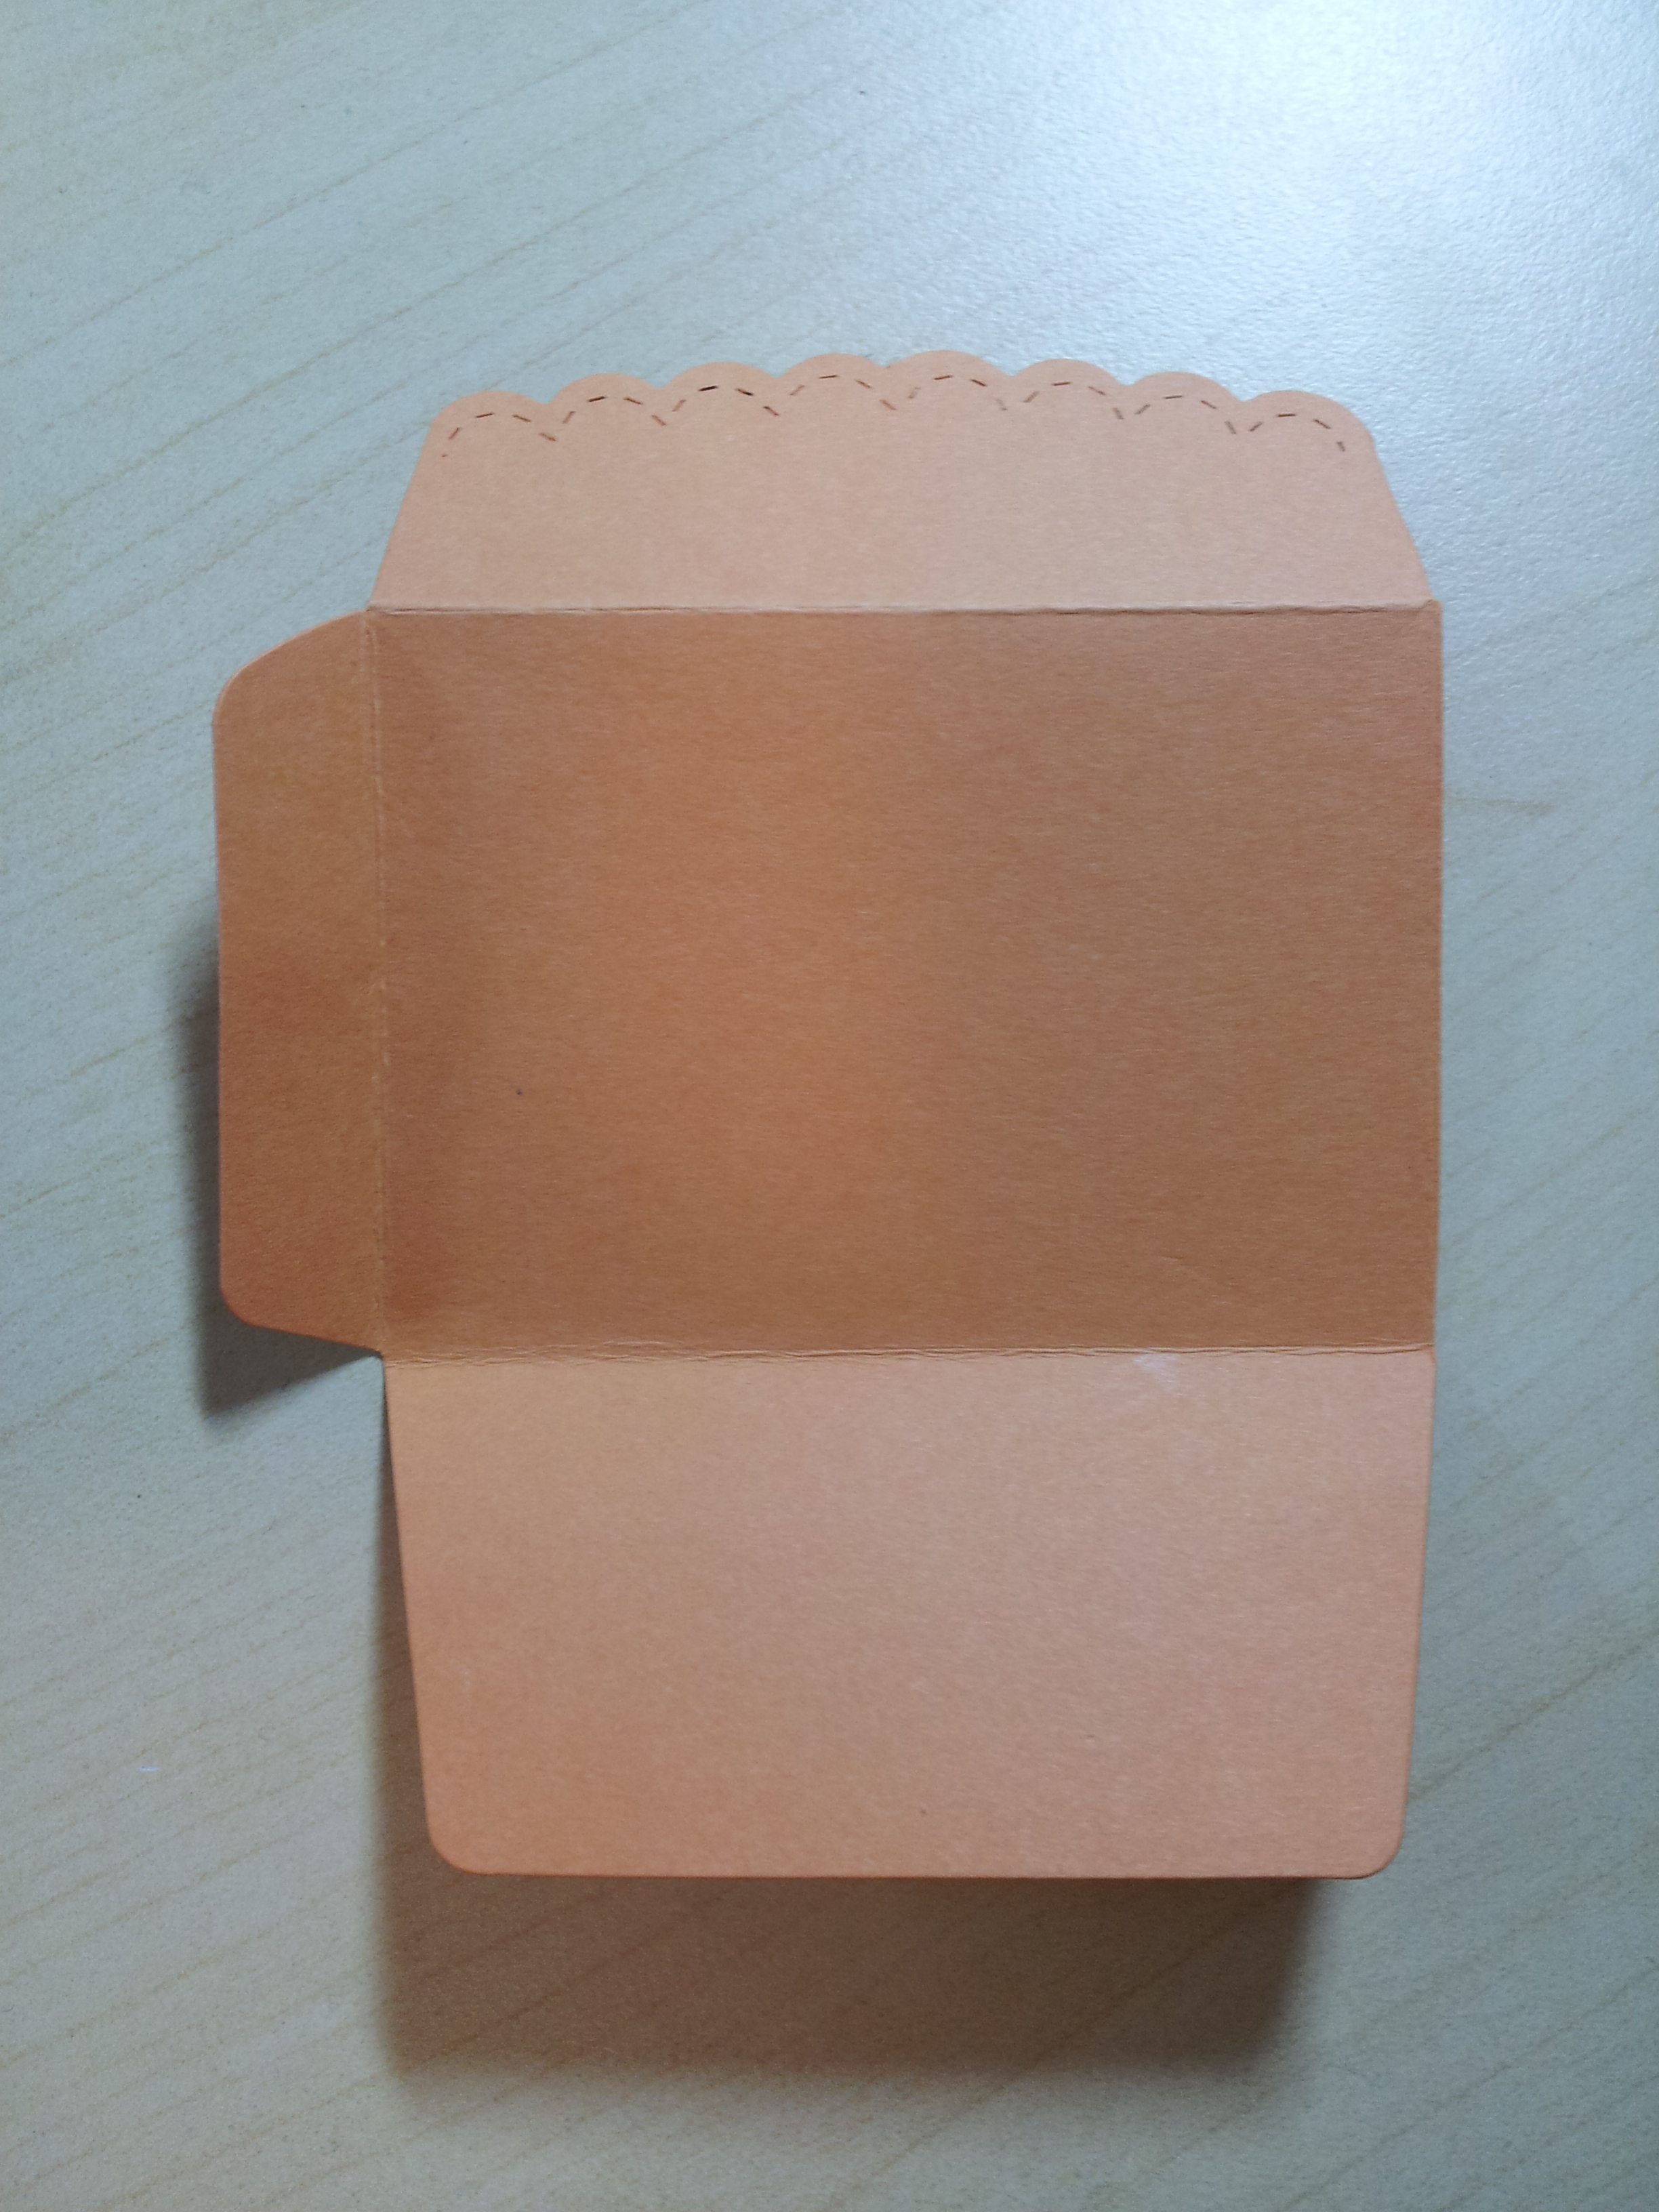
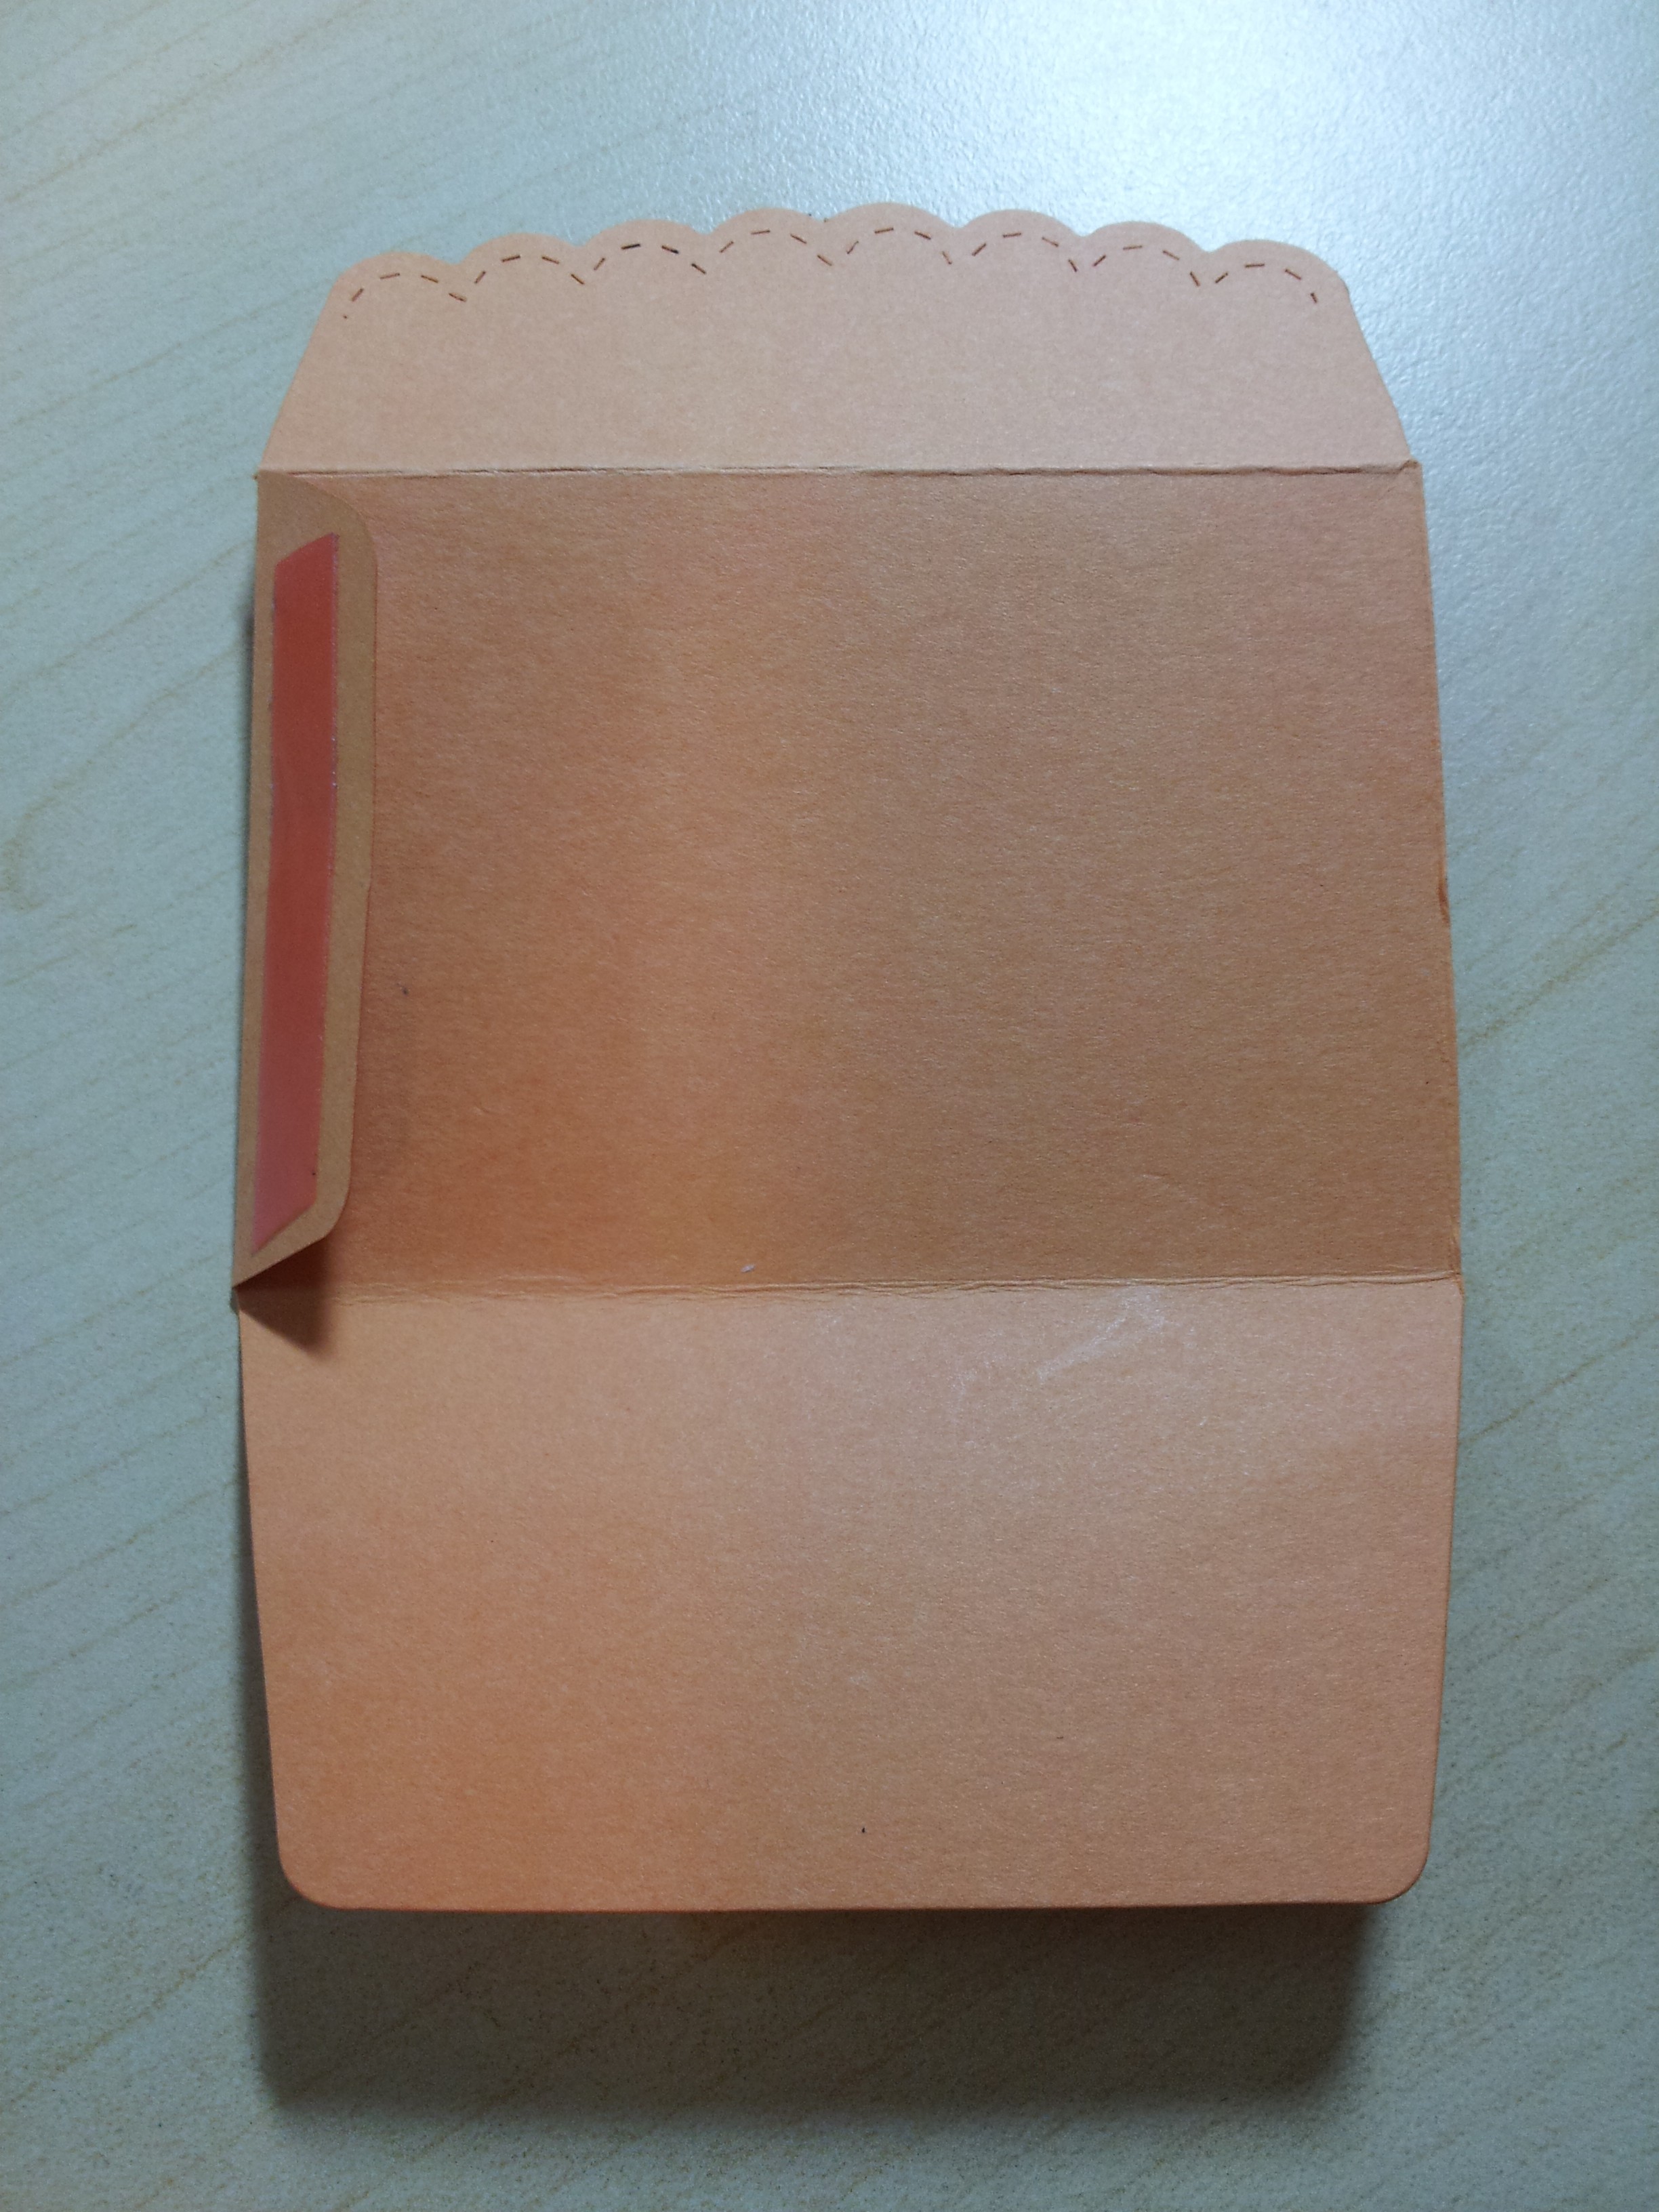
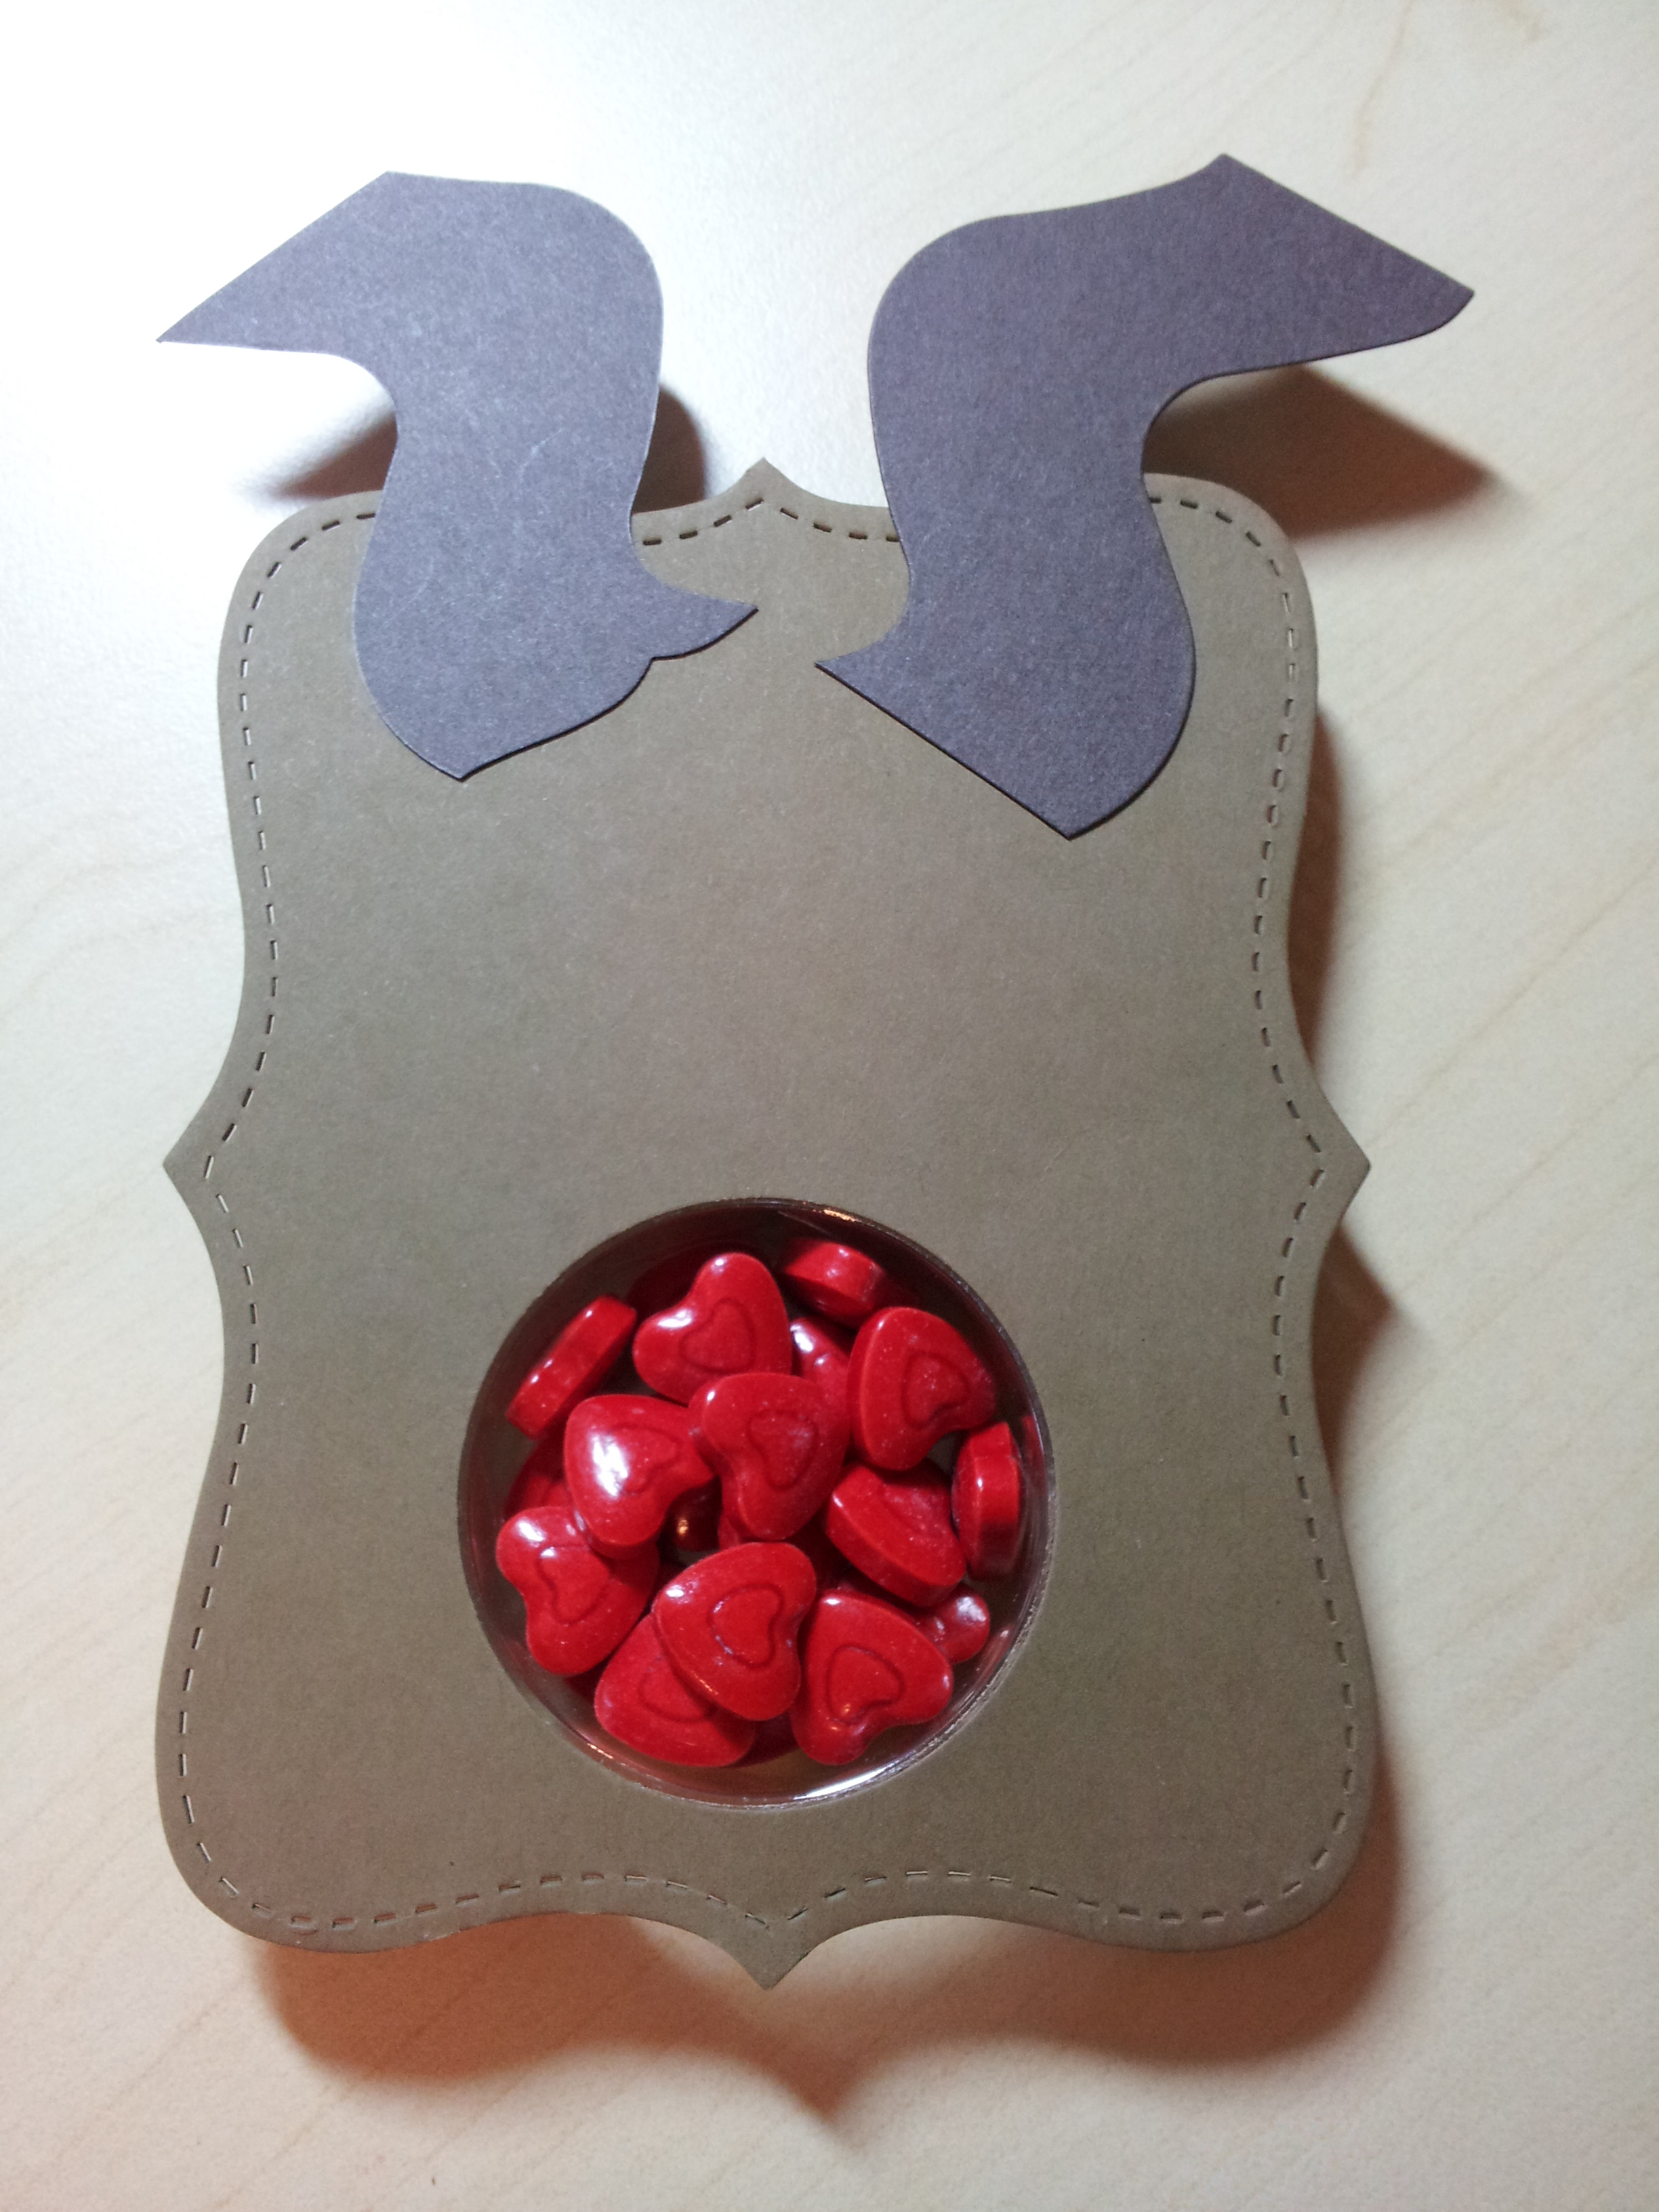
I then stuck on eyes* and cut a hole with my 1 3/4 inch circle punch (which is the size that perfectly matches the sweet treat cups)

20130815_182033

Next step was to stick the sweet treat cup on the front and then turn it over and fill up with lollies.   (Tip: make sure you stick the cup on really well.  Run your fingers around it a few times sticking it down.  I let my little boy stick a couple on and they needed to be restuck later!)

20130815_182153

I then stuck another top note on the back of the first one to hold the lollies in – and ta da, some Rudolph the Red Nosed Reindeers!

20130815_182533

Please contact me if you’d like to get your hands on some sweet treat cups and try some of these for yourselves 🙂

Caro

* I will show you how to make the eyes in a separate post.   I played around with a few different methods so I’ll save you the time 🙂

Share this:

  • Pinterest
  • Twitter
  • Facebook
  • Email
  • More
  • Reddit
  • Tumblr

Like this:

Like Loading...

Birthday thank you card

15 Thursday Aug 2013

Posted by Carolyn in Big Shot, Dies, Kids party, Thank you, Top Note

≈ Leave a comment

Tags

simple cards, thank you, top note

Hello!

The other day I showed you a simple layout for a quick thank you card.    I needed to make some thank you cards for my little boy’s recent birthday party so we made some together on the weekend.

photo-1

As it was a rugby themed party of course we had to have rugby themed thank you notes – which means we definitely needed to use Wallabies colours!

These cards are so easy to make – cut an A4 piece of yellow card in 4 pieces to make the card backs.   Fold a white A4 piece of card into 4 pieces then run it through the Big Shot with the Top Note die.  Hey presto – 4 lovely white shapes for a message.    A thank you stamp and you’re done.

Although in this case we weren’t quite done.   Mr 4 wanted them to match his rugby party so we had to find a picture of a rugby ball!  I cut and pasted from a web photo into a word document.  I made the image the same size as the large oval punch so we could punch out the balls.  Then a whole bunch of “copy and paste” and we had enough balls for all the cards.      [Actually, most of the cards.  We didn’t make quite enough so we had to decide which people weren’t big rugby fans to not get a ball!  I didn’t have the heart to break it to him that most people would probably fall into that category!]

Anyway, about an hour and we were done.  Perfect for a 4 year old attention span as well 🙂


Share this:

  • Pinterest
  • Twitter
  • Facebook
  • Email
  • More
  • Reddit
  • Tumblr

Like this:

Like Loading...
← Older posts

Carolyn Dalton

Independent Stampin Up! Demonstrator

Recent Posts

  • Pretty butterfly birthday card 
  • Adding an extra touch to a homemade envelope
  • Quick and easy masculine card 
  • Quick and easy kids card
  • Butterfly soap card

Archives

  • March 2016
  • February 2016
  • January 2016
  • December 2015
  • November 2015
  • October 2015
  • September 2015
  • August 2015
  • July 2015
  • June 2015
  • May 2015
  • April 2015
  • September 2014
  • July 2014
  • April 2014
  • March 2014
  • February 2014
  • November 2013
  • October 2013
  • September 2013
  • August 2013
  • July 2013
  • June 2013
  • May 2013
  • May 2012

Categories

  • 1 1/4 inch circle
  • 1 3/4 circle
  • 1 3/4 inch scallop circle
  • 1 3/8 circle
  • 1 inch circle
  • 1 inch square
  • 2 3/8 inch scallop punch
  • 3/4 inch circle
  • 3D / pop up
  • 3D projects
  • Anniversary
  • Baby cards
  • Beautiful Butterflies
  • Big Shot
  • Bird Builder
  • Birthday
  • Bitty Butterfly
  • Blossom
  • Blossom Builder
  • Boho Blossoms
  • Boxes
  • Butterfly (retired)
  • Candy Wrapper
  • Card sets
  • Cards
  • Chalk Talk
  • Christmas
  • Circle Thinlits
  • Circle treat cups
  • Circles #2
  • Corner rounder
  • Cupcake Builder
  • Cupcakes and other tasty treats
  • Curly label
  • Decorative Label
  • Dies
  • Elegant Butterly
  • Embossing folders
  • Envelopes
  • Extra Large Oval
  • Fancy Flower
  • Framelits
  • Full heart
  • General occasion
  • Gift bags
  • Gift bow
  • Gift card holders
  • Gift tags & wrapping
  • Home decorating
  • Horizontal Slot
  • Invitations
  • Jewellery tag
  • Kids cards
  • Kids craft ideas
  • Kids party
  • Labels collection
  • Large Oval
  • Love notes
  • Masculine
  • Mini scallop
  • Modern Label
  • Music Notes
  • Notebooks
  • Owl
  • Perfect Polka Dots
  • Petite curly label
  • Pinwheel die
  • Punches
  • Scallop circle
  • Scallop edge
  • Scallop envelope
  • Scallop oval
  • Scallop Tag Topper
  • Small Heart
  • Square Lattice
  • Star
  • Sweet treat cups
  • Tag
  • Tasteful Trim
  • Thank you
  • Thoughts and comments
  • Top Note
  • Tutorial
  • Uncategorized
  • Using up scraps
  • Washi tape
  • Wedding cards
  • Wheels
  • Wildflower Meadow
  • Word Window

Pinterest

Follow Me on Pinterest

Follow me on Twitter

My Tweets

Enter your email address to follow this blog and receive notifications of new posts by email.

Join 37 other subscribers

Blog at WordPress.com.

Privacy & Cookies: This site uses cookies. By continuing to use this website, you agree to their use.
To find out more, including how to control cookies, see here: Cookie Policy
  • Follow Following
    • Caro's Pretty Things
    • Join 26 other followers
    • Already have a WordPress.com account? Log in now.
    • Caro's Pretty Things
    • Customize
    • Follow Following
    • Sign up
    • Log in
    • Report this content
    • View site in Reader
    • Manage subscriptions
    • Collapse this bar
 

Loading Comments...
 

    %d bloggers like this: