• About

Caro's Pretty Things

~ My papercraft blog

Category Archives: 1 3/4 circle

Star Wars 30th birthday card

06 Saturday Feb 2016

Posted by Carolyn in 1 3/4 circle, 3D / pop up, Birthday, Jewellery tag, Masculine, Punches, Word Window

≈ 2 Comments

Tags

cards, Star Wars, Star Wars 30th card, Star Wars Punch Art

Hello

I am spending a rainy Saturday afternoon making some cards – and I thought I’d show you one I made for my brother, who is turning 30 this week.  

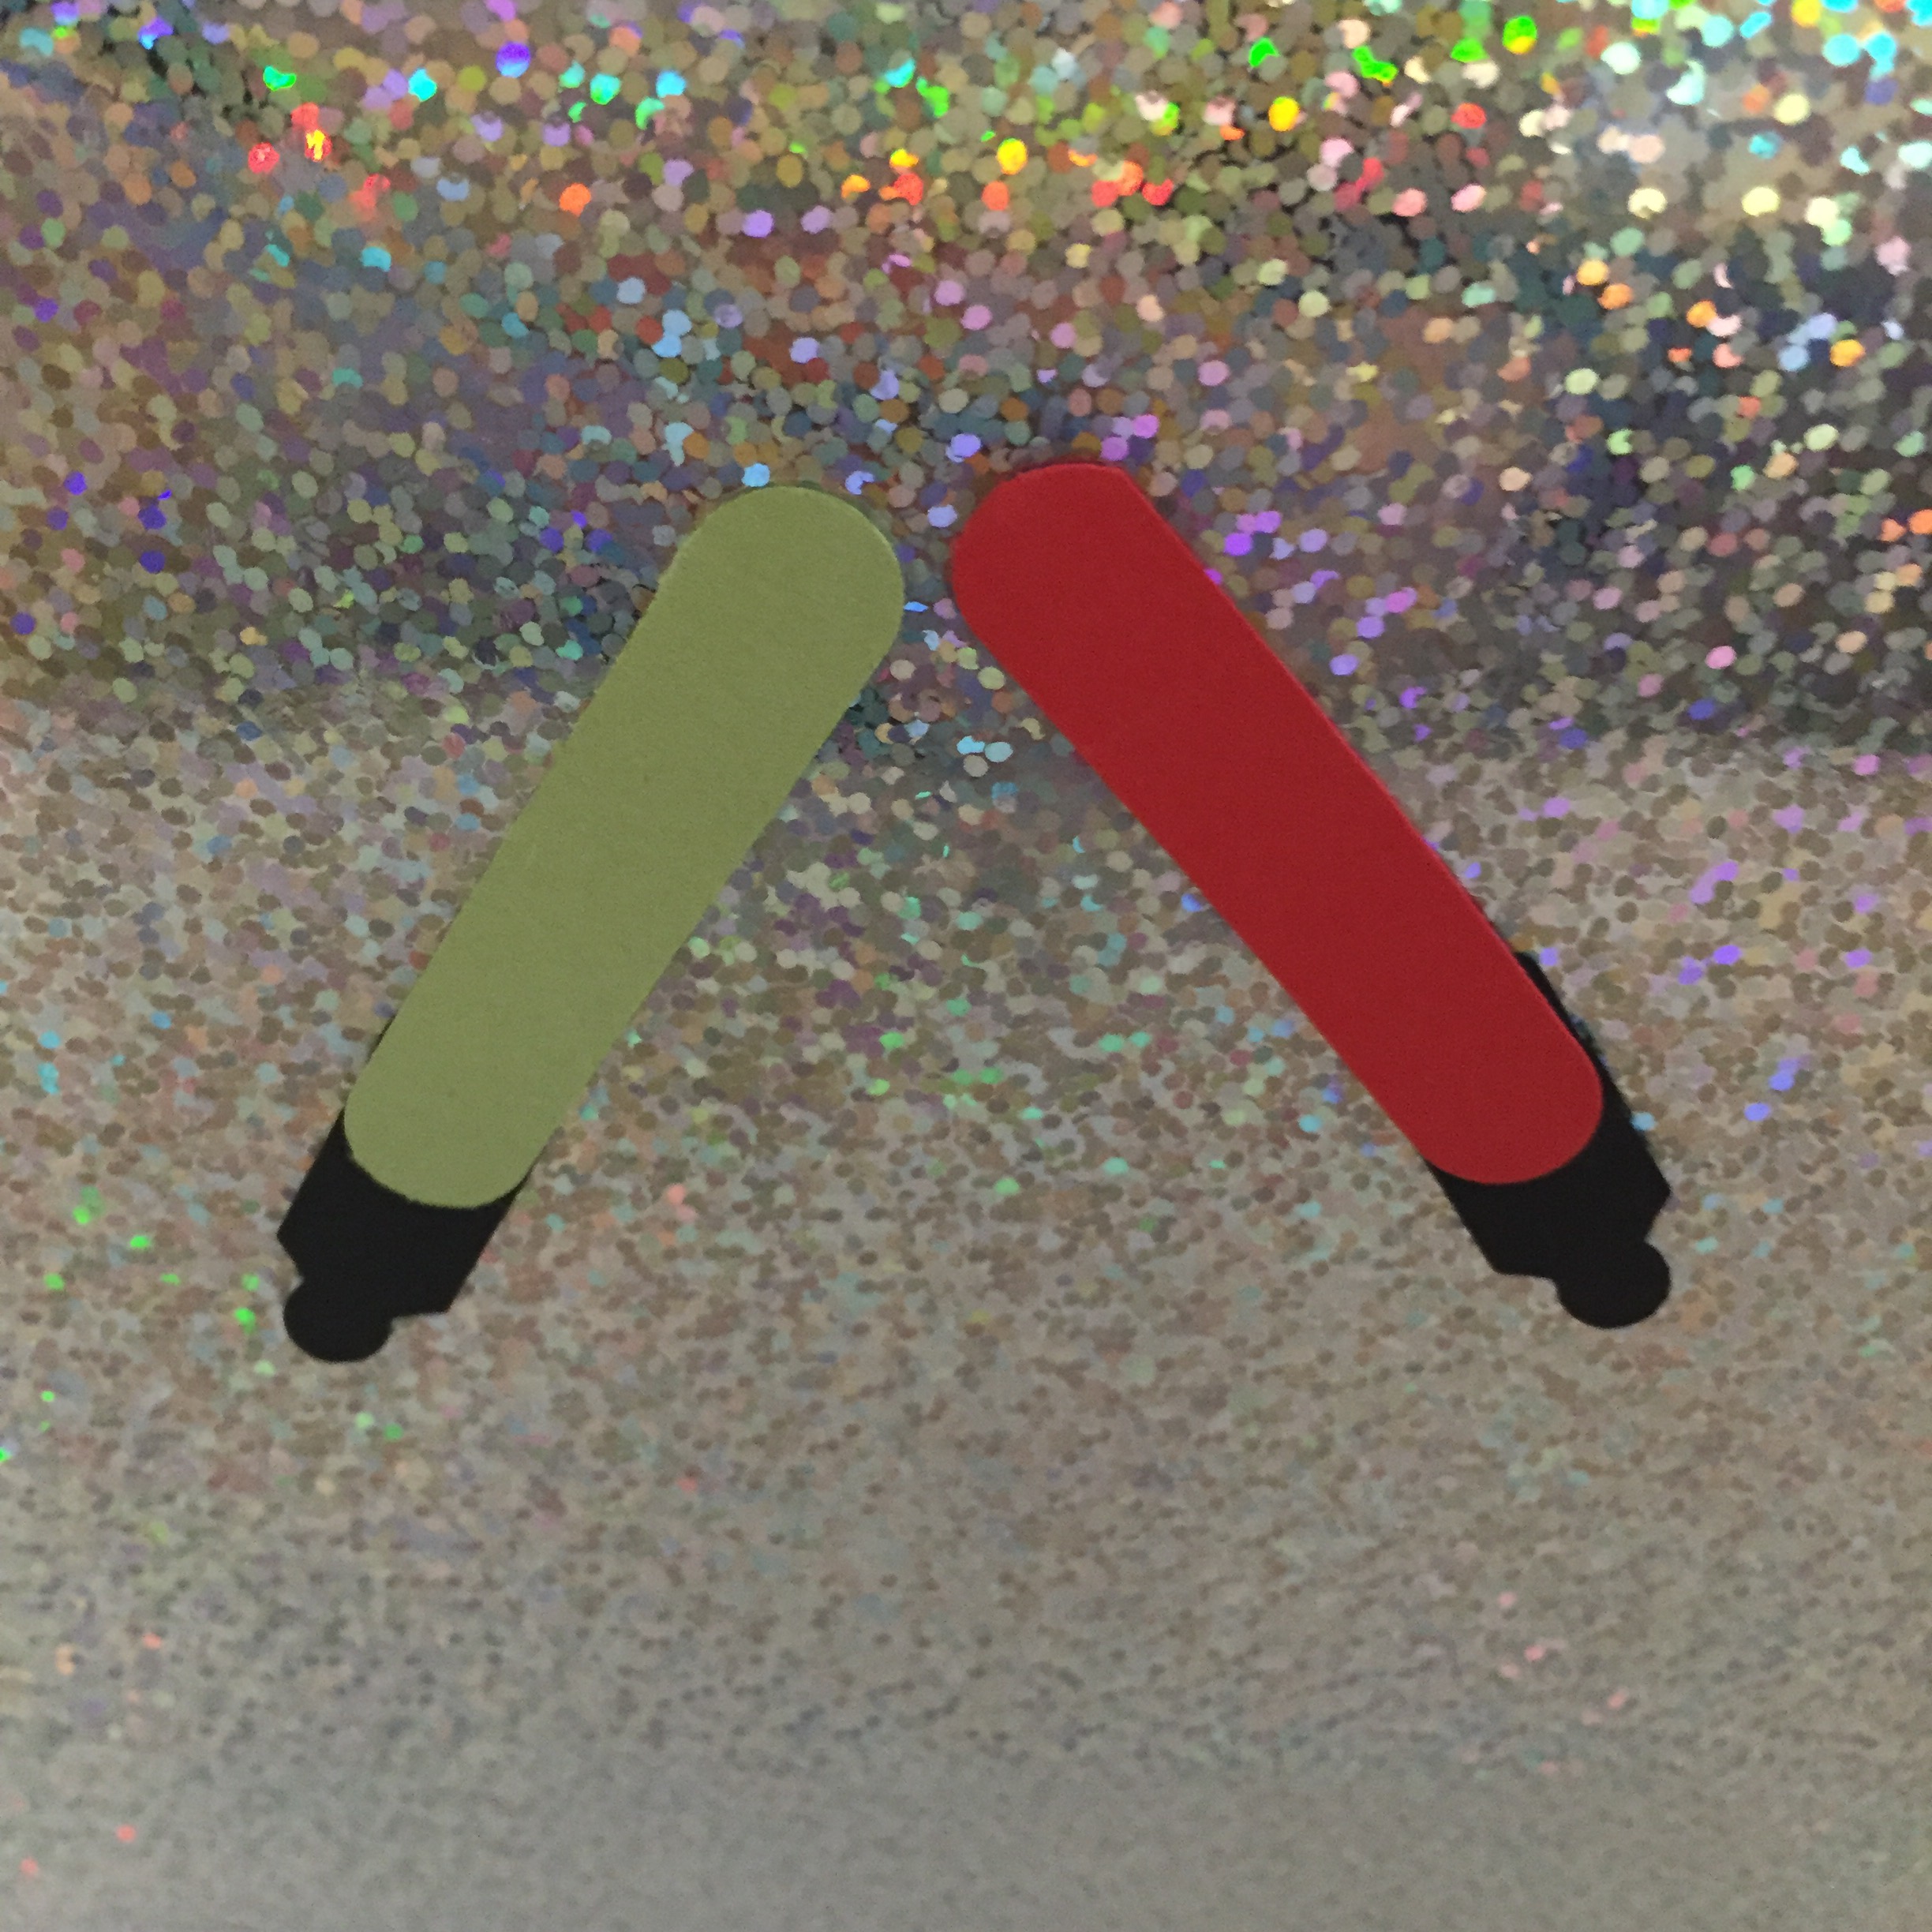
He is a huge Star Wars fan, and also a bit of a maths geek, so I went with a Roman numerals idea –  XXX is 30 in Roman numerals, so I thought I’d make the Xs out of light sabres!

  
I used Stampin’ Up! punches.  The handles of the light sabres are made from the jewelry tag punch. The blades are from the word window punch. 

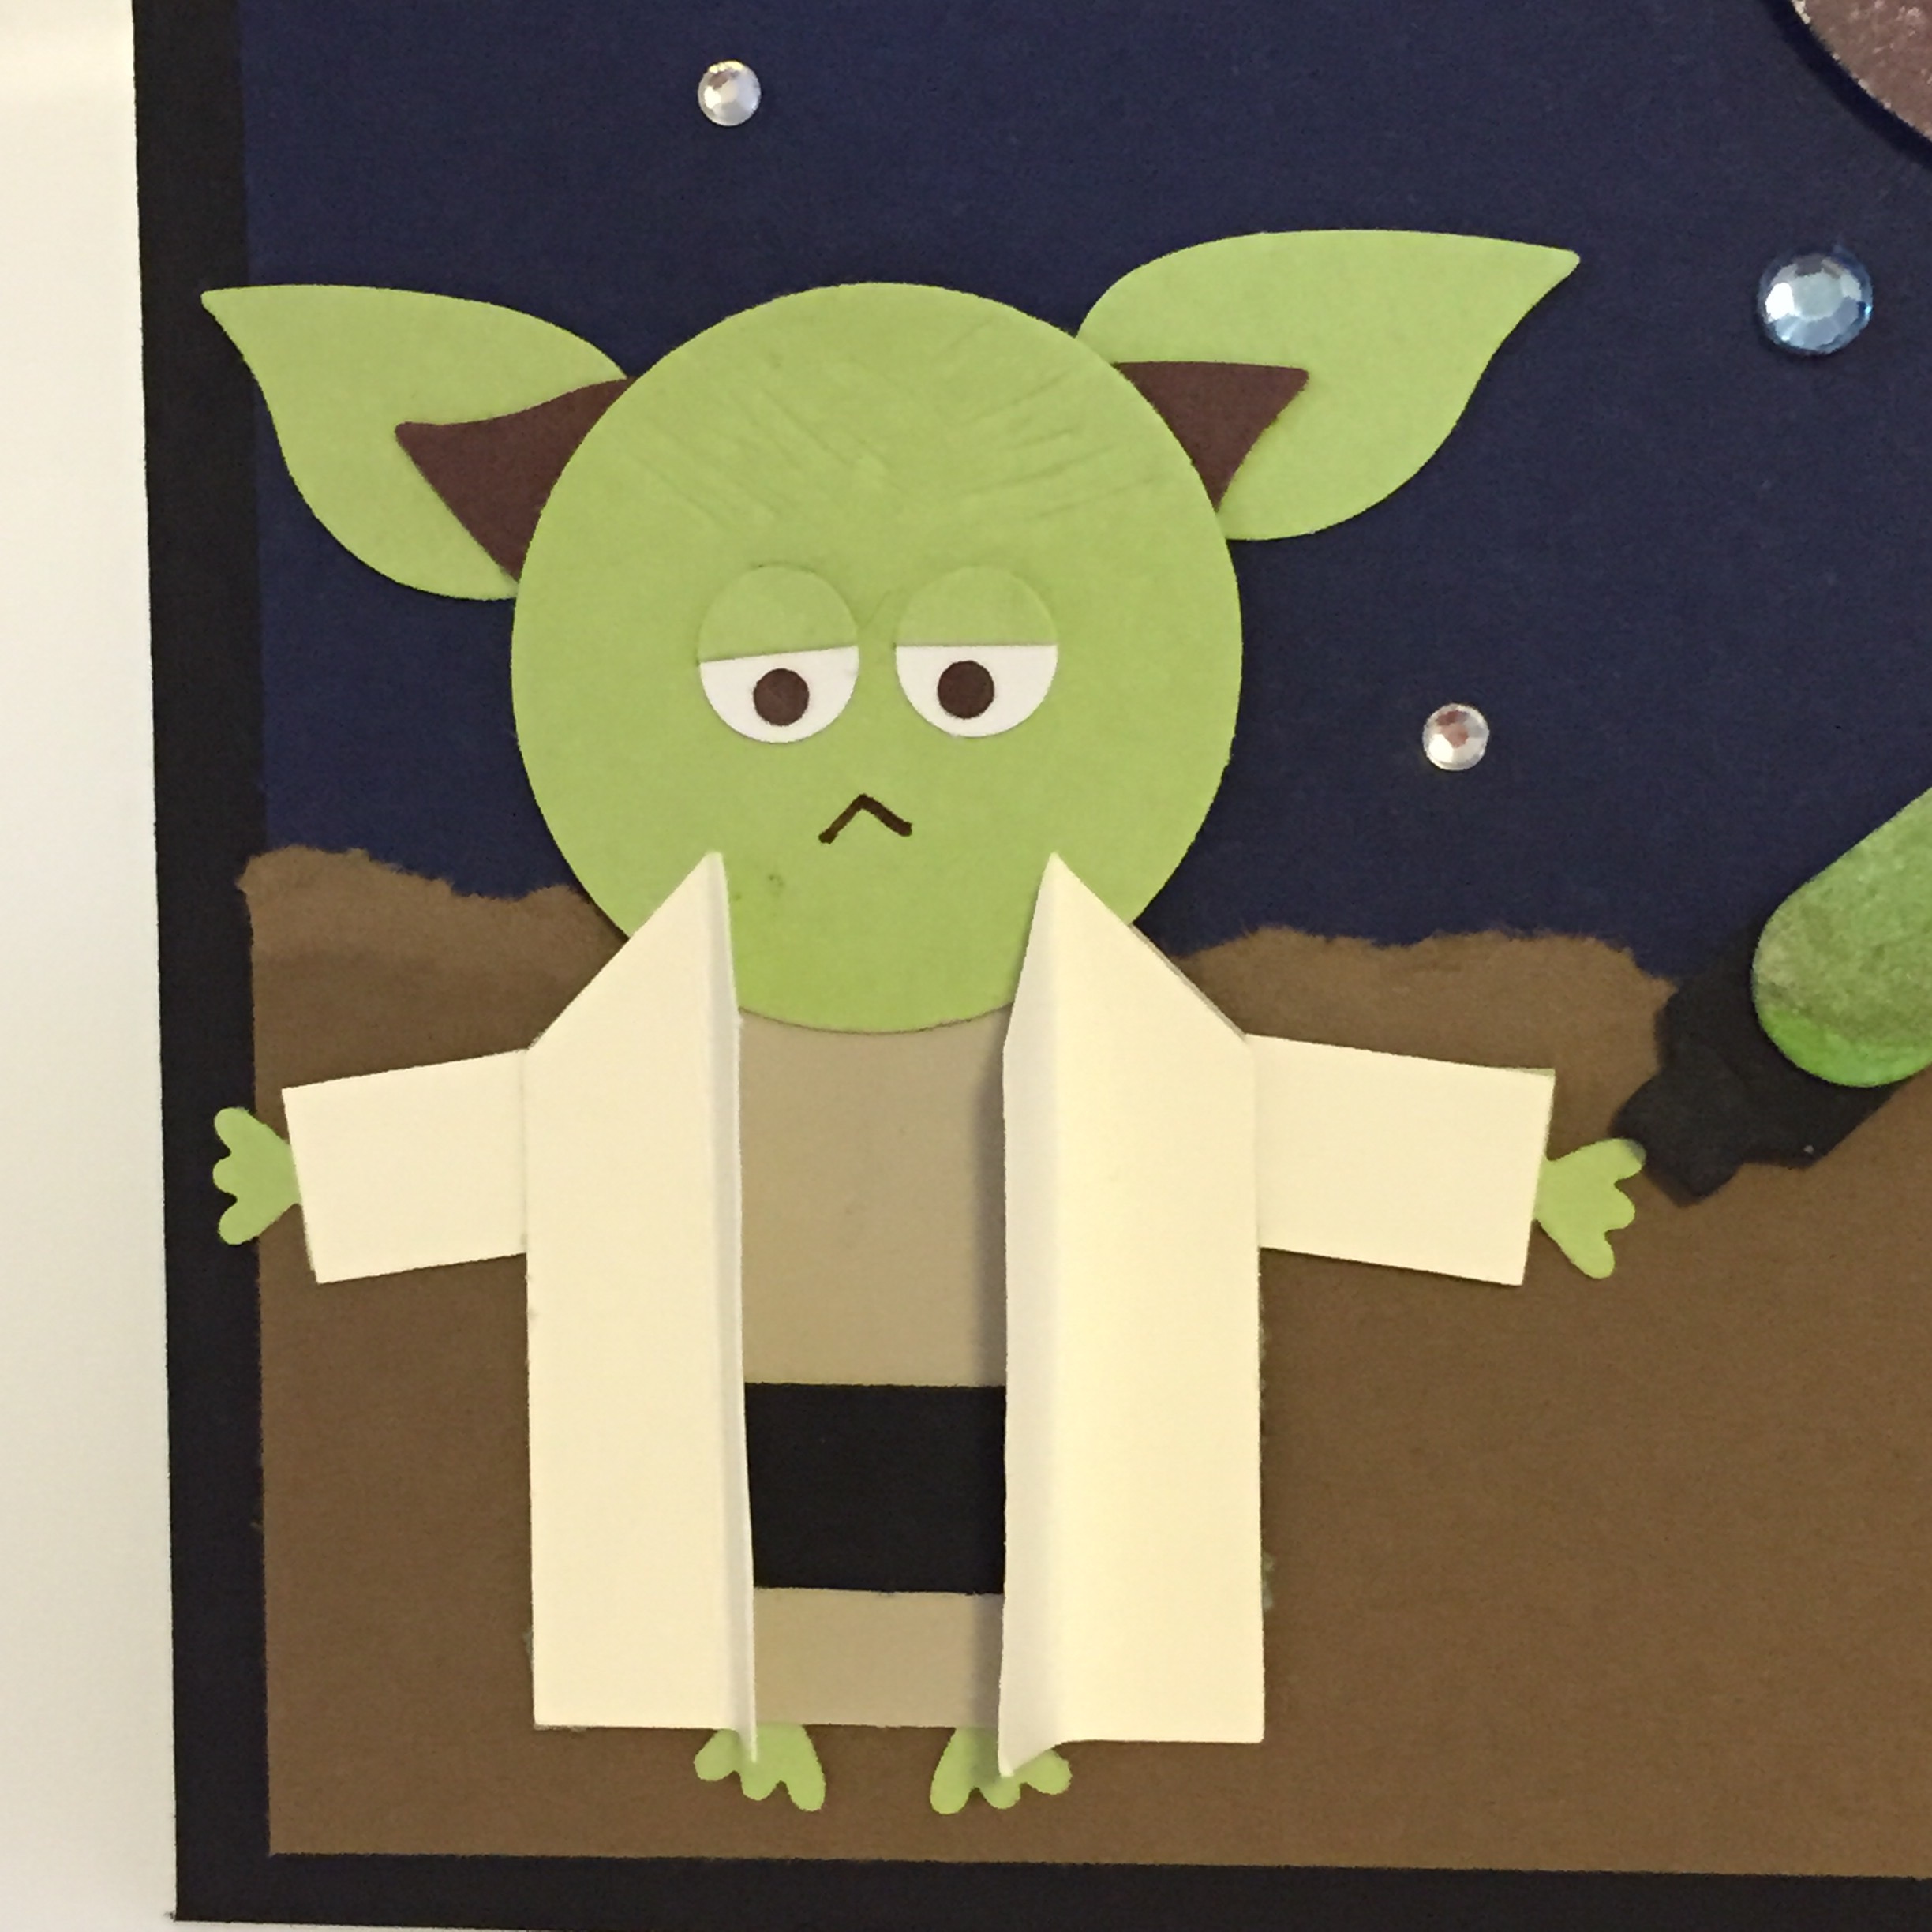
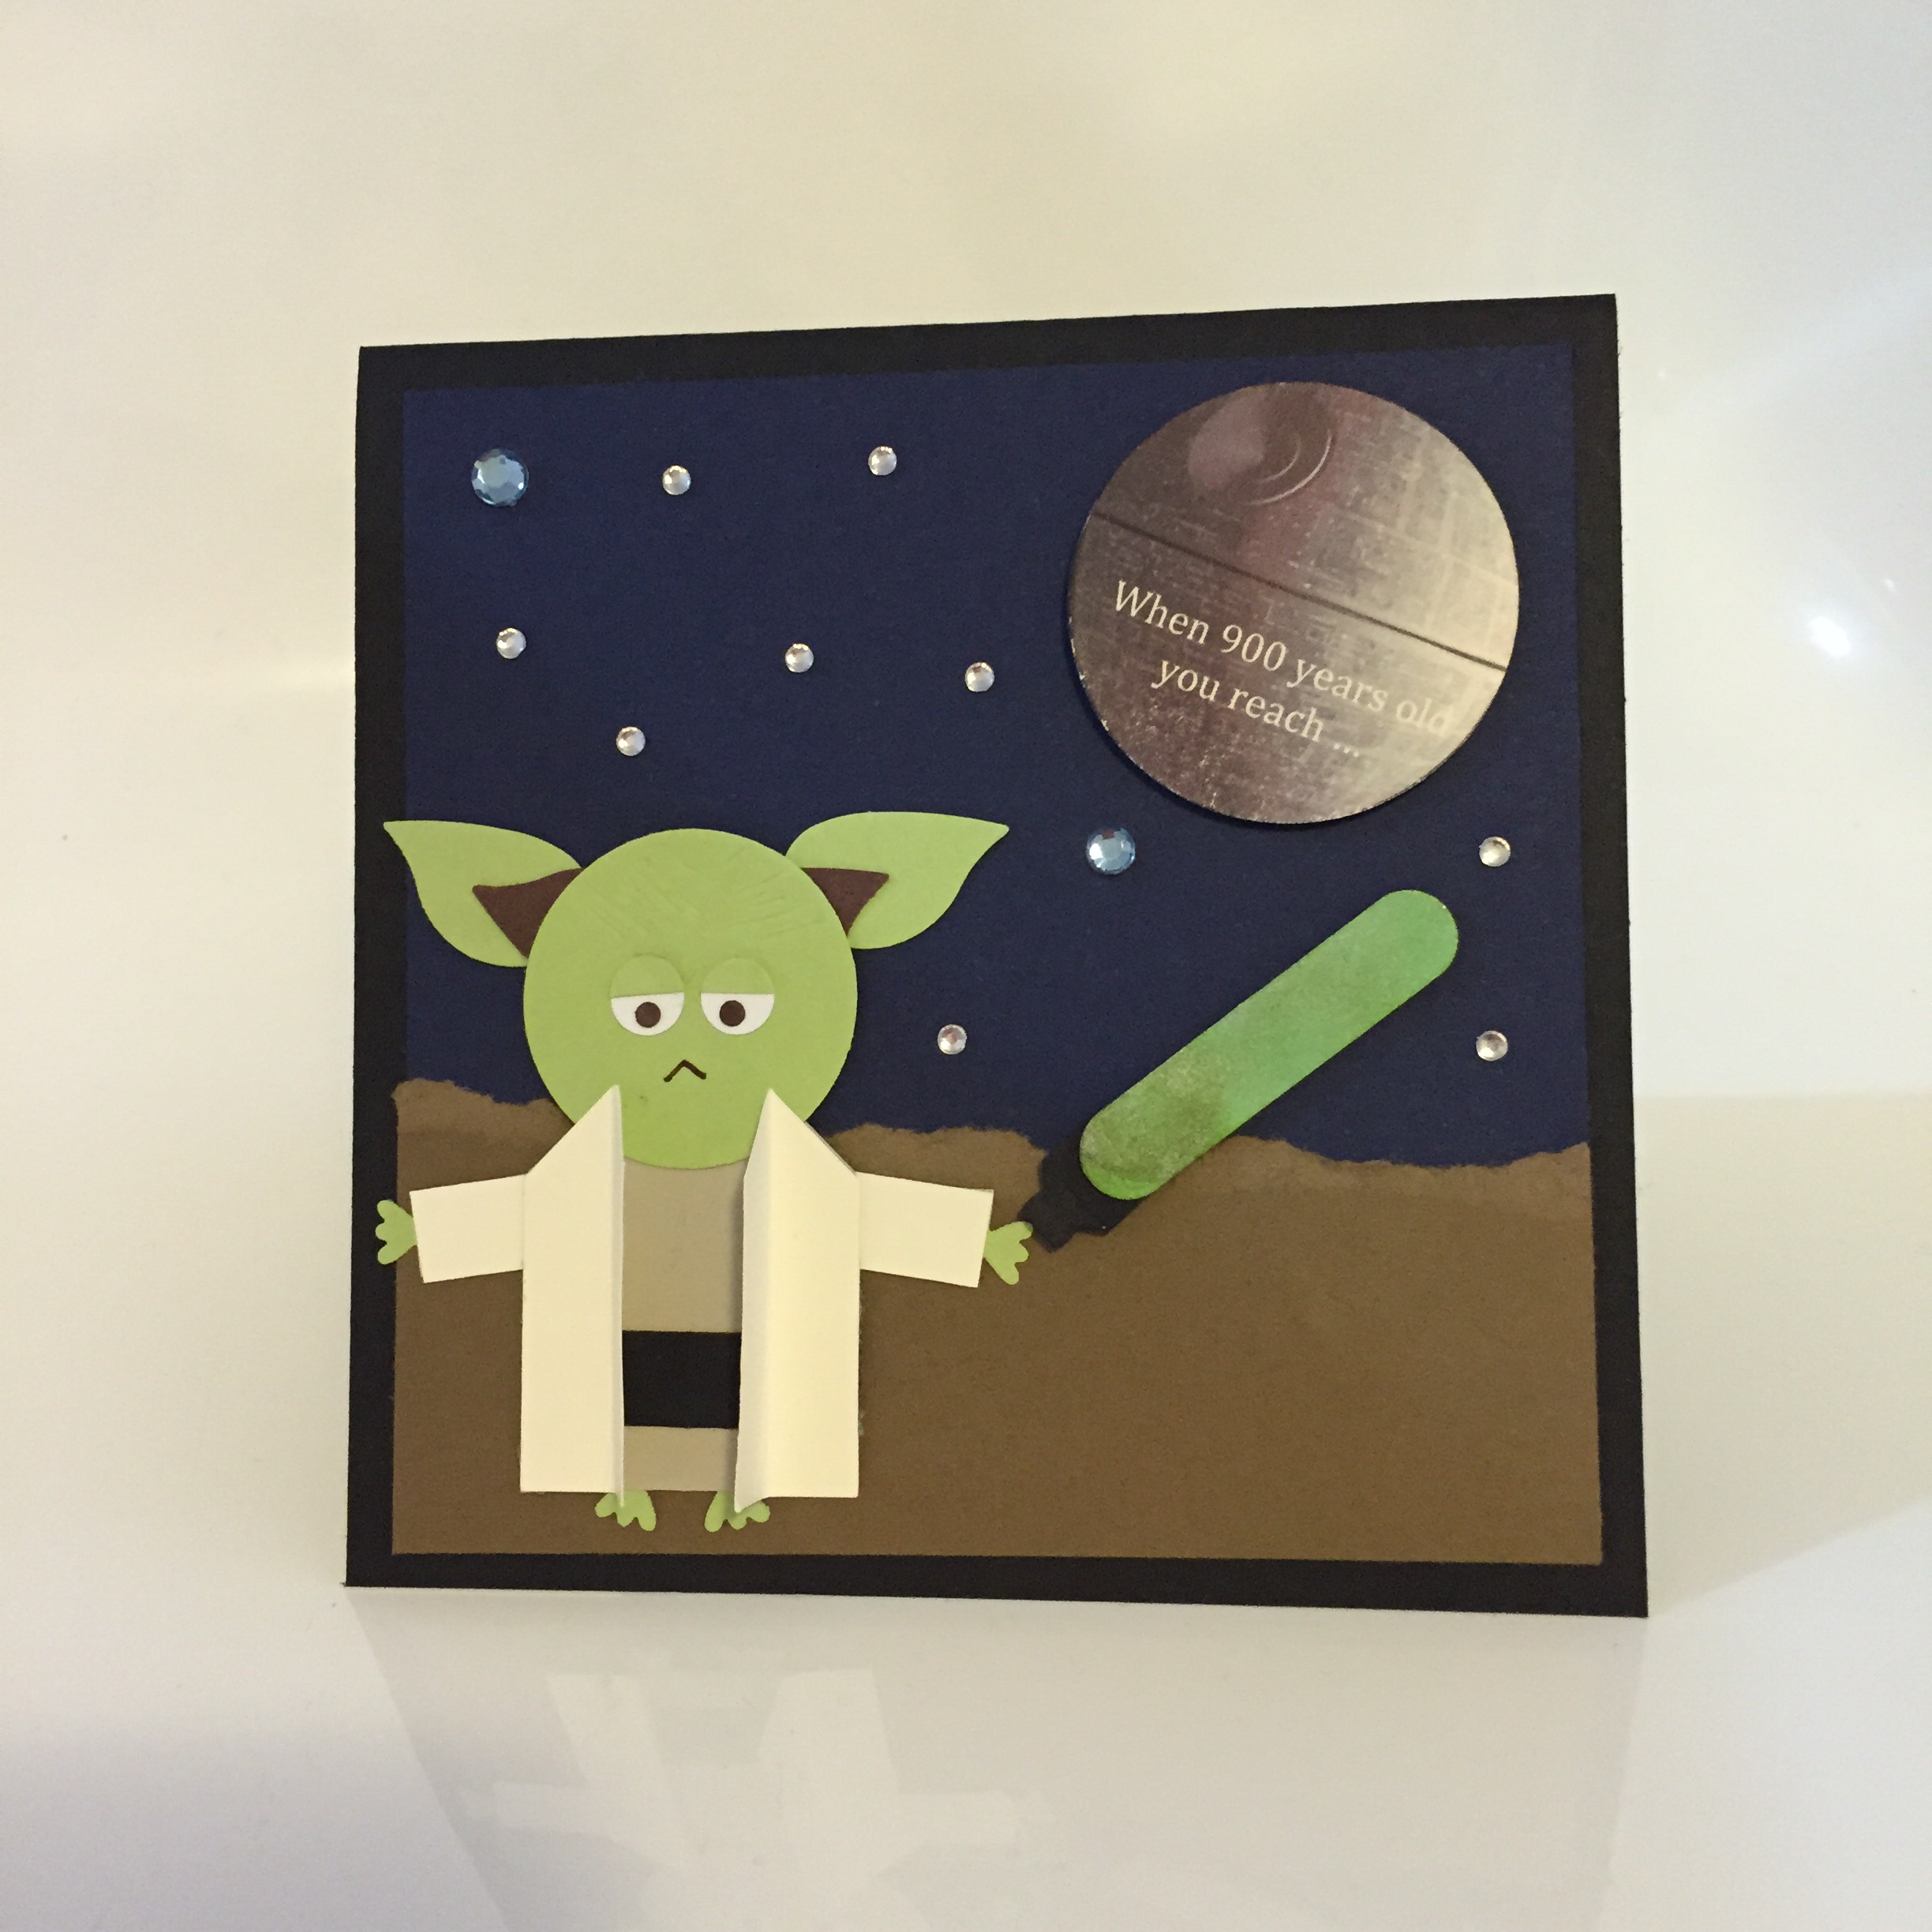
The Death Star image is one I used on a Yoda birthday card a few months ago. I’ve uploaded the image to Dropbox for anyone who’d like to use it (the link is in the previous Yoda post). 

I made the inside a pop-up card:

  
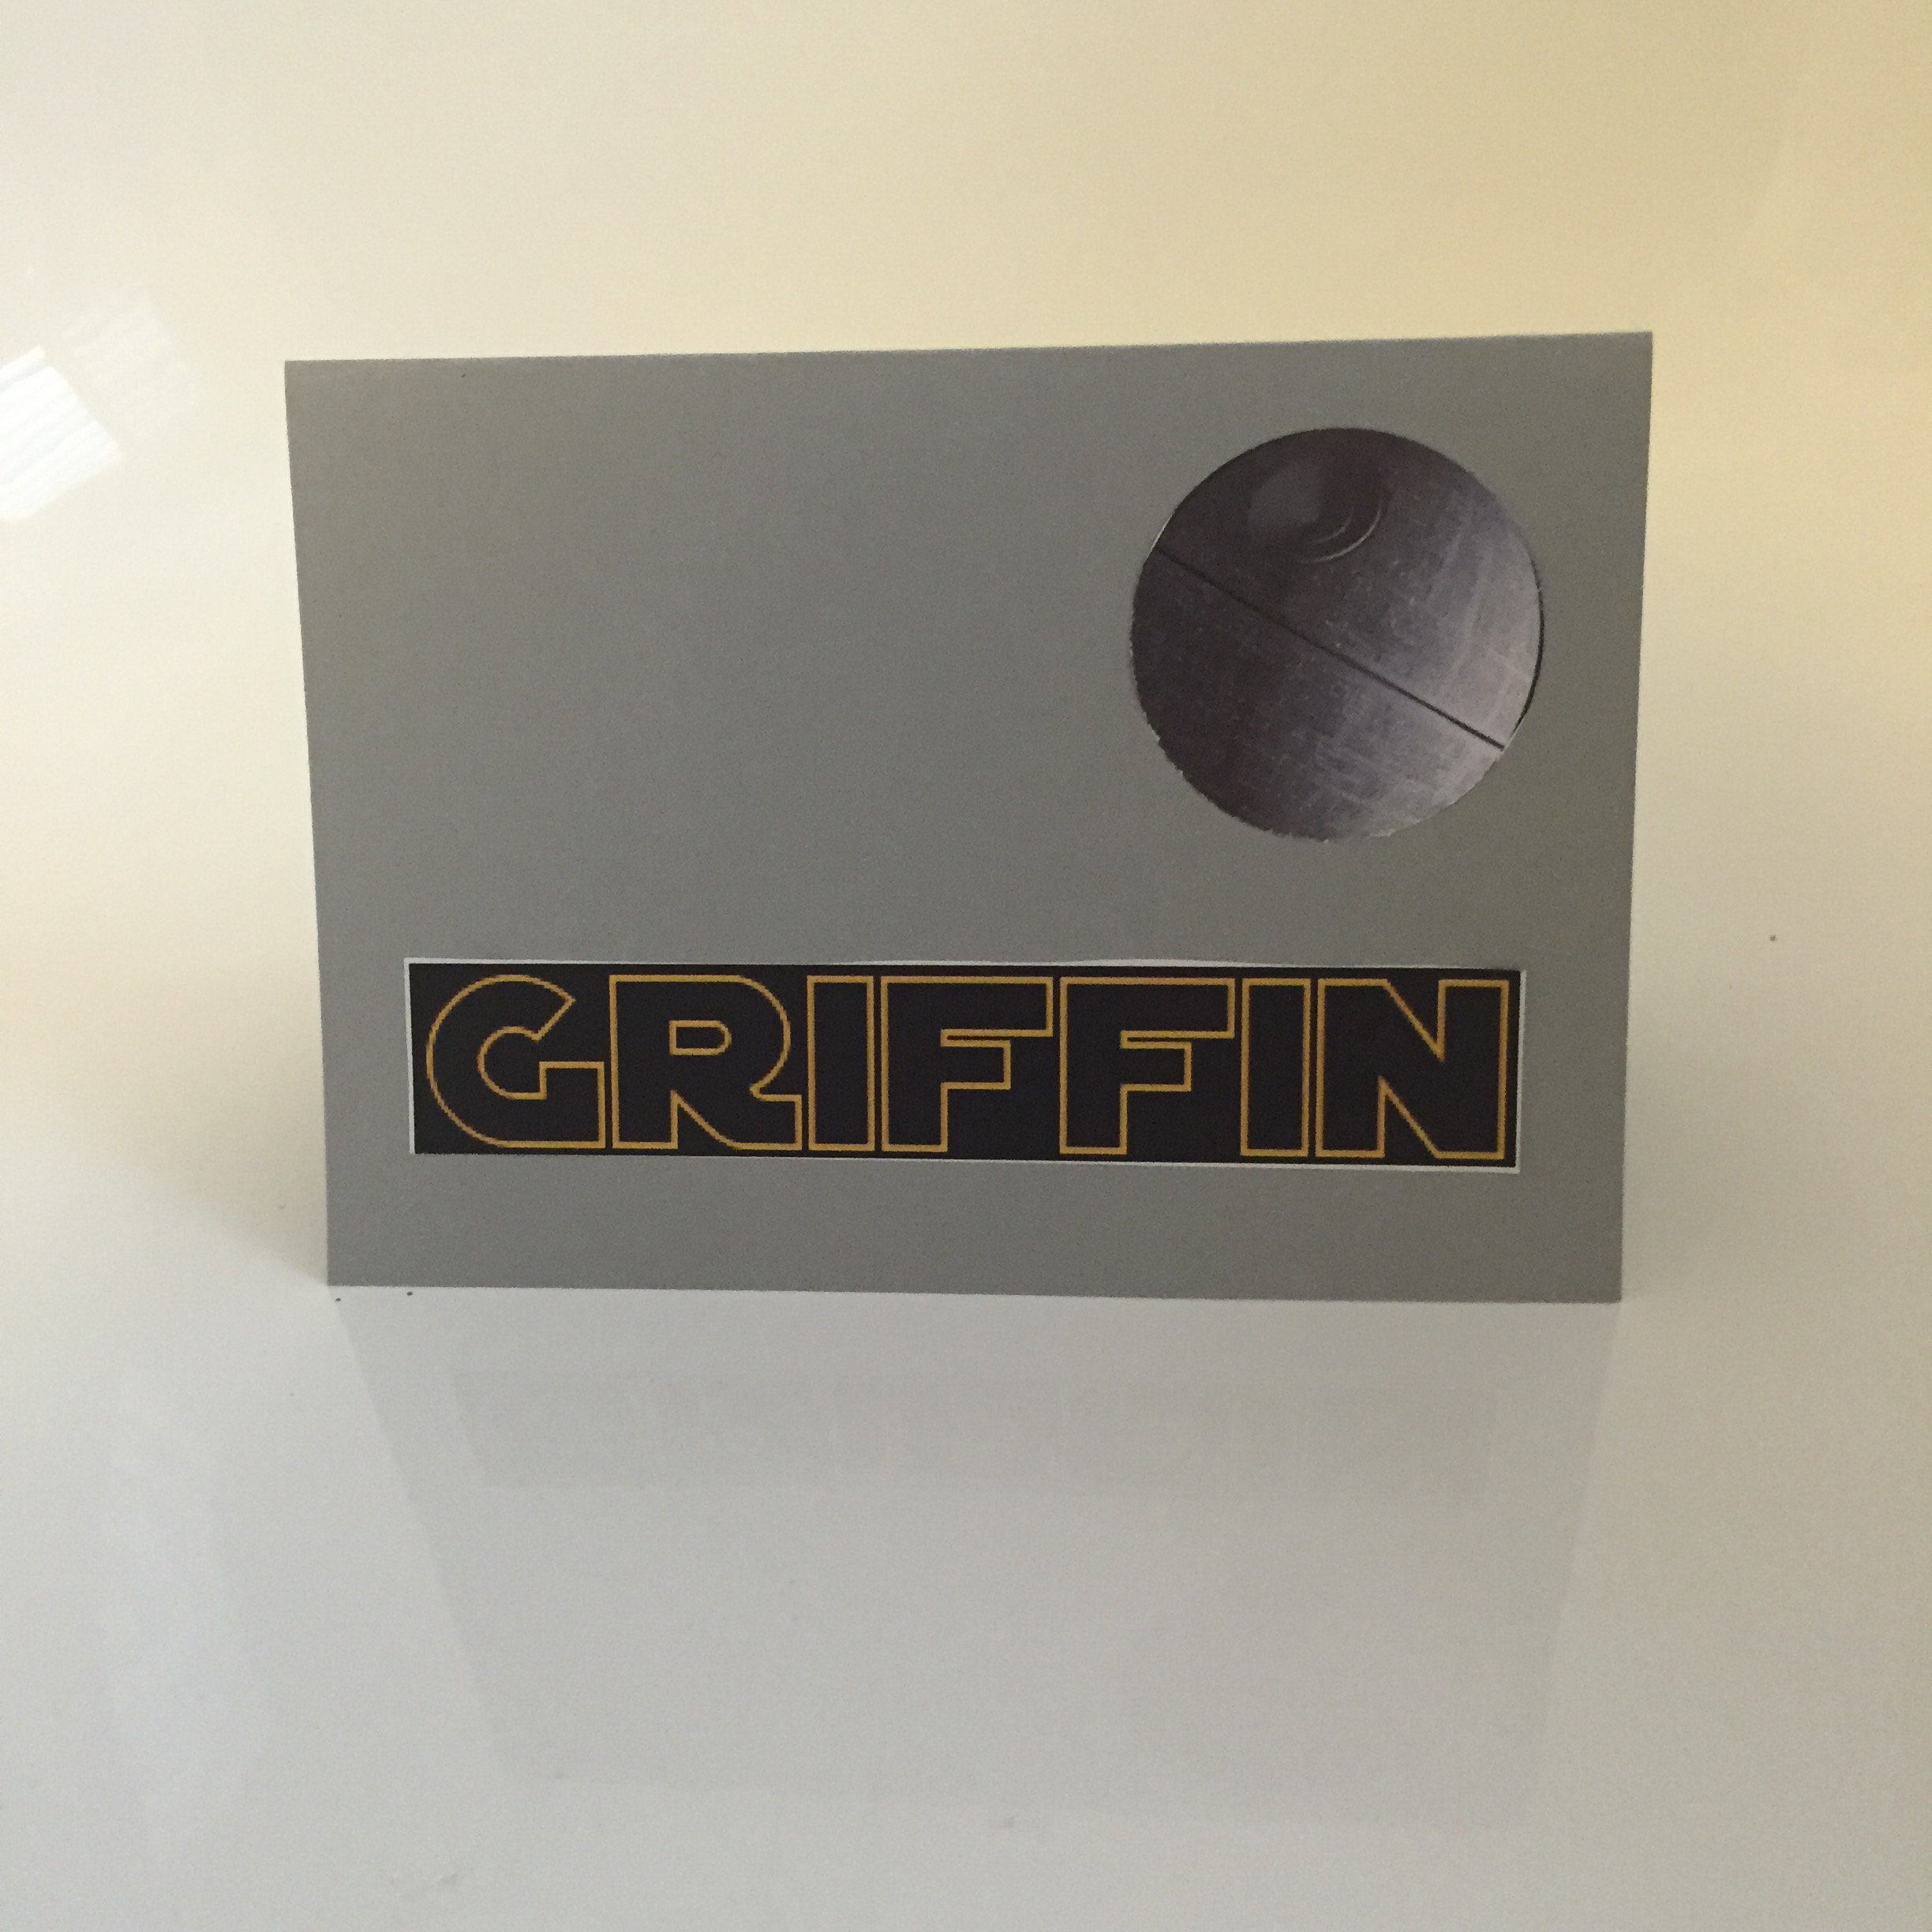
The good folks at Flaming Text have a Star Wars text generator, which I used to make the image. You can use the image for free as long as you keep on their watermark (which is there in my card, I promise, just hard to see in the photo!)

I hope he likes his card! 

Thanks for reading. 

Caro 

Share this:

  • Pinterest
  • Twitter
  • Facebook
  • Email
  • More
  • Reddit
  • Tumblr

Like this:

Like Loading...

Card gift set (made from upcycled salad container)

28 Thursday Jan 2016

Posted by Carolyn in 1 3/4 circle, 1 3/8 circle, 2 3/8 inch scallop punch, 3D projects, Birthday, Card sets, Cards, Chalk Talk, General occasion, Gift tags & wrapping, Punches, Scallop Tag Topper, Using up scraps

≈ Leave a comment

Tags

card gift sets, Card sets, homemade gifts, reusing salad containers, Upcycling, using up scraps

Hi 

Today I want to show you an idea I had for making a gift boxed set of cards using a plastic container that some salad leaves came in.   


When I was getting my rocket leaves out of the fridge a few days ago, I thought that the container would be just right to hold some square cards. 


I thought while I was in the upcycling/recycling mood, I should also use up some of my spare paper stash.  So I grabbed some old Bravo Burgundy (Stampin’ Up!) card stock and matching designer series paper, some punches and a pile of paper doilies I had in my “random craft stuff” box, and here’s what I came up with:


It was a layering job of DSP and card stock. I used my 2 3/8 inch scallop circle punch and the 1 3/4 and 1 3/8 inch circle punches.   The “For You” sentiment is from the Chalk Talk stamp set.  


I then decorated the plastic container to match the cards. 


 A quick tag using the scallop tag topper punch, some matching ribbon and voila!  


I made this for someone very special to me who is forever sending cards to other people, so hopefully she enjoyed receiving some cards of her own.  

Thanks for reading. 

Caro x 

Share this:

  • Pinterest
  • Twitter
  • Facebook
  • Email
  • More
  • Reddit
  • Tumblr

Like this:

Like Loading...

Star Wars gift bag

24 Saturday Oct 2015

Posted by Carolyn in 1 3/4 circle, Gift bags, Gift tags & wrapping, Jewellery tag, Kids craft ideas, Kids party, Word Window

≈ Leave a comment

Hello! 

Yesterday I showed you some quick Star Wars themed kids cards I made.  Today I want to show you a simple Star Wars themed gift bag for that little Jedi in your life!

I decorated up a gift bag from the $2 shop:    

   
The picture of the Death Star is sized to fit my 1 3/4 circle punch. The lightsabers are made from the word window and jewellery tag punches.  

I’m a little bit in love with this one!!! 

Caro x

Share this:

  • Pinterest
  • Twitter
  • Facebook
  • Email
  • More
  • Reddit
  • Tumblr

Like this:

Like Loading...

Star Wars kids cards

23 Friday Oct 2015

Posted by Carolyn in 1 3/4 circle, Birthday, Curly label, Jewellery tag, Kids cards, Kids craft ideas, Masculine, Owl, Word Window

≈ Leave a comment

Tags

Kids cards, Star Wars cards, Star Wars Punch Art

Hello

My 6 year old and all his friends are obsessed with Star Wars at present.  There are a couple of Padawan birthdays coming up over next few weeks so I’ve been looking for some quick Star Wars cards to make. 

Here they are in order of simplicity!!!


The lightsabers are made with the word window and jewellery punches.   The Death Star is a print out sized to fit my 1 3/4 inch circle punch. (I made it for this yoda card I made a few months ago). 

The next one is basically the same but with the child’s name in Star Wars font – check out the cool tool at logo54.com/movie/starwars


I’m not sure you can really file the next card under “quick” but it was still pretty easy! And still didn’t take more than 10 minutes.  

  
Darth Vader and Obi Wan are made from the owl punch.  Vader’s face is the owl’s vest turned upside down with some black fake pearls for eyes.  

I made the cape with the curly label punch turned on its side and trimmed off at the sides:

  
I hope you enjoyed reading this.  And here’s hoping the little Jedis enjoy them too!

Caro 

Share this:

  • Pinterest
  • Twitter
  • Facebook
  • Email
  • More
  • Reddit
  • Tumblr

Like this:

Like Loading...

Yoda birthday card 

13 Monday Jul 2015

Posted by Carolyn in 1 3/4 circle, Bird Builder, Birthday, Jewellery tag, Kids cards, Kids party, Masculine, Owl, Tag, Word Window

≈ 2 Comments

Tags

birthday cards, masculine birthday, Star Wars card, Star Wars Punch Art, Yoda card

It’s a good friend of mine’s birthday tomorrow and he is a bit of a Star Wars fan.  So I decided to update a Yoda card I made a few months ago for his birthday.  


All of the instructions you need to make Yoda are in my previous post here.  

Here is a close up of Yoda, as well as some of my jewel stars and planets:

  
And a close up of the greeting, written over an image of the Death Star.  

  
I am a little bit chuffed with this – I made it in Microsoft Word to fit inside my 1 3/4 inch circle punch.  I’ve uploaded the image to Dropbox in case you’d like to use it yourself.  The text in the image is white, and I printed it out on Very Vanilla card stock to match Yoda’s robe.  

A 12 x 12 cm Very Vanilla piece on the inside sponged in silver ink finished the card off. 

  
I hope you enjoy!

  
Caro x 

Share this:

  • Pinterest
  • Twitter
  • Facebook
  • Email
  • More
  • Reddit
  • Tumblr

Like this:

Like Loading...

Ben’s birthday card

16 Saturday Nov 2013

Posted by Carolyn in 1 3/4 circle, Cards, Kids cards, Punches, Star, Using up scraps

≈ Leave a comment

Tags

5th birthday, 5th birthday card, Birthday card, Kids cards, name card

Hello!

Today we had a 5th birthday party for a little boy called Ben.   Here’s the birthday card we made this morning:

letter, circle and star kid's birthday card


The colours are Night of Navy, Daffodil Delight and Poppy Parade (now retired, but Real Red would look just as good)

I used the 1 3/4 inch circle punch and a star punch as well as using my Big Shot and an alphabet die set to die cut the letters.

My son – and creative director! – insisted Ben needed ‘jewels’ on the card – so he stuck on 5, for a 5th birthday.  I’m actually quite impressed – he stuck them on really quite straight!

The little birthday boy seemed very chuffed with his card – so job done!   I was actually really pleased with how it turned out – sometimes the simplest cards are the most effective I think?

Thanks for reading.

Caro

Share this:

  • Pinterest
  • Twitter
  • Facebook
  • Email
  • More
  • Reddit
  • Tumblr

Like this:

Like Loading...

Cut out card technique

05 Saturday Oct 2013

Posted by Carolyn in 1 3/4 circle, Baby cards, Birthday, Cards, Decorative Label, General occasion, Punches, Tutorial

≈ Leave a comment

Tags

card making technique, cards, Punches, tutorial

Yesterday I showed you a card I made with a cut out image in it.   I think of this as a peek-a-boo card!

Baby punch out card

Today I wanted to show you how to make it.

Step 1:  fold a card blank.   I used my 1 3/4 inch circle punch, but you could use any shape you like.     Centre the punch at the top of the front of the card and punch out an image.

IMAG0168Step 2:  stick the image on the inside of the card so you can see it through the open circle on the front.  Tip!  Do not try and glue this from the inside.  Close the card and stick the image to the inside of the card through the hole on the front.   This will make sure you get a perfect alignment.

IMAG0172

IMAG0170

Step 3: decorate the front of the card however you like.  This will probably mean covering over the circle you’ve cut out, but this doesn’t matter.  We’ll fix that later.   I’ve kept this card front really simple:

IMAG0171

The hole is hiding there under the purple card stock.

Step 4: Once you’ve decorated the card, open it, and cut a circle on the inside from the same hole as the first one you cut.

IMAG0173

(Note: this picture is upside down from how you’d see it if you were punching yourself!)

This is how it will look like when finished:

IMAG0180

And you’re done!  A very simple card but pretty effective I think?

My mother is sitting here while I’m typing this and she says to say it’s so simple even your mother could make it! Here’s a picture of a card we made together this afternoon using the same technique:

IMAG0209


This technique also works with other punches.  Tomorrow I will show you a couple of cards I’ve made using the same technique but a different punch.

I hope you enjoy making some of these.

Caro x

Share this:

  • Pinterest
  • Twitter
  • Facebook
  • Email
  • More
  • Reddit
  • Tumblr

Like this:

Like Loading...

Using my colouring in …. Part 4 (The final part!)

04 Friday Oct 2013

Posted by Carolyn in 1 3/4 circle, Baby cards, Cards, Punches

≈ Leave a comment

Tags

baby cards, Colouring in

Over the past week I’ve been showing you some of the range of cards I’ve made using a pile of coloured in images I have had lying around.  You’ll probably be pleased to here that this is the last post I plan on doing on this topic!

One of the images I coloured in multiples of was this cute image from a retired Stampin’ Up! stamp set called Give a Gift.

IMAG0046

Here are some of the cards I made with these cute little circles:

Baby punch out card

(this green one is my favourite one!)

IMAG0179

Baby cut out card - yellow

They are all a bit different.  I’ve used up quite a lot of spare DSP or sheets of card stock I’d embossed but not yet figured out what to do with.

I hope you can see that this is a ‘cut out’ card – and the image is actually stuck on the inside of the card with a punched shape cut out of the front of the card.   This photo gives you a better idea:

IMAG0177

This is such a simple and effective technique you can use it for pretty much any stamp or imagine that has a matching punch.    If you’d like to know how I made this card, come back tomorrow and I’ll show you!

Thanks for reading

Caro x

Share this:

  • Pinterest
  • Twitter
  • Facebook
  • Email
  • More
  • Reddit
  • Tumblr

Like this:

Like Loading...

More balloon cards

17 Tuesday Sep 2013

Posted by Carolyn in 1 3/4 circle, 1 inch square, 3D / pop up, Birthday, Cards, Cupcake Builder, General occasion, Kids cards, Punches, Using up scraps

≈ Leave a comment

Tags

Balloons, cards, Hot Air Balloons, Punches

Hello

Yesterday I showed you some hot air balloon cards I made using the Stampin’ Up! A Little Treat stamp, which is now retired.   I said I would show you how you could make one of these cards even if you didn’t have this stamp set.   I thought of 2 ways you could do this: using the Stampin’ Up! cupcake builder punch and a square punch with a pair of scissors.

Method 1 – the cupcake builder punch

The first way is to use the cupcake base from the cupcake builder punch as a basket.

IMAG0053

You can see that the base is not quite ‘square’.  That doesn’t bother me when I’m sticking the hot air balloon on the card at an angle, but you can always cut just a small amount off to make it straight:

IMAG0054

Here are some hot air balloon cards made with the cupcake builder punch baskets:

IMAG0057You can also use the cupcake tops as clouds!

IMAG0066You can also give your basket a little ‘bling’:

IMAG0075

Method 2 – Using a square punch

Another way to make a basket is to cut a square and cut down the sides to make a basket.

IMAG0067Here’s a balloon made out of a square punch basket:

IMAG0068

(I can’t help myself and had to use up a tiny scrap of lace I’d had lying in my scrap pile!)

I hope you enjoy making some of these.

Caro

Share this:

  • Pinterest
  • Twitter
  • Facebook
  • Email
  • More
  • Reddit
  • Tumblr

Like this:

Like Loading...

Balloon card

16 Monday Sep 2013

Posted by Carolyn in 1 3/4 circle, 3D / pop up, Birthday, Cards, General occasion, Kids cards, Using up scraps

≈ Leave a comment

Tags

Balloons, cards, Hot Air Balloons

Hello 🙂

I think I’ve mentioned before that a lot of my craft time these days is focused on making cards for my son’s various birthday parties?   He’s very interested in hot air balloons at the moment (no idea why!) so he thought he might like to give his friend a hot air balloon card.

I have a retired Stampin’ Up! stamp set called A Little Treat which has a hot air balloon at the base.  One of my quick ‘go to’ cards for several years has been to stamp the hot air balloon base and cut a 1 3/4″ circle out of DSP to act as the balloon.  Literally the 2 minute card to make and I’ve made many over the years.

This time I wanted to step it up a little and try for something a little fancier!   I had pinned these gorgeous cards several months ago so decided to make some of my own.   Here was the end result:

IMAG0030

They were so much fun to make I made a few!

IMAG0029

IMAG0031

IMAG0034OK, I’ll confess, I may have made more than a few … more like lots!

IMAG0078

You may have guessed that they are a) very easy and b) very addictive to make!   You just need to punch out several circles from your 1 3/4″ circle punch.  Another brilliant way to use up scraps of DSP!   Fold each circle in half and stick them together until you have a ‘ball’ of circles for your balloon.

Here’s a close up of a balloon:

IMAG0033

And of the stuck together circles:

IMAG0028

IMAG0027

These are so much fun to make it got me thinking – how could you make them if you didn’t have the basket stamp?    Interested?  Stay tuned tomorrow to find out 😉

Caro

Share this:

  • Pinterest
  • Twitter
  • Facebook
  • Email
  • More
  • Reddit
  • Tumblr

Like this:

Like Loading...
← Older posts

Carolyn Dalton

Independent Stampin Up! Demonstrator

Recent Posts

  • Pretty butterfly birthday card 
  • Adding an extra touch to a homemade envelope
  • Quick and easy masculine card 
  • Quick and easy kids card
  • Butterfly soap card

Archives

  • March 2016
  • February 2016
  • January 2016
  • December 2015
  • November 2015
  • October 2015
  • September 2015
  • August 2015
  • July 2015
  • June 2015
  • May 2015
  • April 2015
  • September 2014
  • July 2014
  • April 2014
  • March 2014
  • February 2014
  • November 2013
  • October 2013
  • September 2013
  • August 2013
  • July 2013
  • June 2013
  • May 2013
  • May 2012

Categories

  • 1 1/4 inch circle
  • 1 3/4 circle
  • 1 3/4 inch scallop circle
  • 1 3/8 circle
  • 1 inch circle
  • 1 inch square
  • 2 3/8 inch scallop punch
  • 3/4 inch circle
  • 3D / pop up
  • 3D projects
  • Anniversary
  • Baby cards
  • Beautiful Butterflies
  • Big Shot
  • Bird Builder
  • Birthday
  • Bitty Butterfly
  • Blossom
  • Blossom Builder
  • Boho Blossoms
  • Boxes
  • Butterfly (retired)
  • Candy Wrapper
  • Card sets
  • Cards
  • Chalk Talk
  • Christmas
  • Circle Thinlits
  • Circle treat cups
  • Circles #2
  • Corner rounder
  • Cupcake Builder
  • Cupcakes and other tasty treats
  • Curly label
  • Decorative Label
  • Dies
  • Elegant Butterly
  • Embossing folders
  • Envelopes
  • Extra Large Oval
  • Fancy Flower
  • Framelits
  • Full heart
  • General occasion
  • Gift bags
  • Gift bow
  • Gift card holders
  • Gift tags & wrapping
  • Home decorating
  • Horizontal Slot
  • Invitations
  • Jewellery tag
  • Kids cards
  • Kids craft ideas
  • Kids party
  • Labels collection
  • Large Oval
  • Love notes
  • Masculine
  • Mini scallop
  • Modern Label
  • Music Notes
  • Notebooks
  • Owl
  • Perfect Polka Dots
  • Petite curly label
  • Pinwheel die
  • Punches
  • Scallop circle
  • Scallop edge
  • Scallop envelope
  • Scallop oval
  • Scallop Tag Topper
  • Small Heart
  • Square Lattice
  • Star
  • Sweet treat cups
  • Tag
  • Tasteful Trim
  • Thank you
  • Thoughts and comments
  • Top Note
  • Tutorial
  • Uncategorized
  • Using up scraps
  • Washi tape
  • Wedding cards
  • Wheels
  • Wildflower Meadow
  • Word Window

Pinterest

Follow Me on Pinterest

Follow me on Twitter

My Tweets

Enter your email address to follow this blog and receive notifications of new posts by email.

Join 37 other subscribers

Create a free website or blog at WordPress.com.

Privacy & Cookies: This site uses cookies. By continuing to use this website, you agree to their use.
To find out more, including how to control cookies, see here: Cookie Policy
  • Follow Following
    • Caro's Pretty Things
    • Join 26 other followers
    • Already have a WordPress.com account? Log in now.
    • Caro's Pretty Things
    • Customize
    • Follow Following
    • Sign up
    • Log in
    • Report this content
    • View site in Reader
    • Manage subscriptions
    • Collapse this bar
 

Loading Comments...
 

    %d bloggers like this: