Hi.
On the weekend I made a card for a friend with a matching home made envelope. I happened to have a die cut butterfly lying around (as you do!!) – which matched perfectly.
Too cute! 🙂
Thanks for reading
Caro
09 Wednesday Mar 2016
Posted in Envelopes, Gift bags, Using up scraps
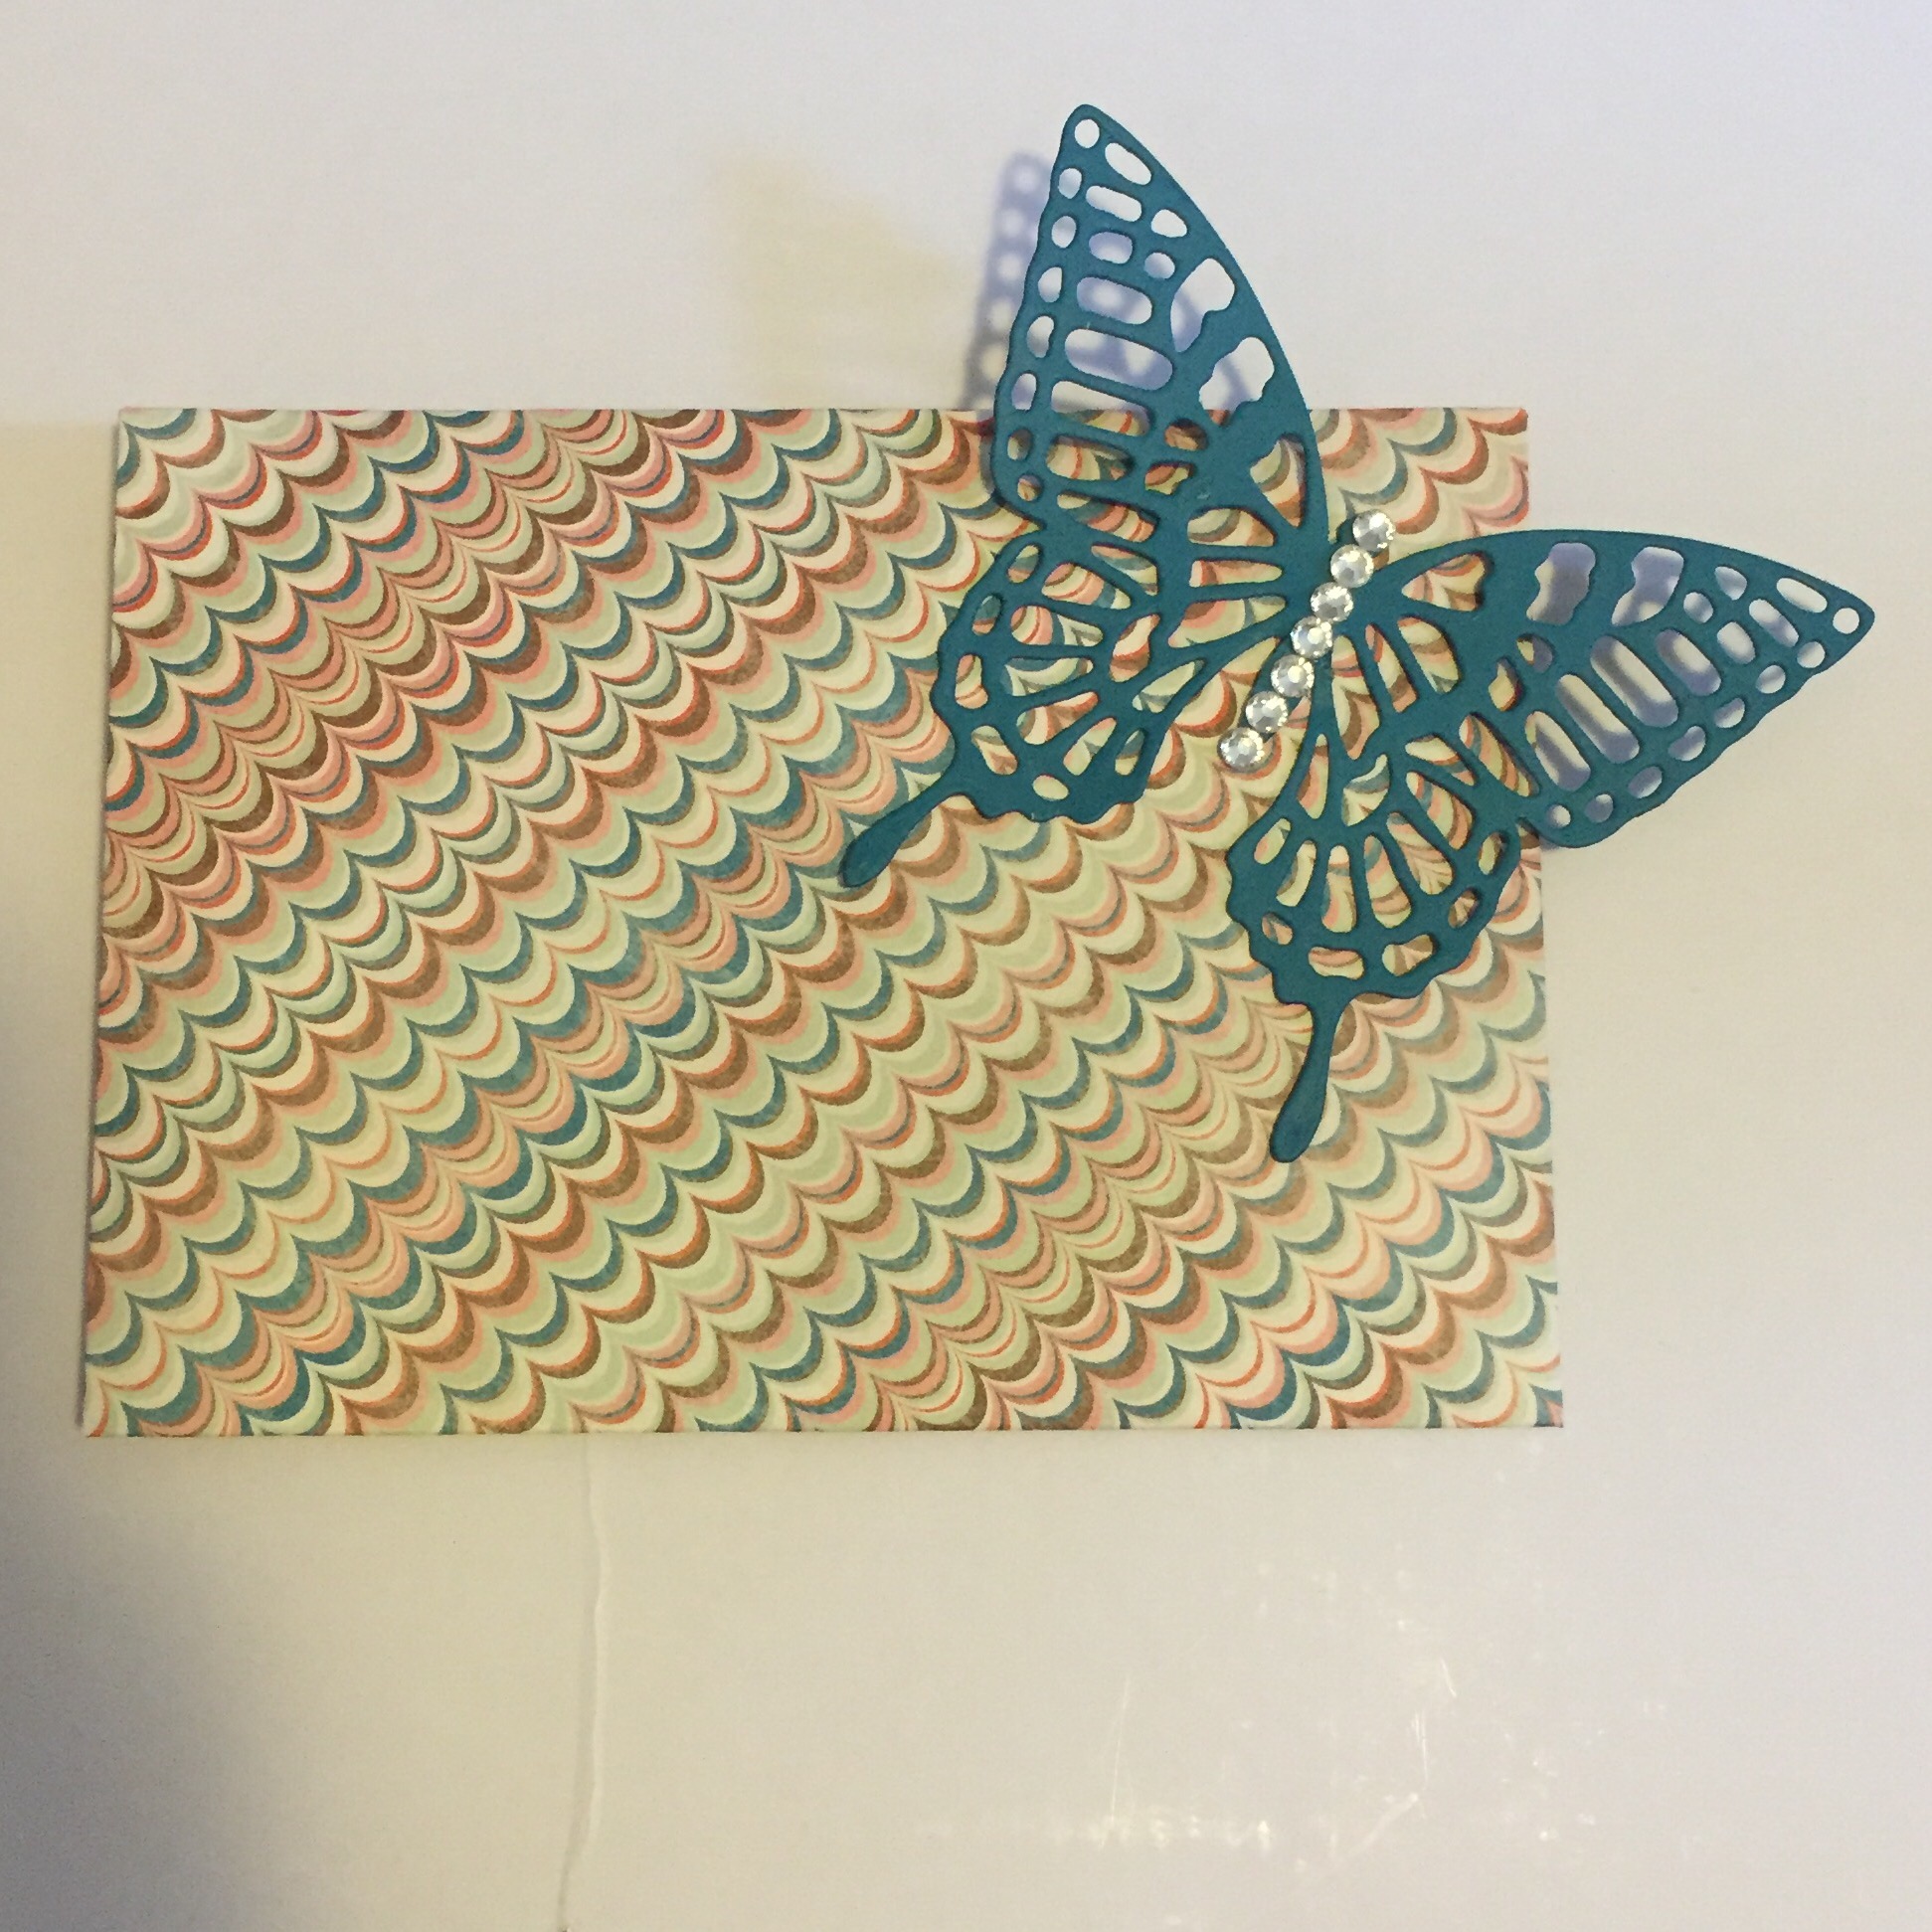
Hi.
On the weekend I made a card for a friend with a matching home made envelope. I happened to have a die cut butterfly lying around (as you do!!) – which matched perfectly.
Too cute! 🙂
Thanks for reading
Caro
10 Wednesday Feb 2016
Posted in 3D / pop up, 3D projects, Birthday, Cards, General occasion, Thoughts and comments
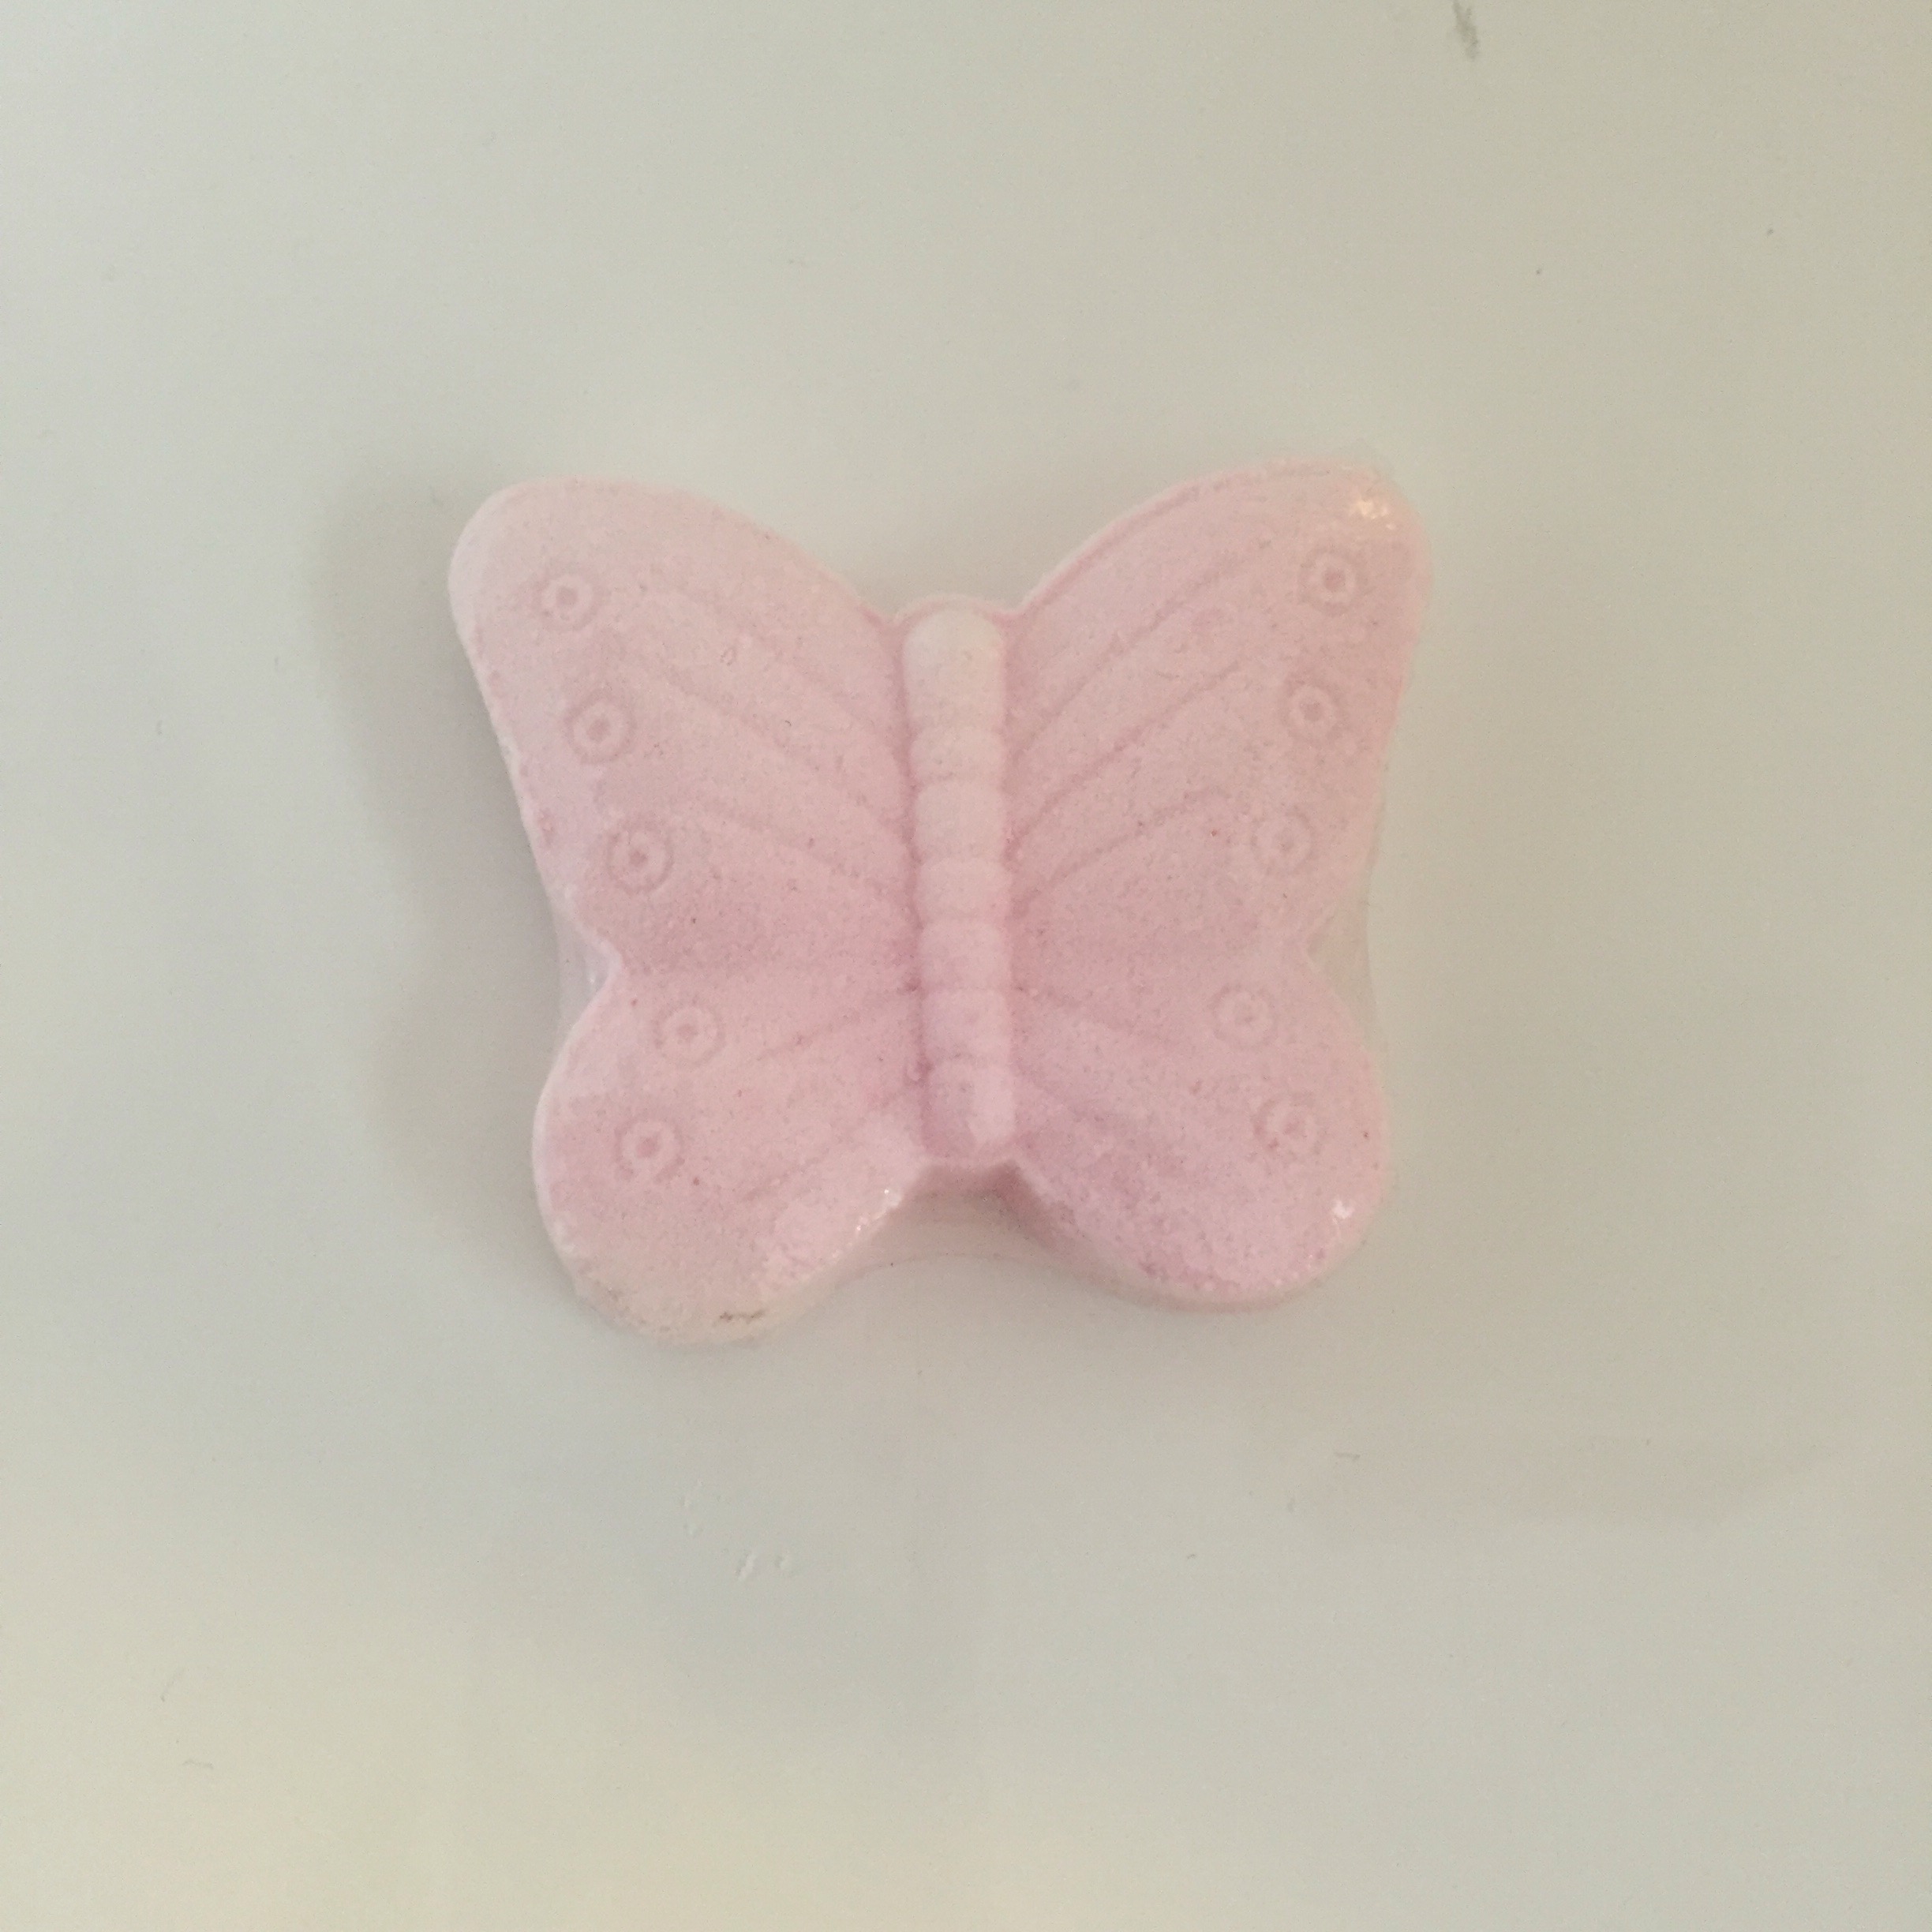
I was browsing the discount bin at the local pharmacy (drug store) the other day and found a cute butterfly soap.
I remembered I had some butterfly paper in my card stash …

How cute is that?

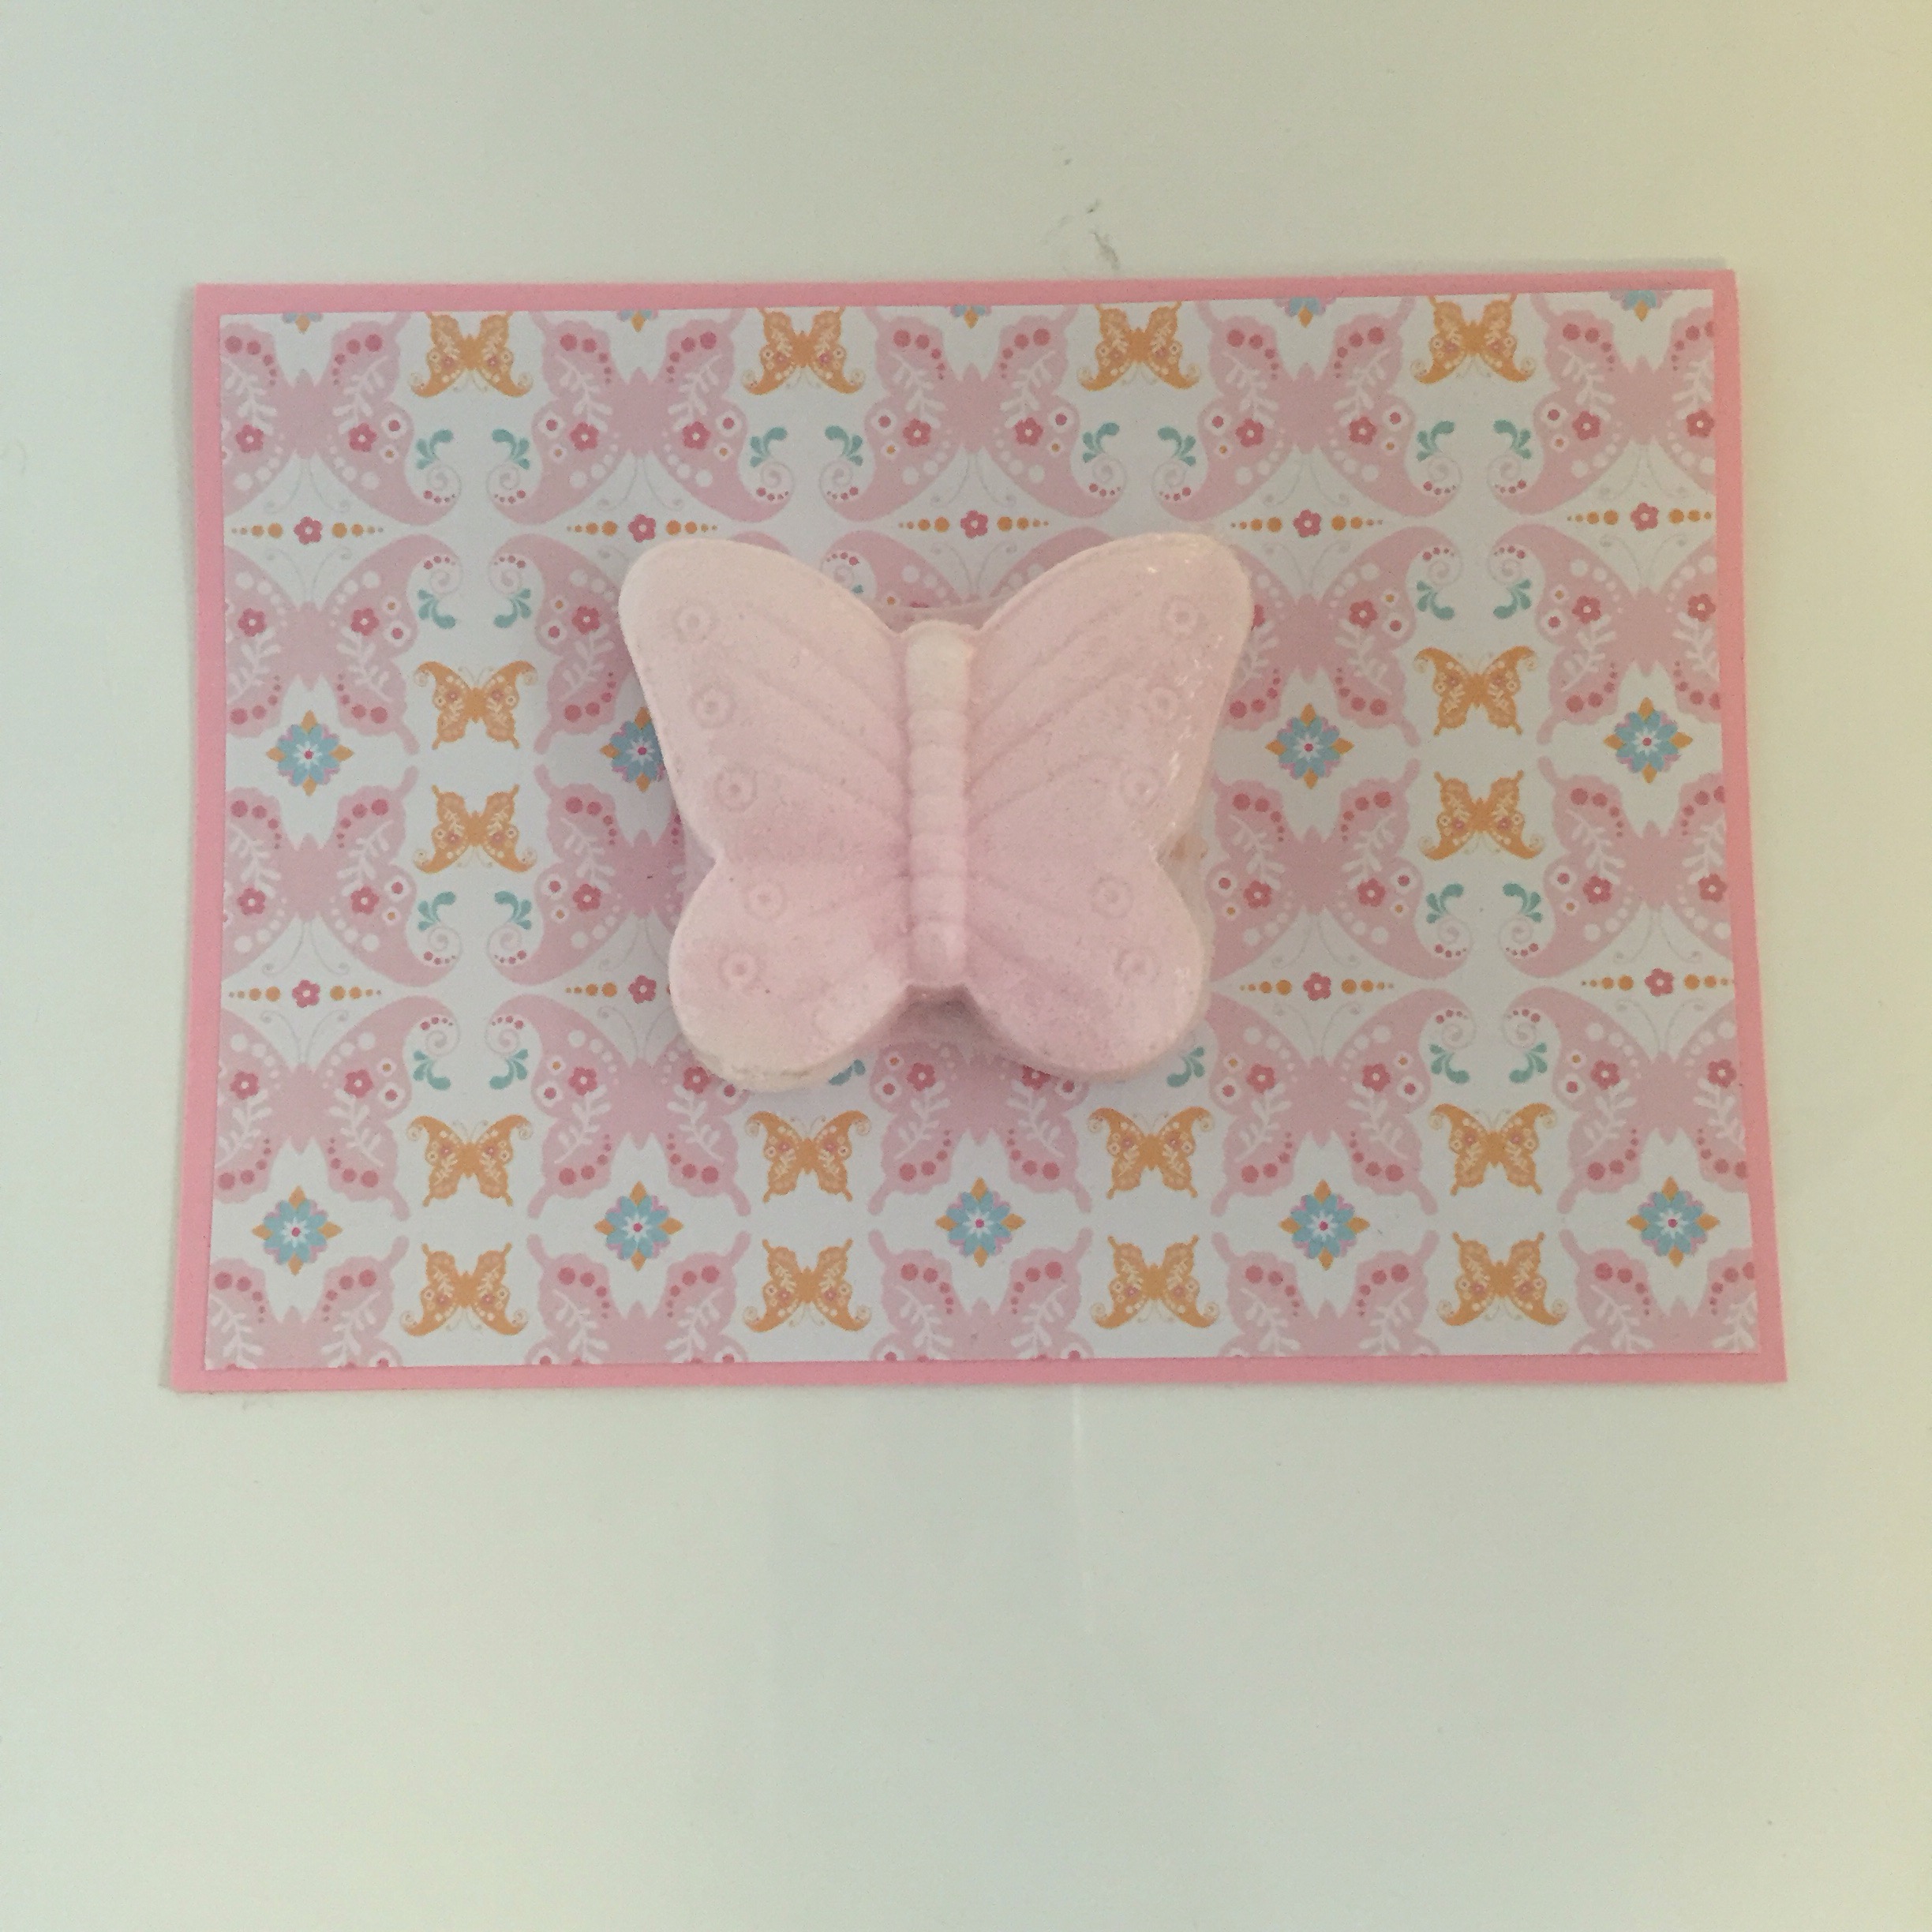
I have a “tween” in mind who I hope will love this card.
Thanks for reading.
Caro
07 Sunday Feb 2016
Posted in 3D projects, Gift bags, Gift tags & wrapping, Kids party
Today I wanted to show you something silly I made for my Star Wars obsessed brother’s birthday. Instead of wrapping his gift, I made a silly gift bag – with a stormtrooper dressed for a birthday party!
Complete with silly party hat and bow tie!

I made the gift boy with my new We R Memory Keepers 1-2-3 punch board. Stampin’ Up! also has a similar bow punch board.
There’s something about the idea of a scary stormtrooper with a silly bow tie that really appealed to me!
And him – he loved it!!!
Thanks for reading.
Caro
28 Thursday Jan 2016
Hi
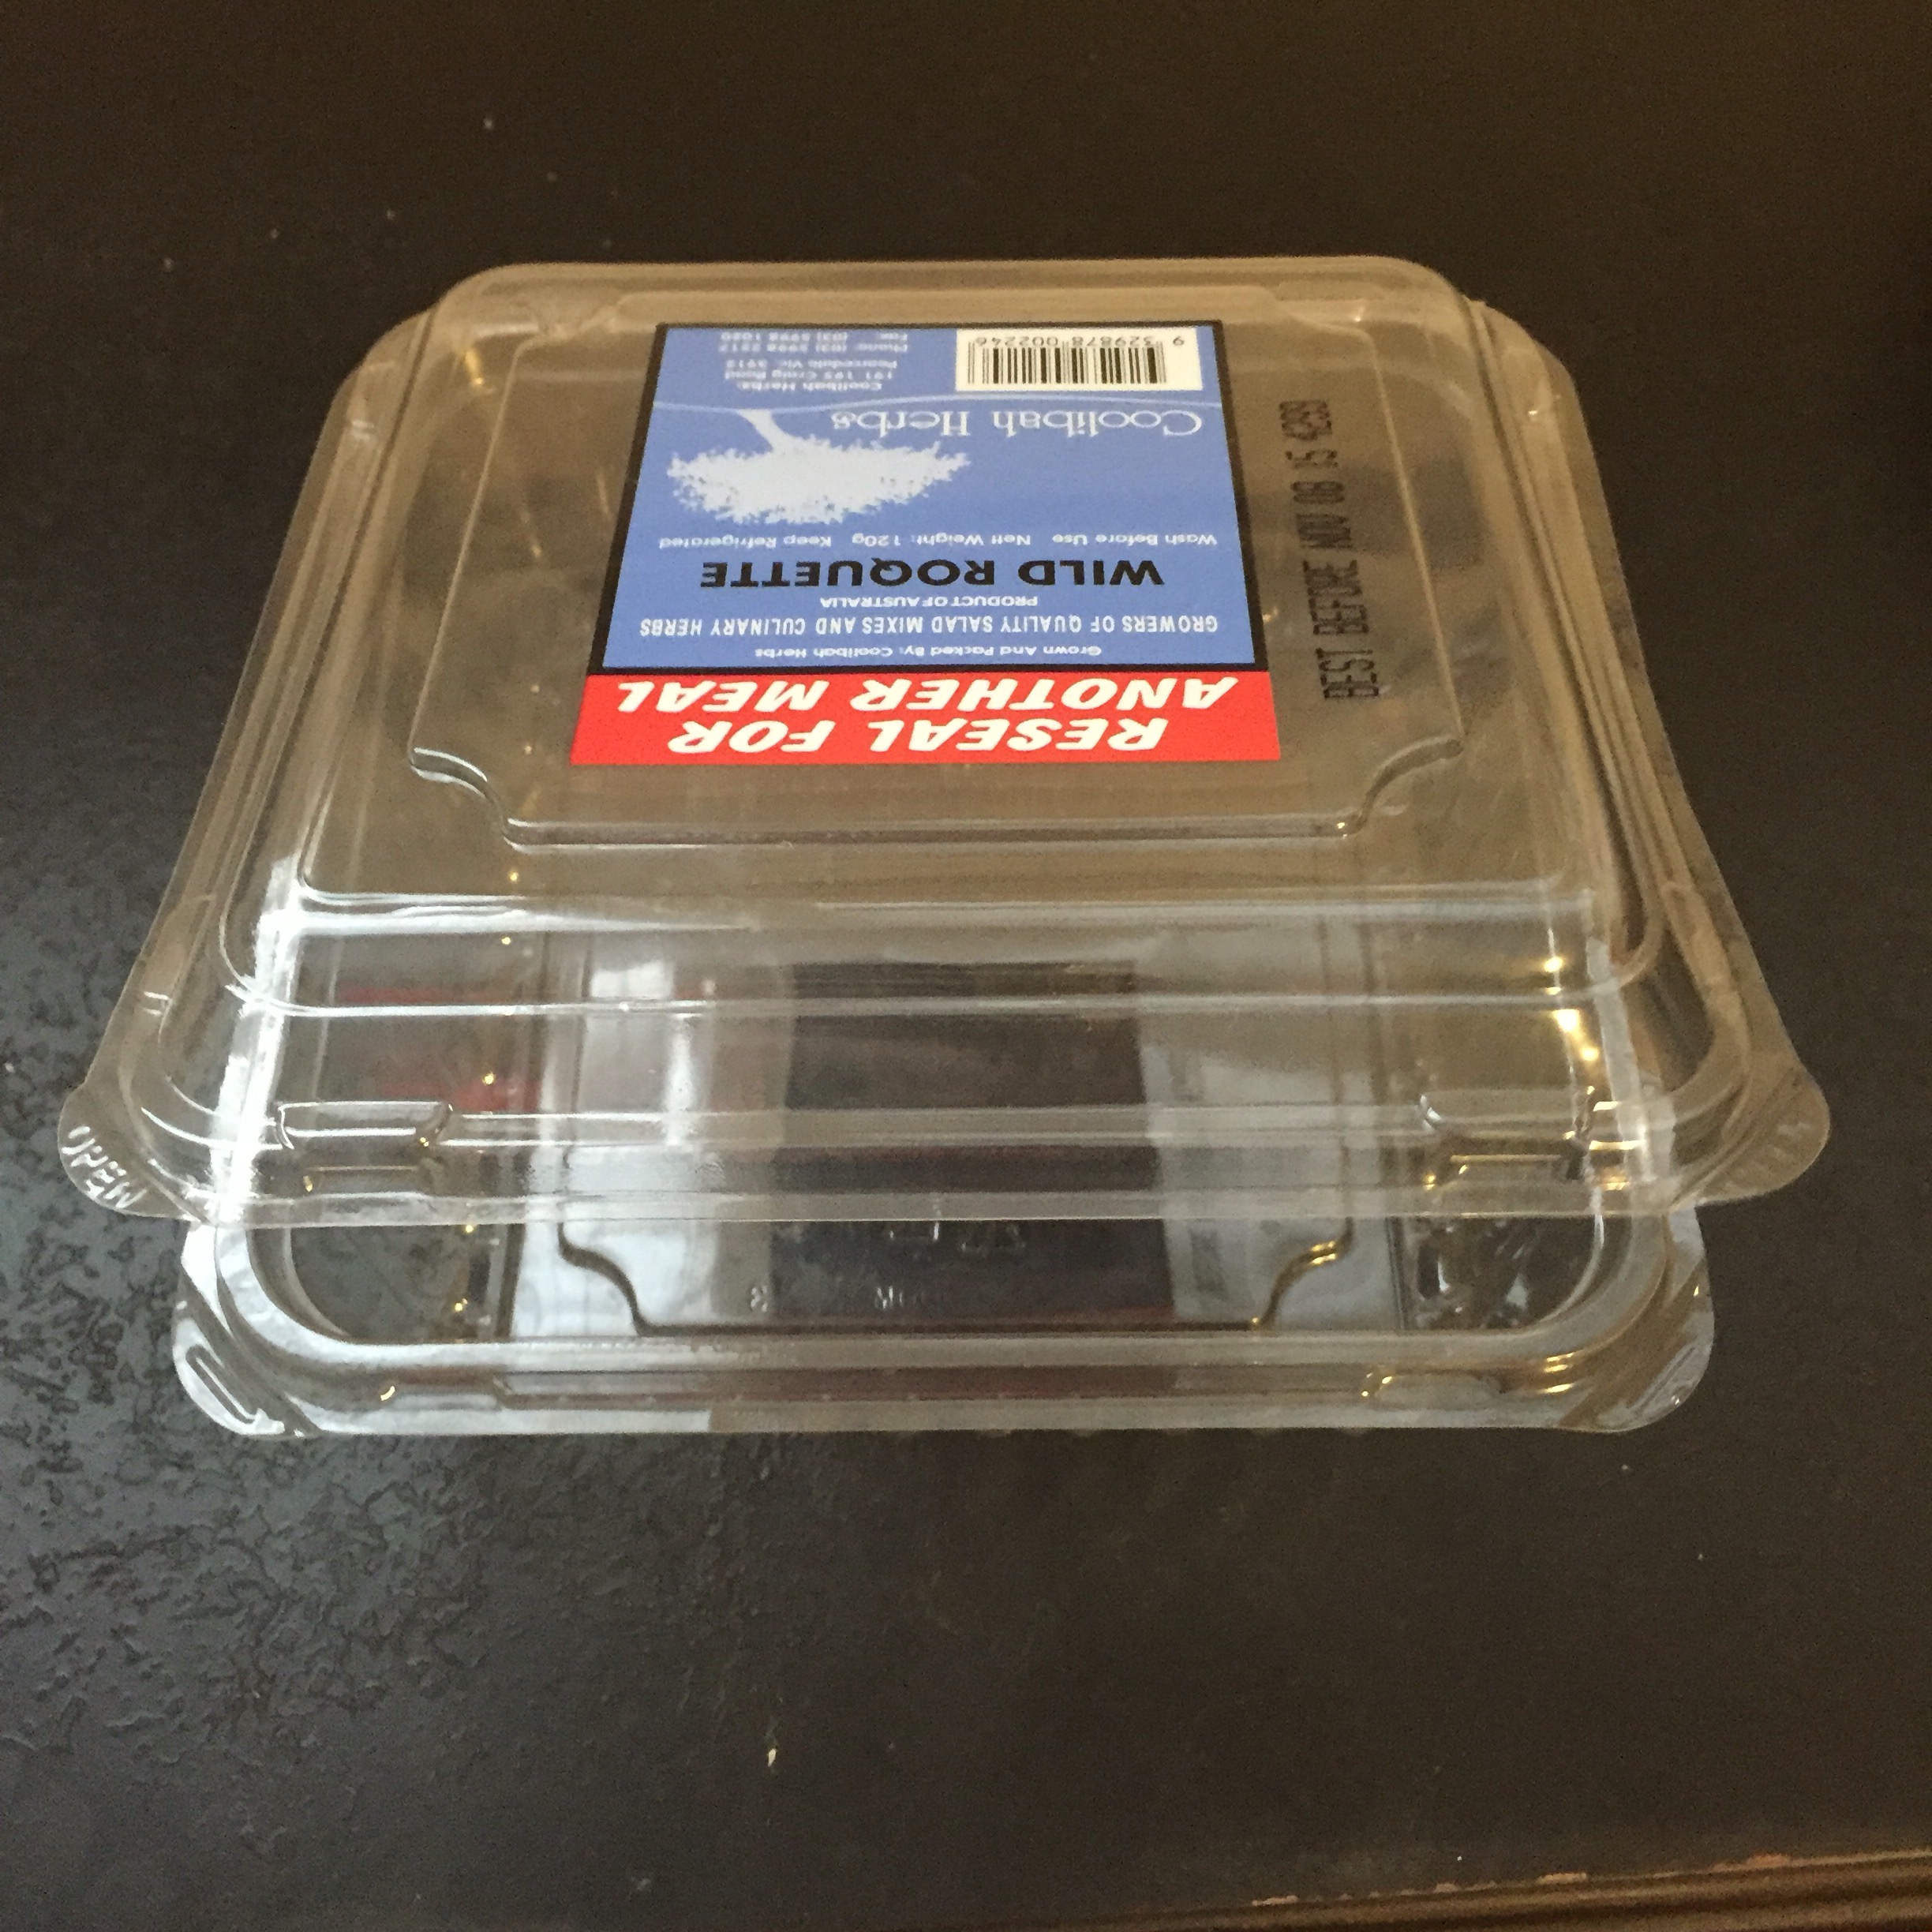
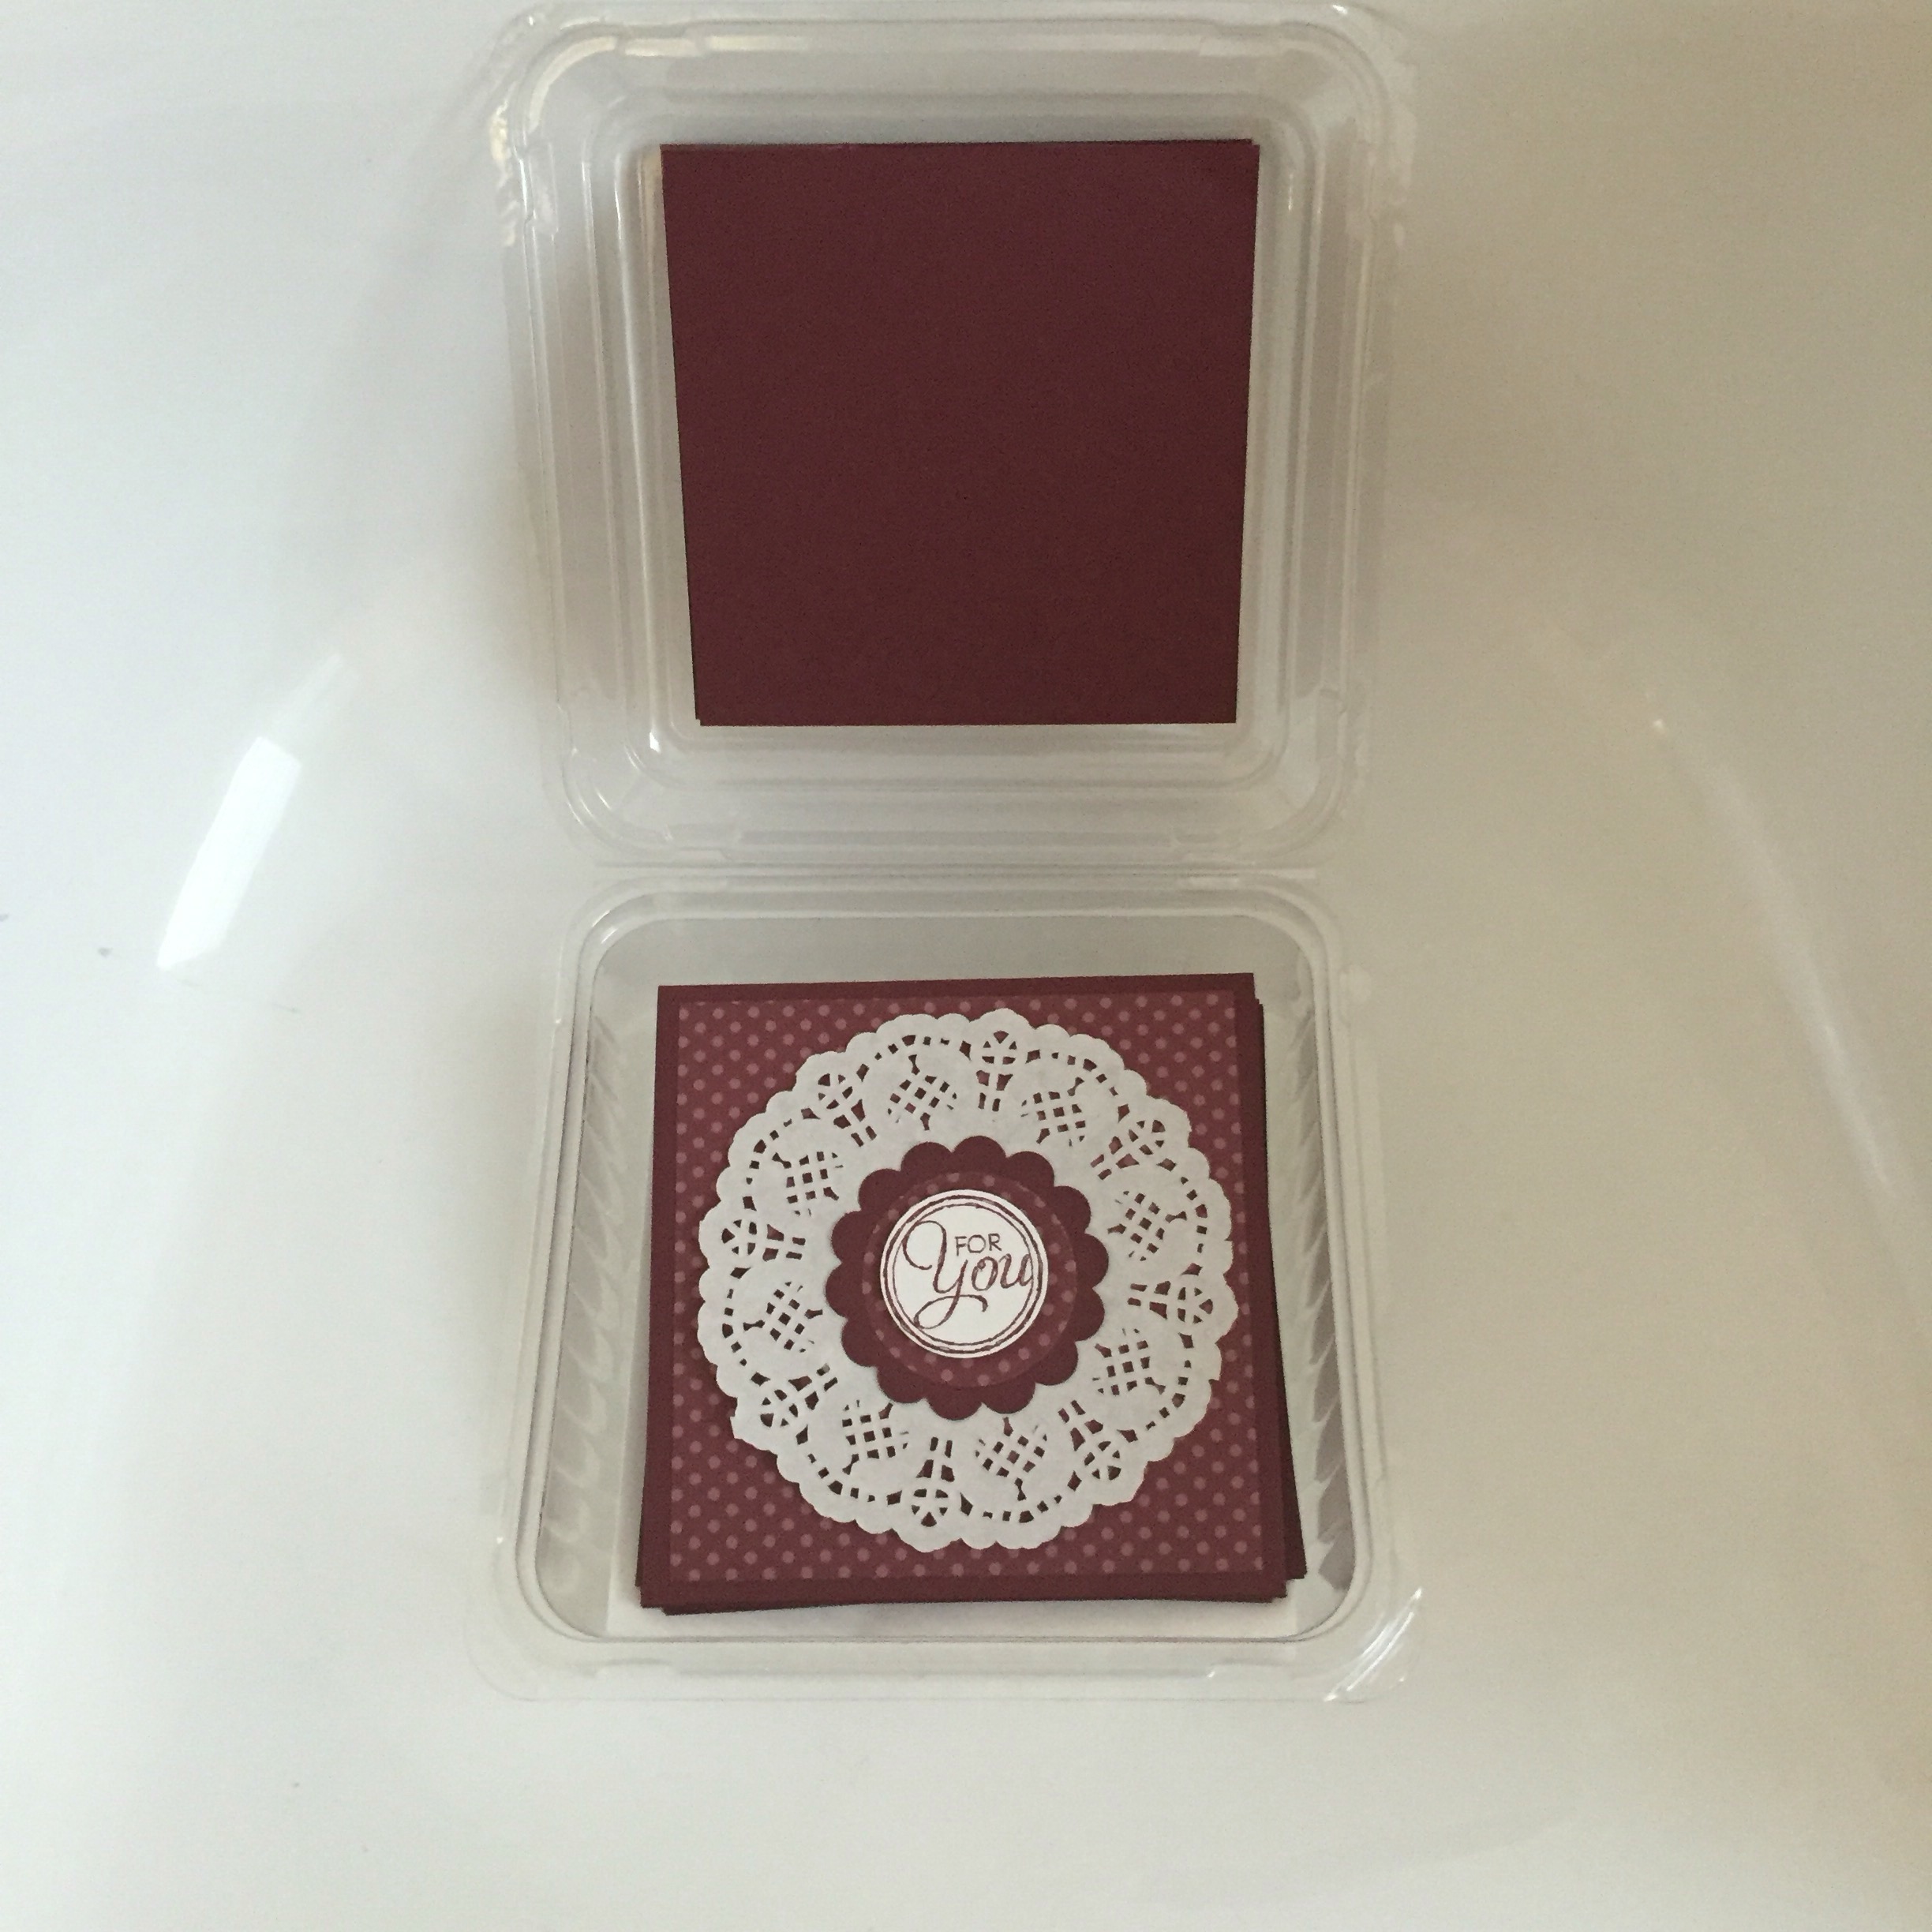
Today I want to show you an idea I had for making a gift boxed set of cards using a plastic container that some salad leaves came in.

When I was getting my rocket leaves out of the fridge a few days ago, I thought that the container would be just right to hold some square cards.
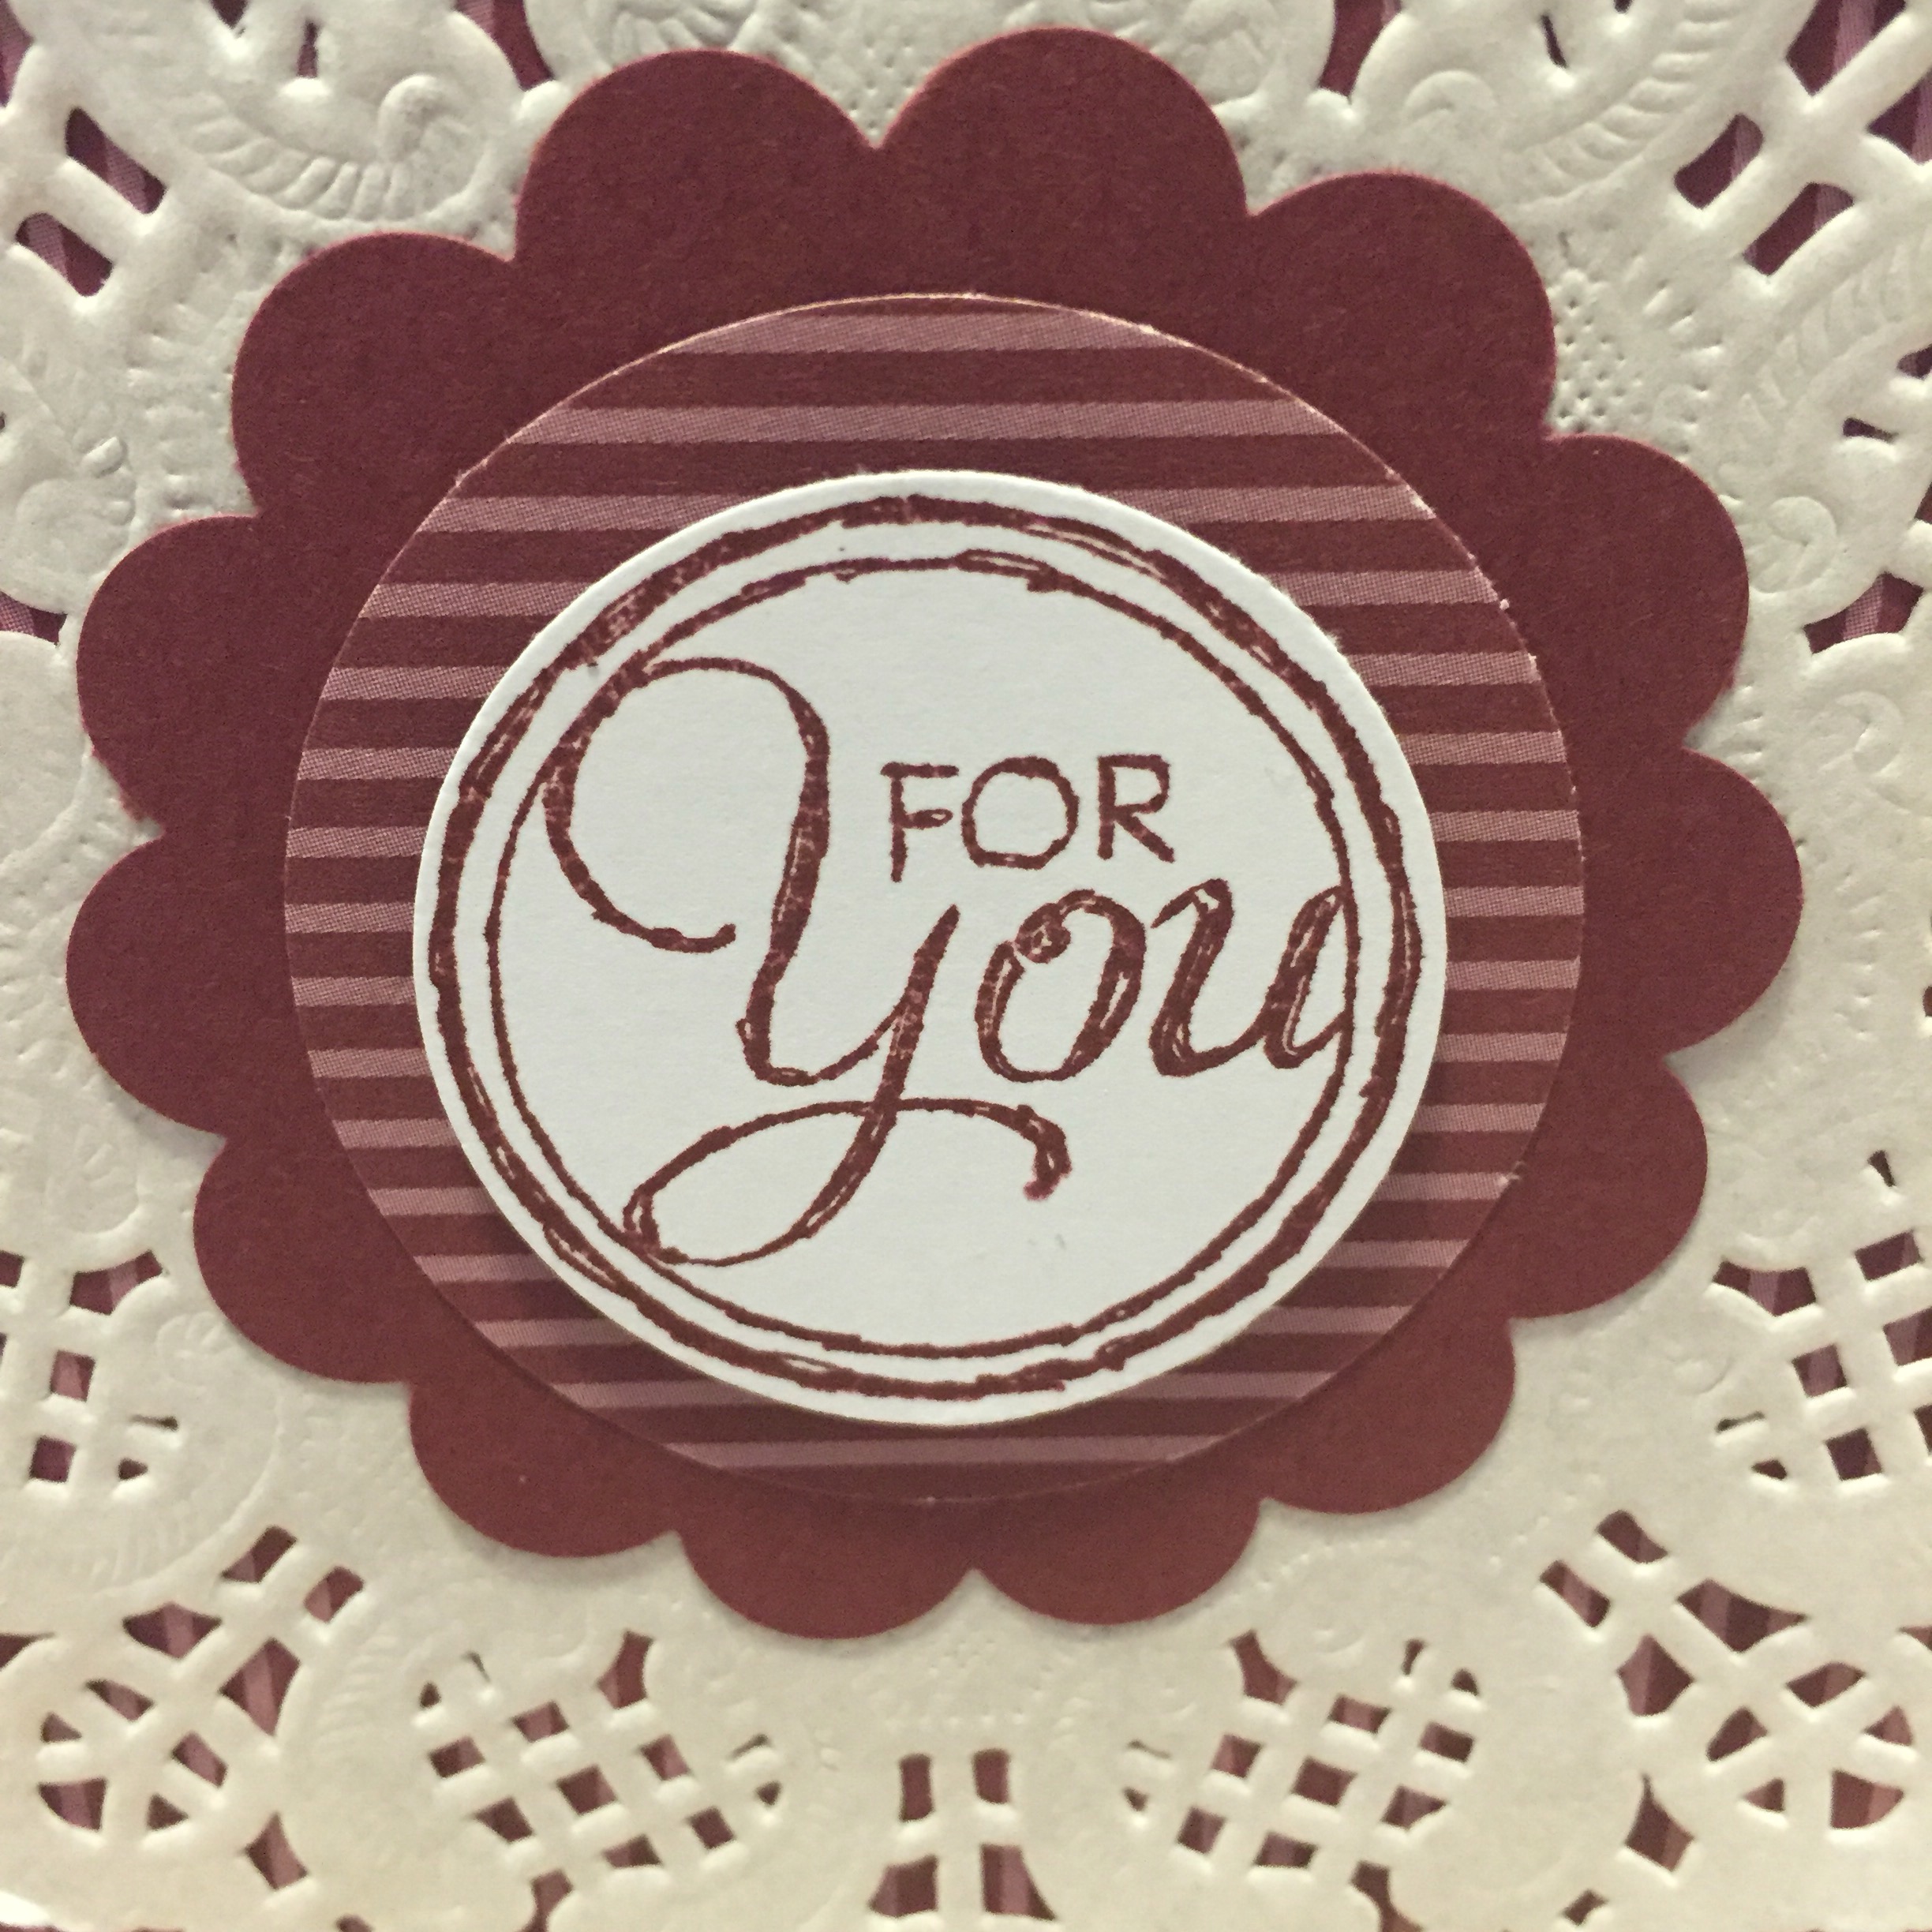
I thought while I was in the upcycling/recycling mood, I should also use up some of my spare paper stash. So I grabbed some old Bravo Burgundy (Stampin’ Up!) card stock and matching designer series paper, some punches and a pile of paper doilies I had in my “random craft stuff” box, and here’s what I came up with:
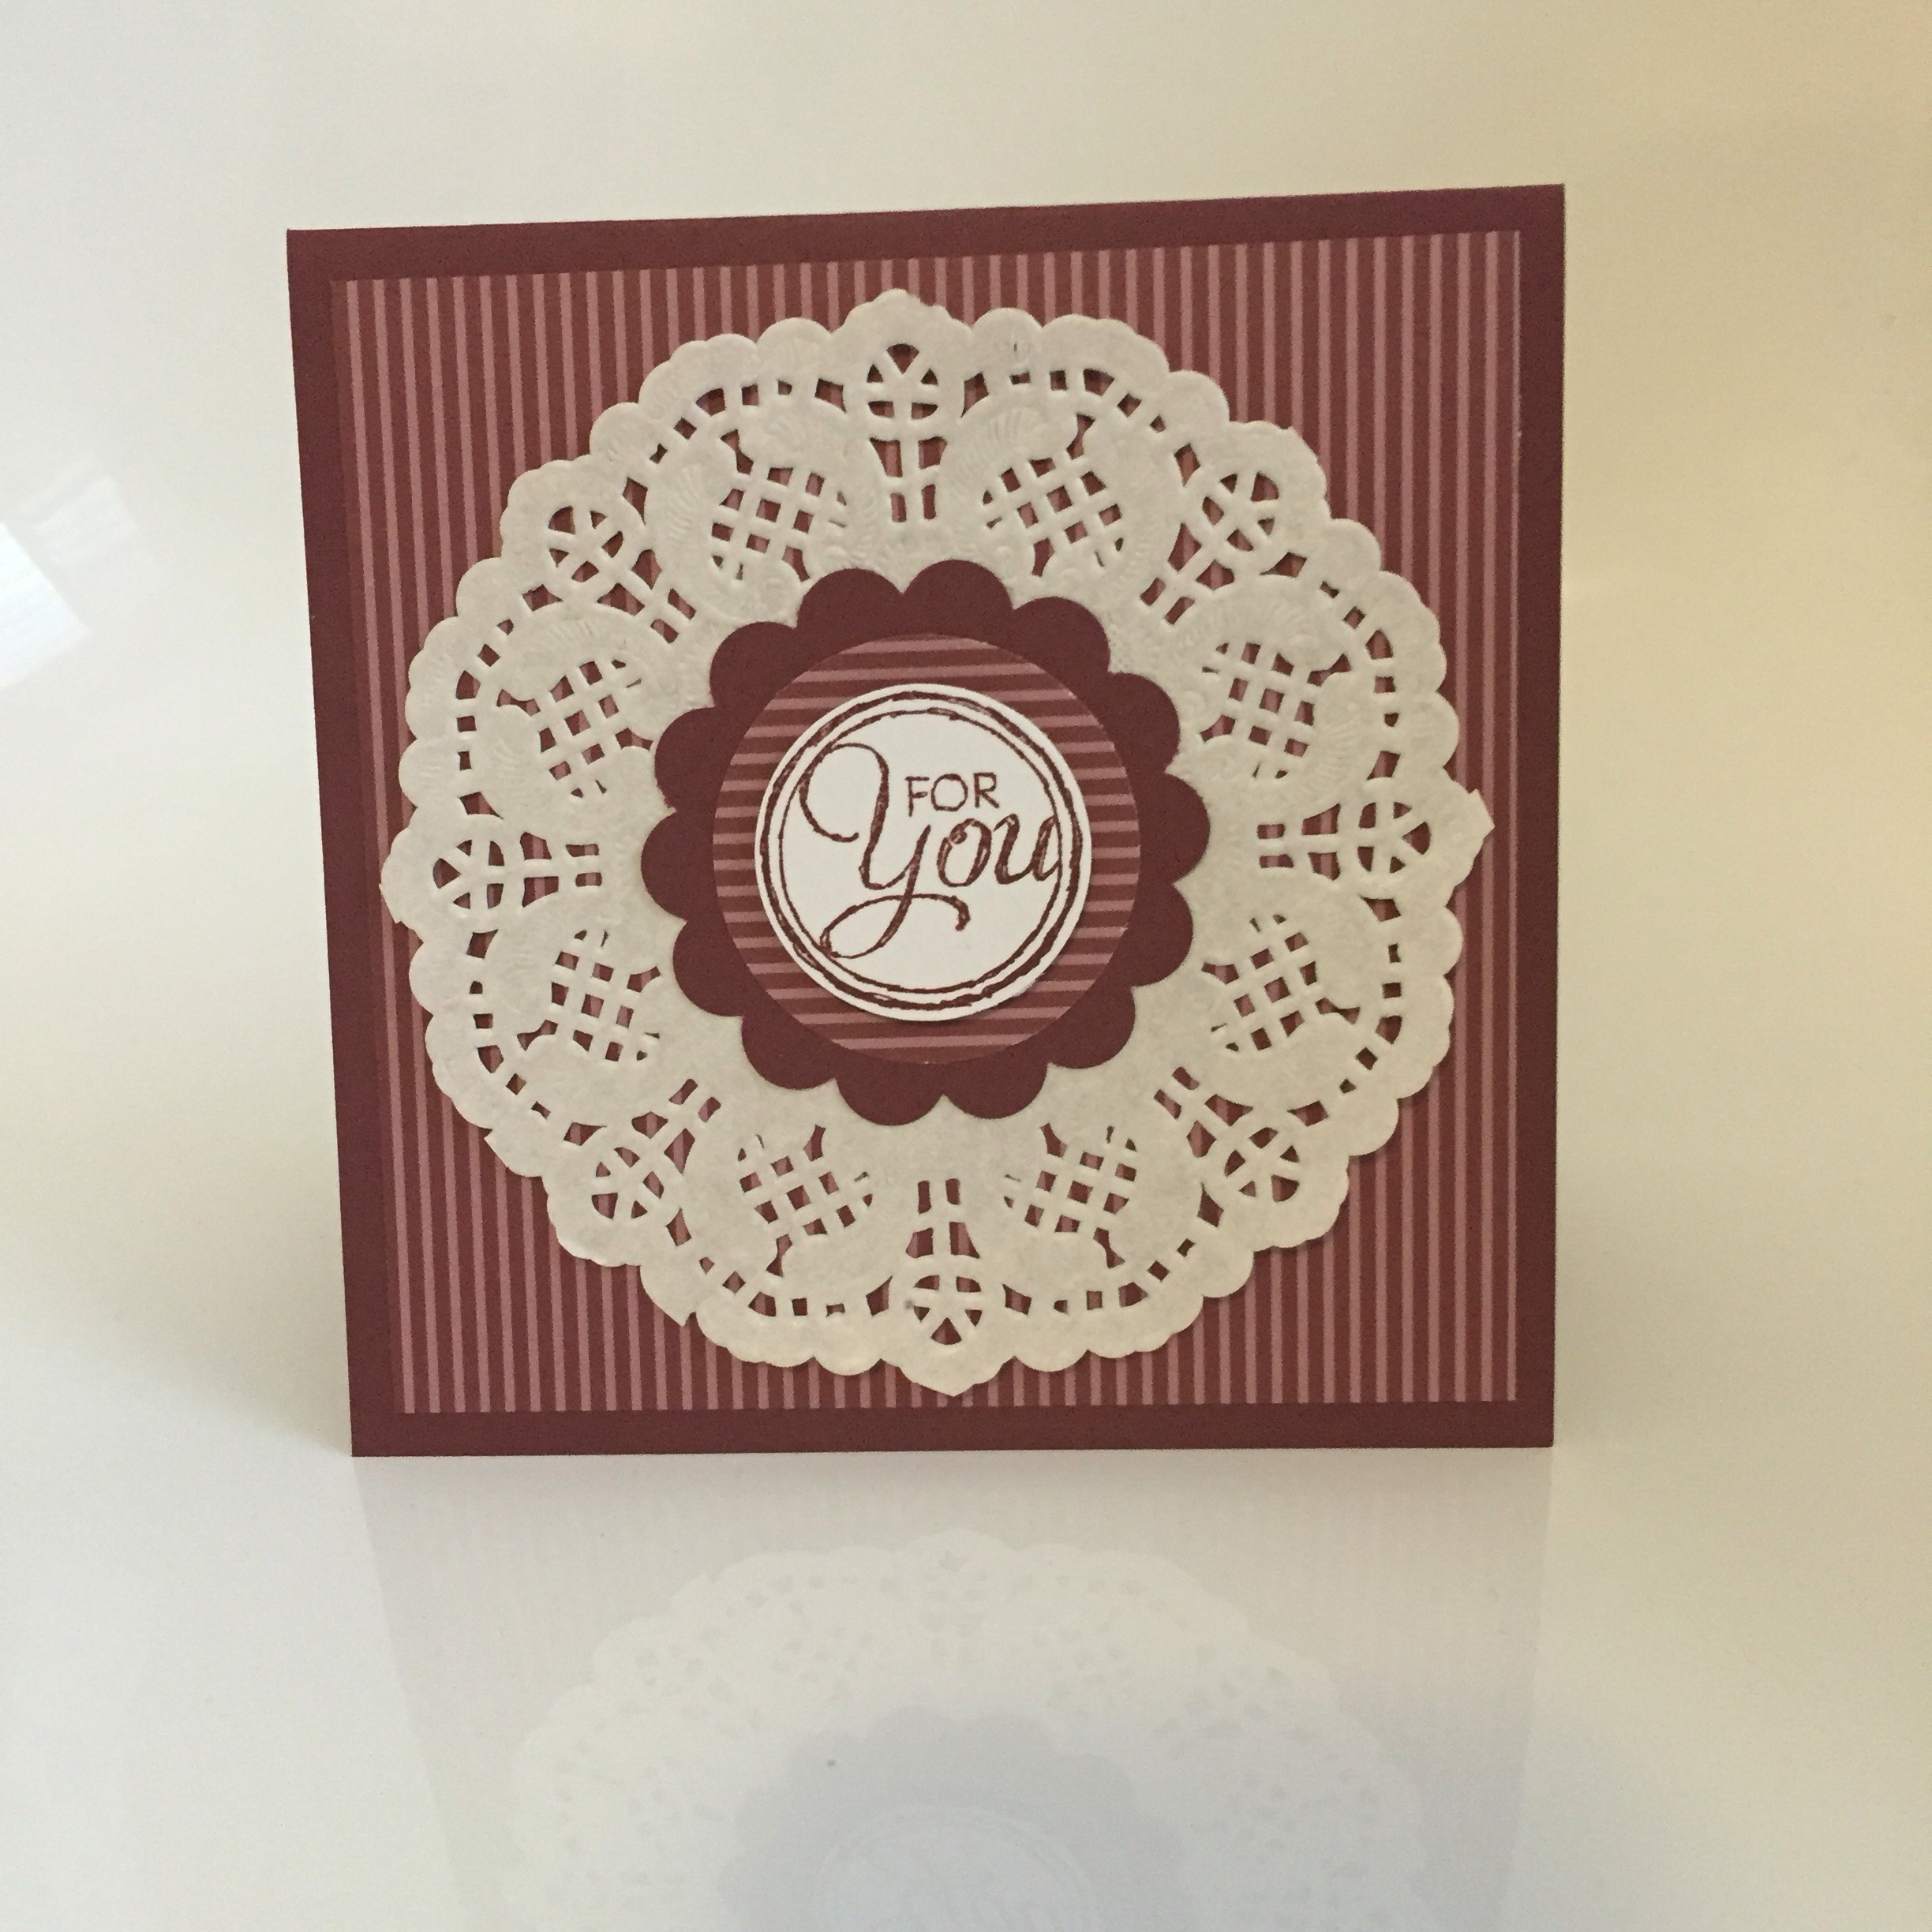
It was a layering job of DSP and card stock. I used my 2 3/8 inch scallop circle punch and the 1 3/4 and 1 3/8 inch circle punches. The “For You” sentiment is from the Chalk Talk stamp set.


I then decorated the plastic container to match the cards.

A quick tag using the scallop tag topper punch, some matching ribbon and voila!


I made this for someone very special to me who is forever sending cards to other people, so hopefully she enjoyed receiving some cards of her own.
Thanks for reading.
Caro x
28 Saturday Nov 2015
Posted in 1 1/4 inch circle, 1 inch circle, 3D projects, Home decorating, Star, Tutorial, Washi tape
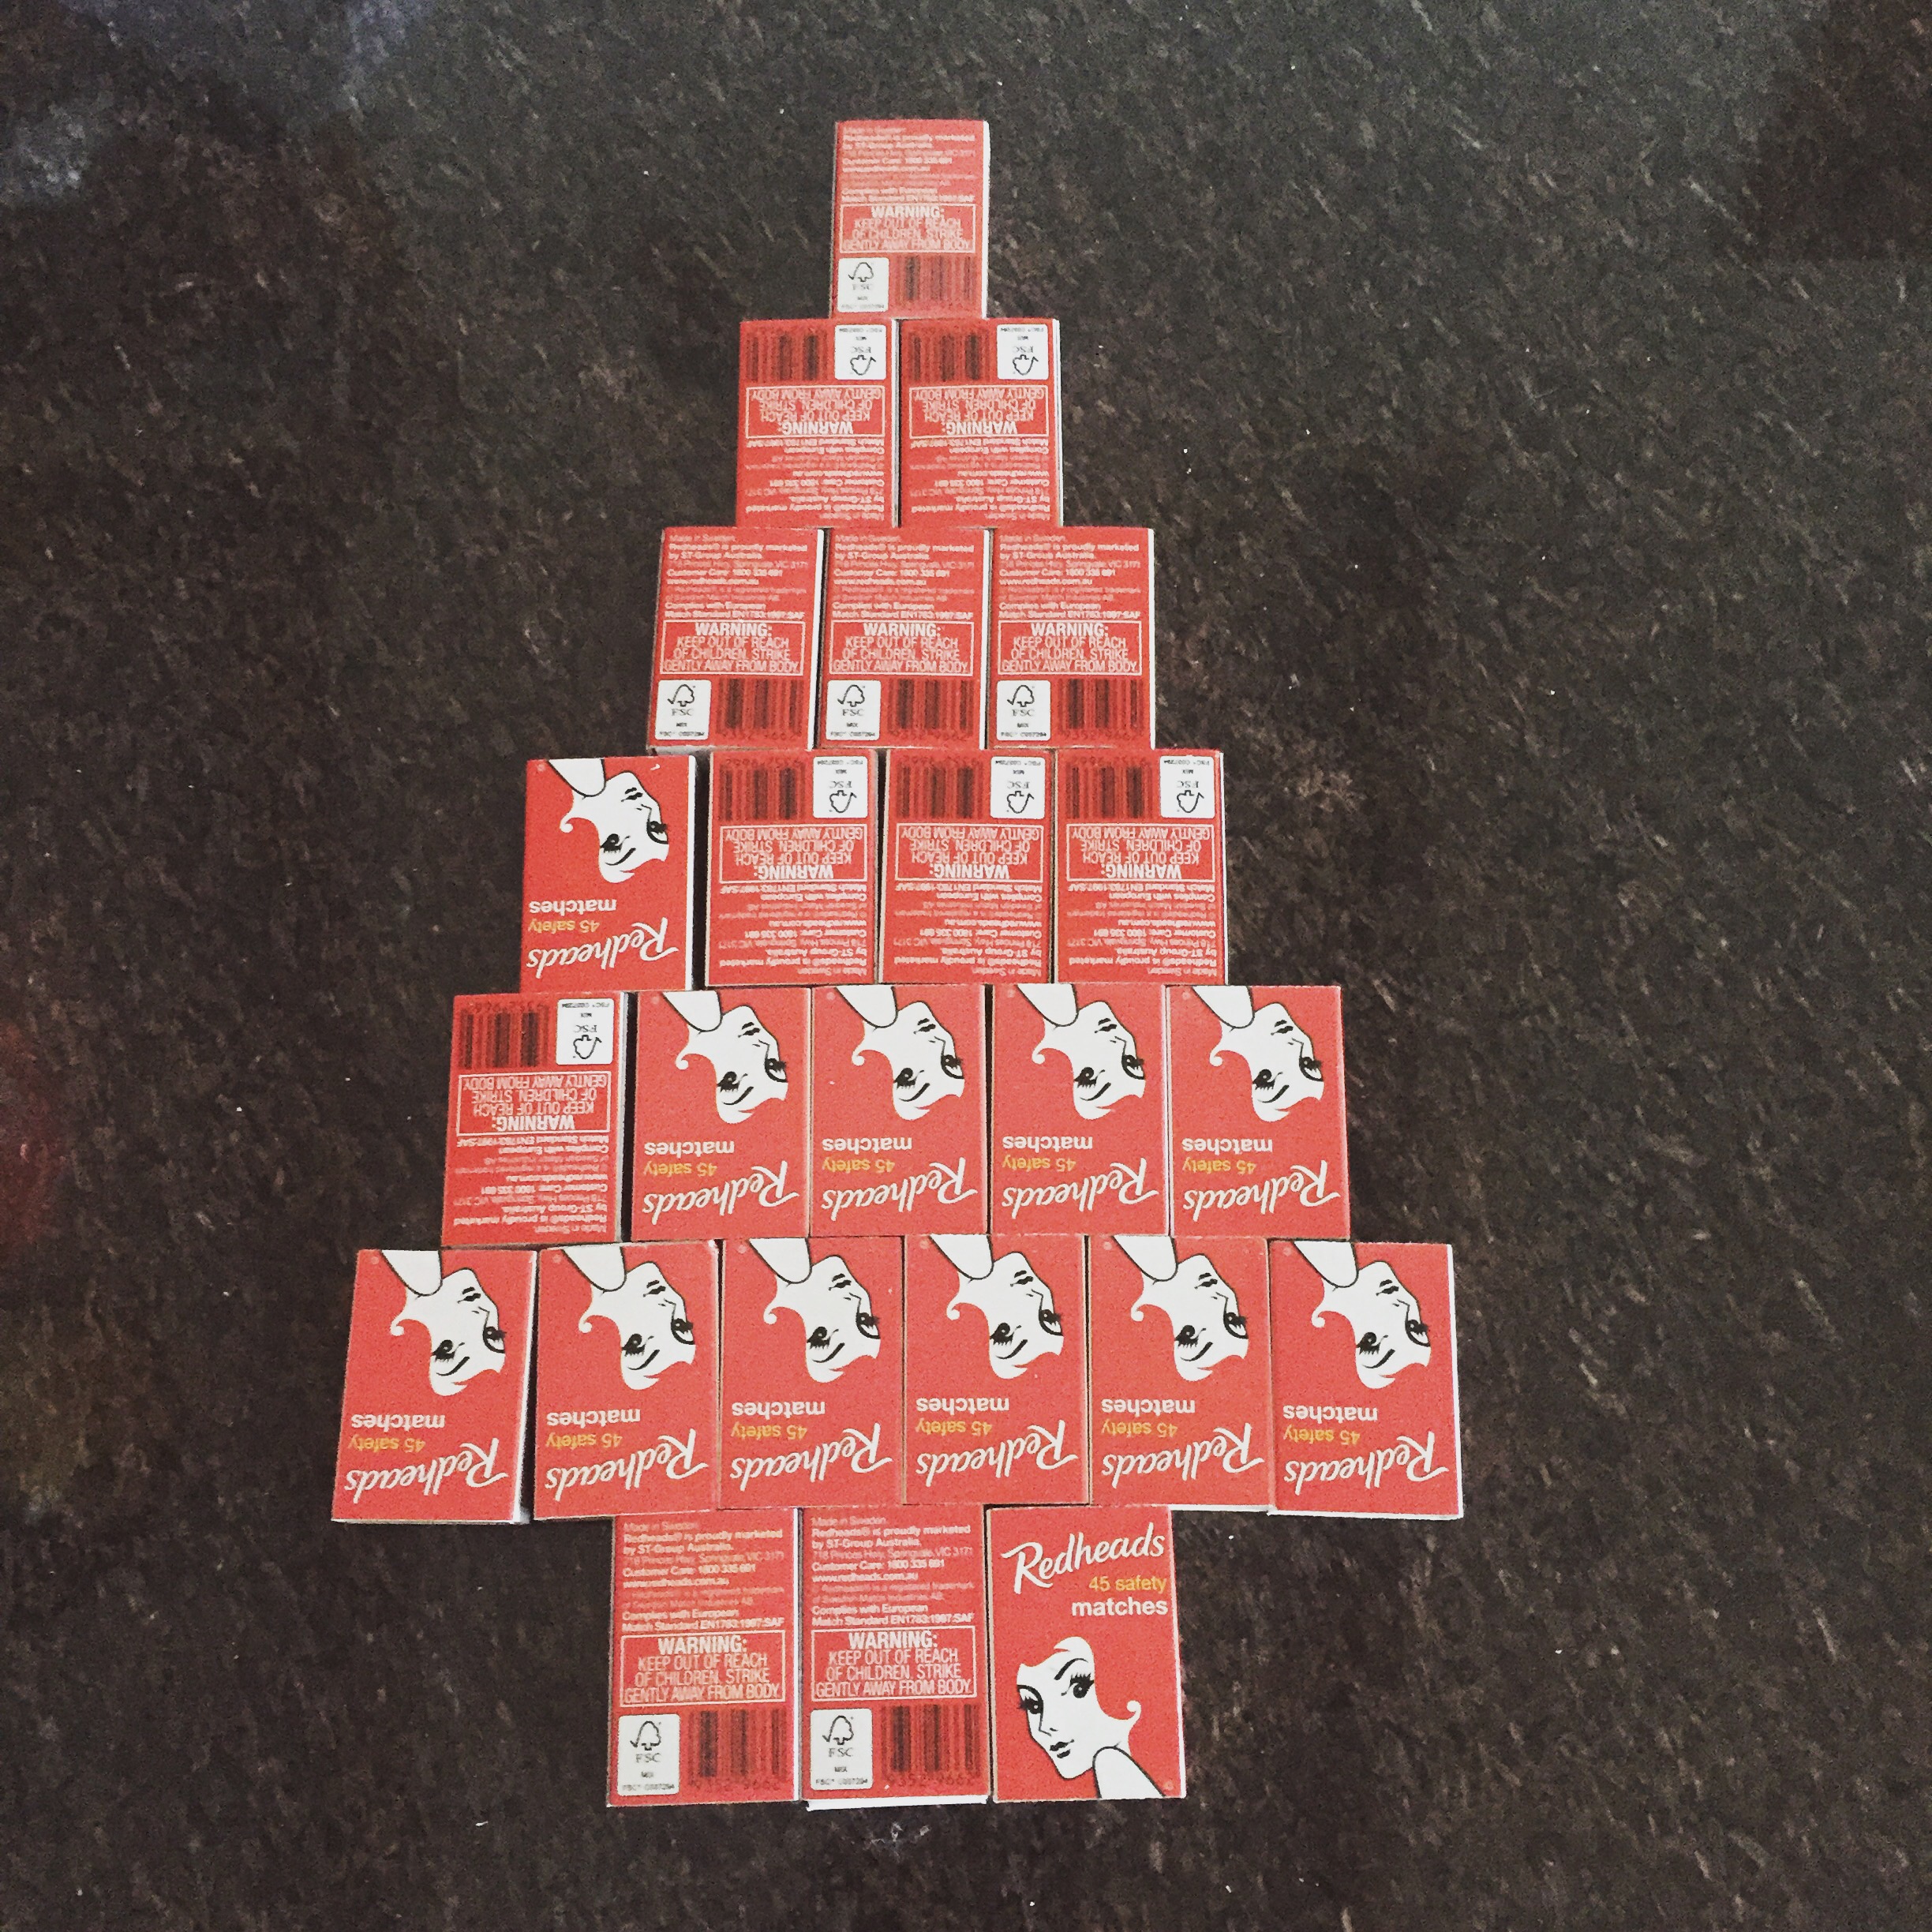
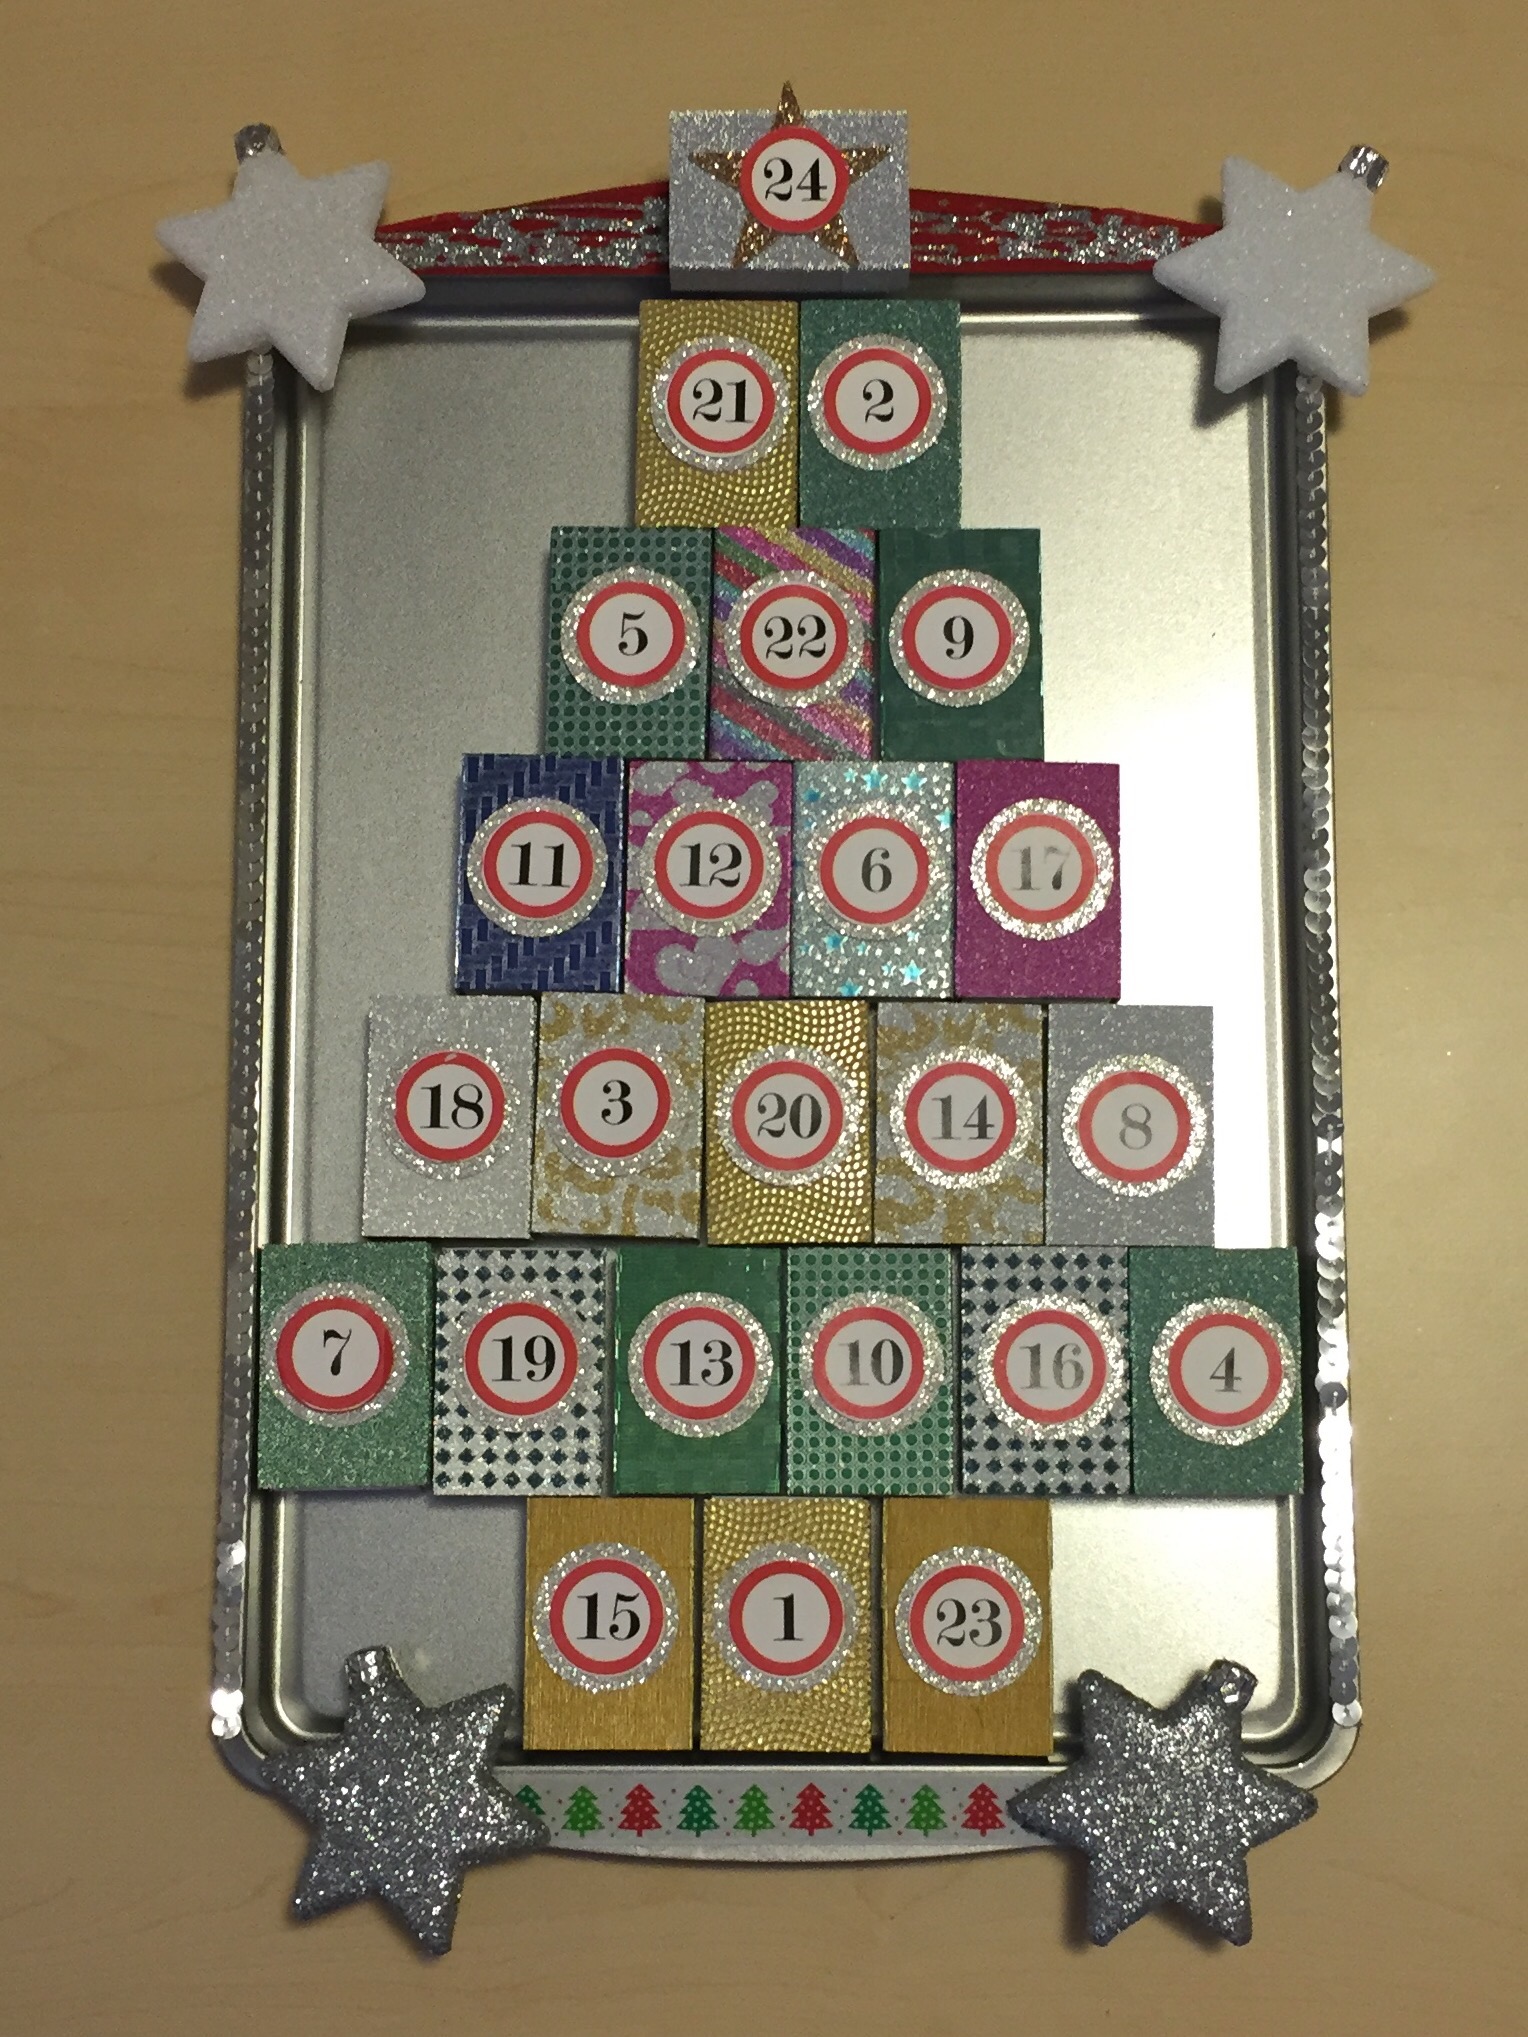
I am ridiculously excited to show you what I’ve been working on over the past few days – an advent calendar!
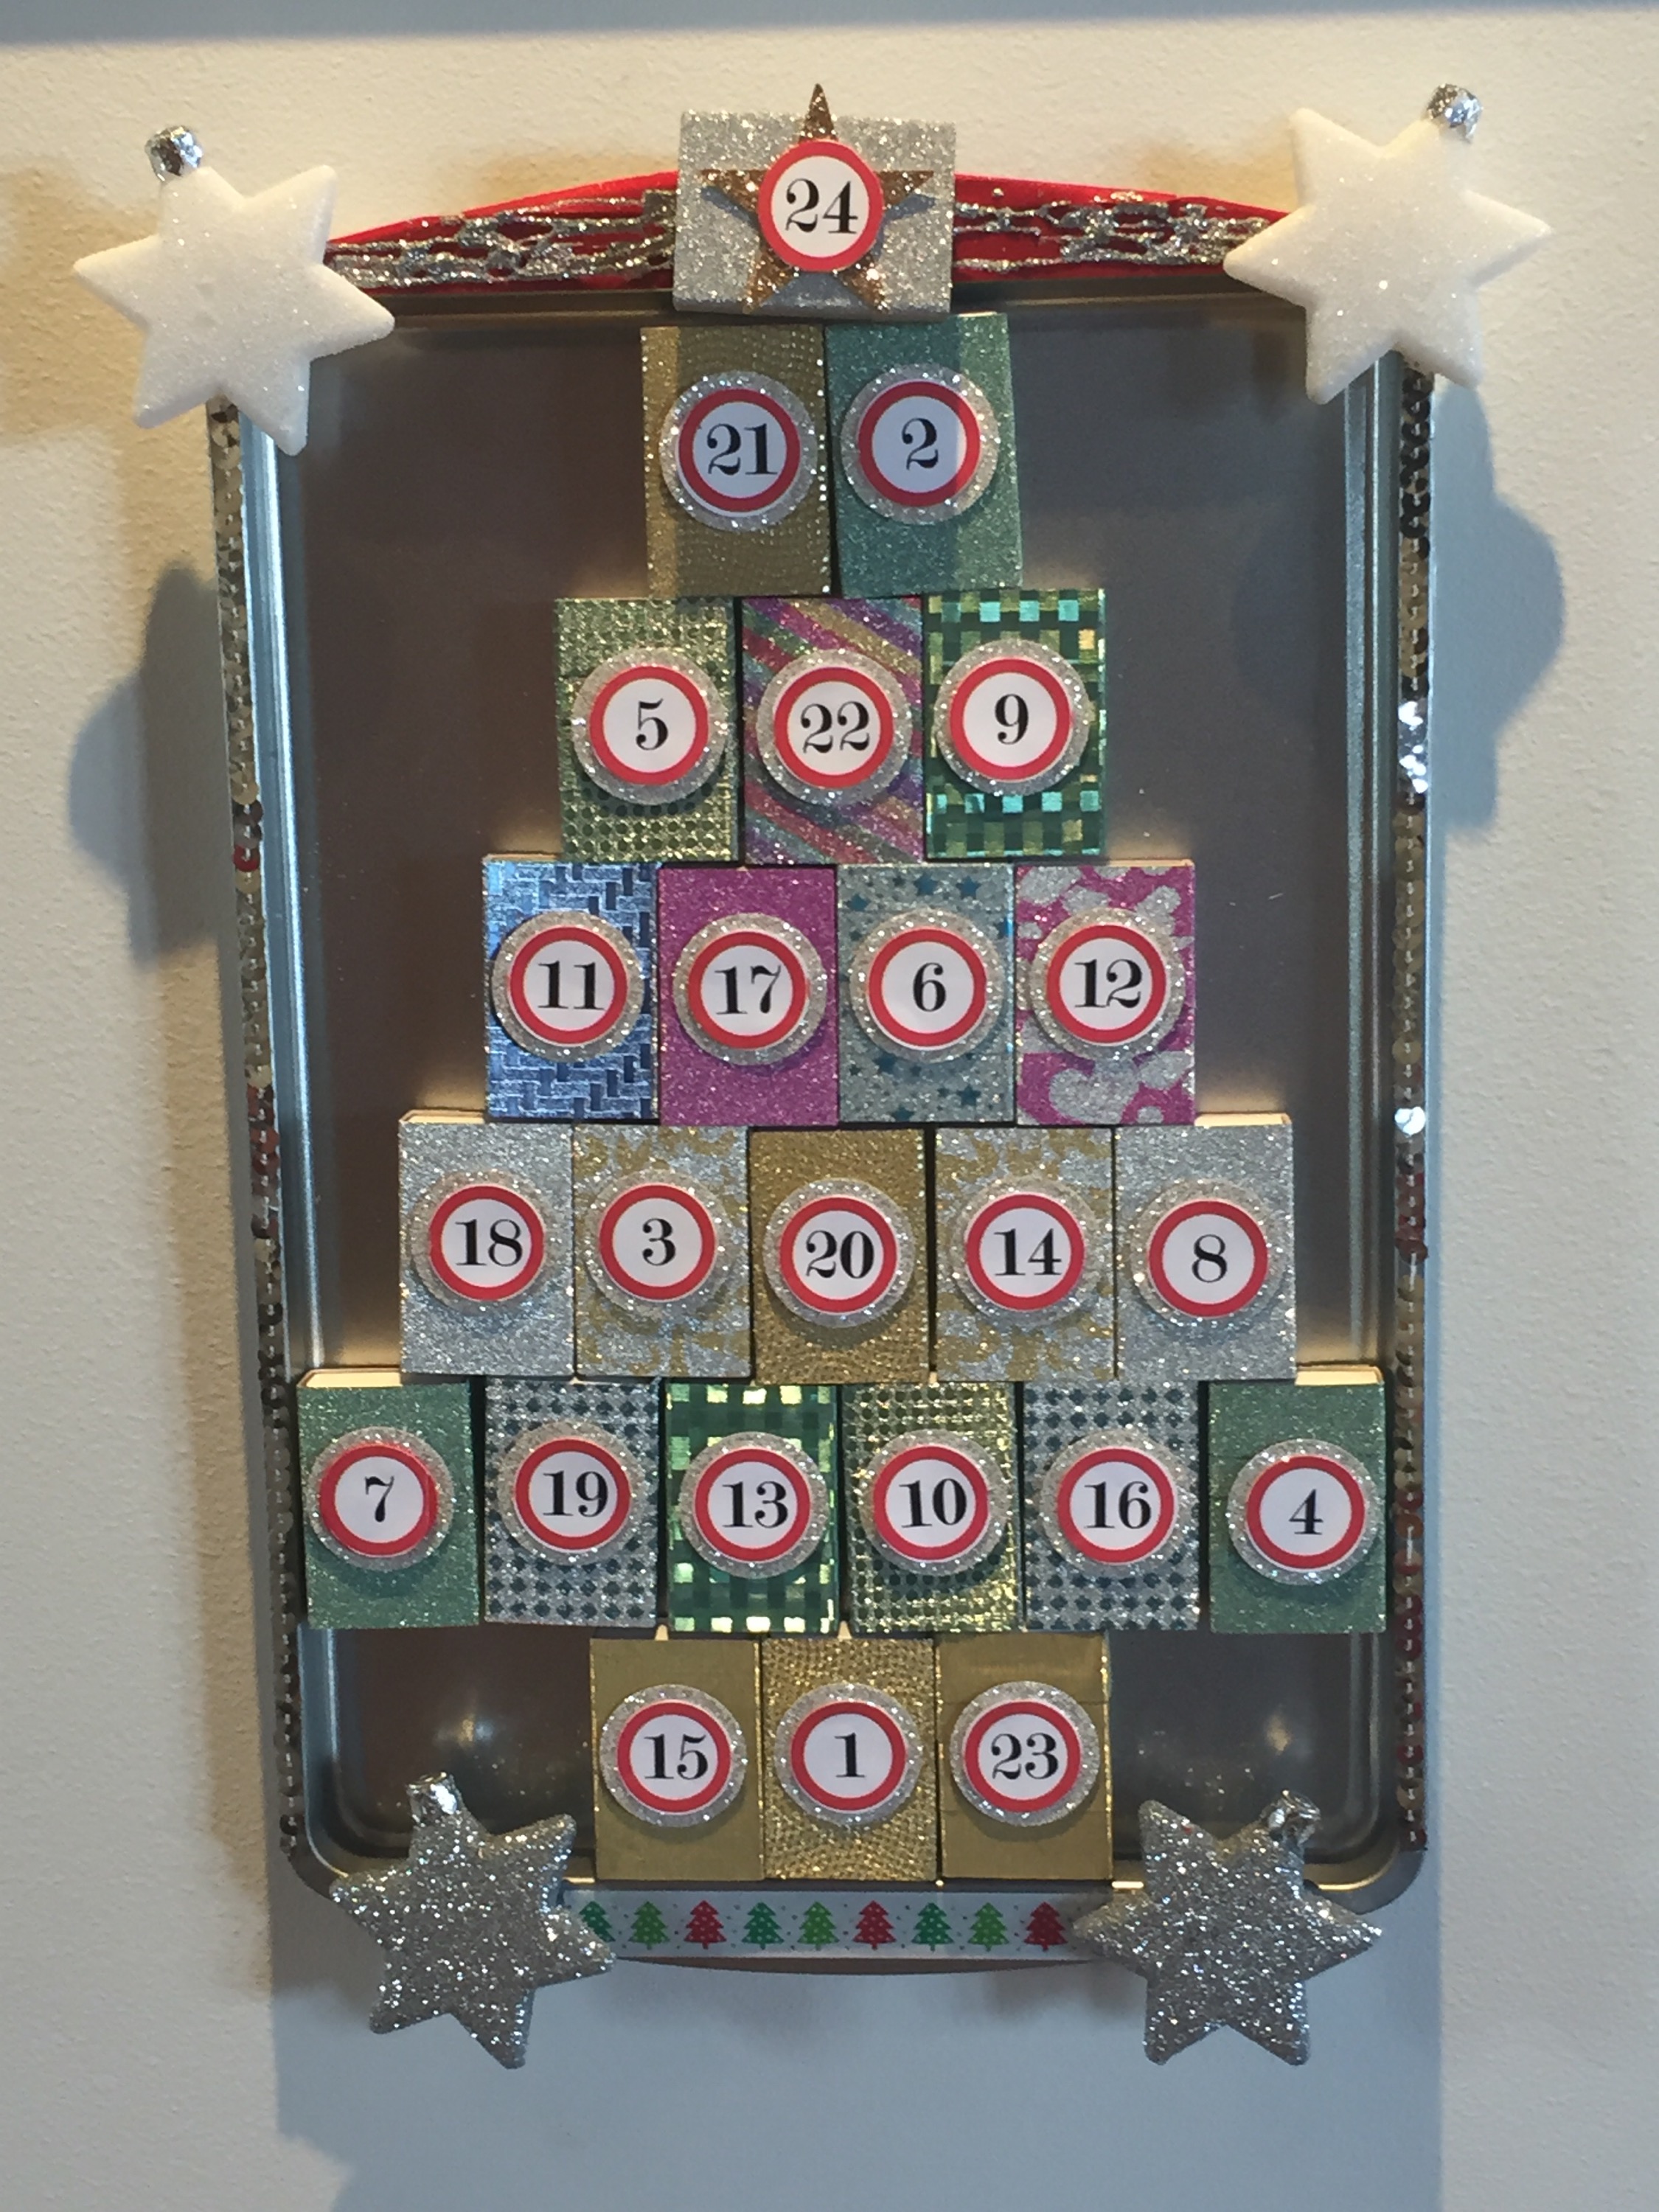
I’ve just hung it on my wall after extracting solemn promises from Mr 6 that it will not be touched before 1 December!
This is made with match boxes, a baking tray, magnets and glitter Washi tape to cover the boxes. I also grabbed a few Christmas decorations to stick on the edge. (And nothing but super glue worked to stick those suckers onto the metal!)
Here are some photos of how I put it all together:


The Washi tape is a Selley’s pack I bought at Costco.
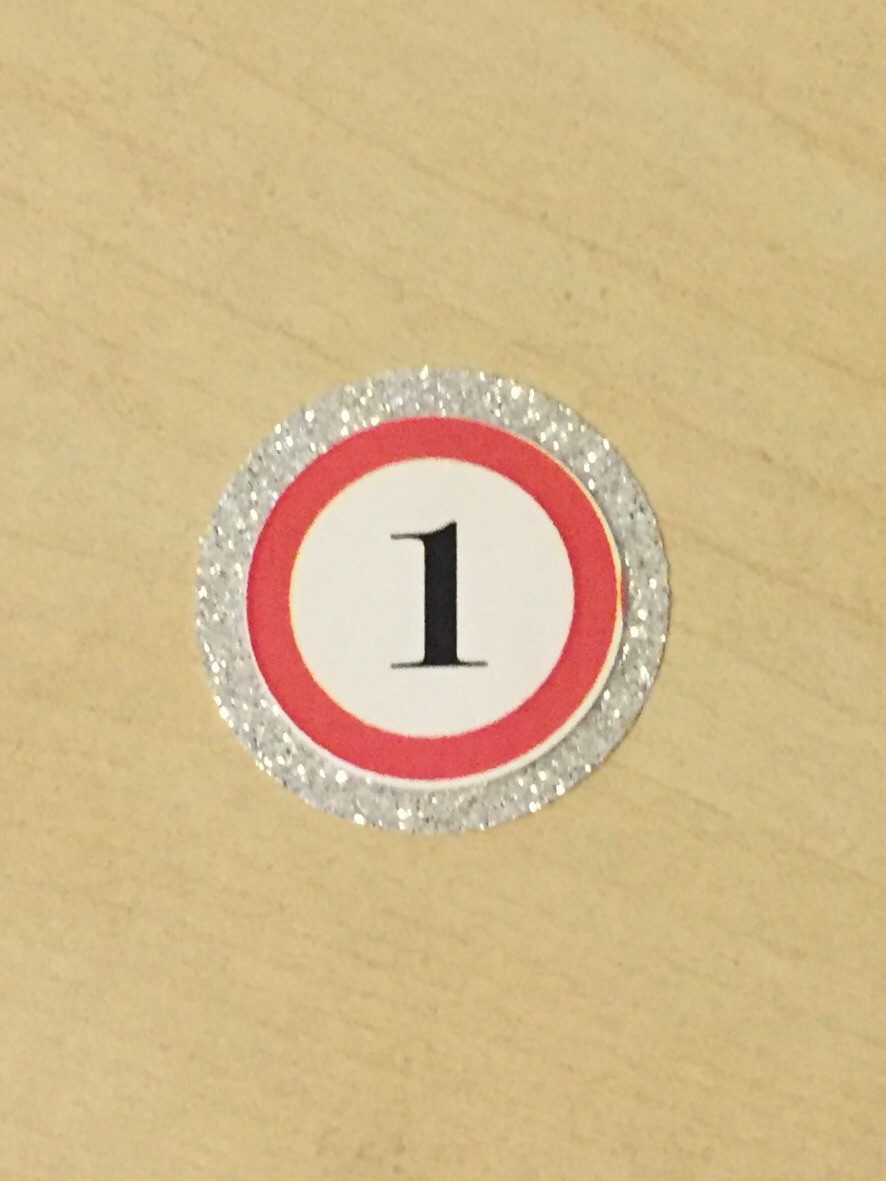
The numbers are a free download from http://justsomethingimade.com/2009/10/simple-spool-advent-calendars/.
They work with a 1 inch circle punch. I also used Stampin’ Up!’s glitter sheets and my 1 1/4 inch circle and star punches as backgrounds for the numbers.
I stuck magnets on the back of each box so they would stick to the baking tray.
I also used sticky strip to run sequins along the side edges of the tray and some Washi tape and glitter glue for the top and bottom.
I stuck it to the wall using 3M removable hanging strips.
So there you have it – my glittery, sparkly home made advent calendar. Anyone got any ideas for what to do with hundreds of spare matches? 😉
Thanks for reading.
Caro
16 Monday Nov 2015
Posted in Home decorating, Notebooks, Using up scraps
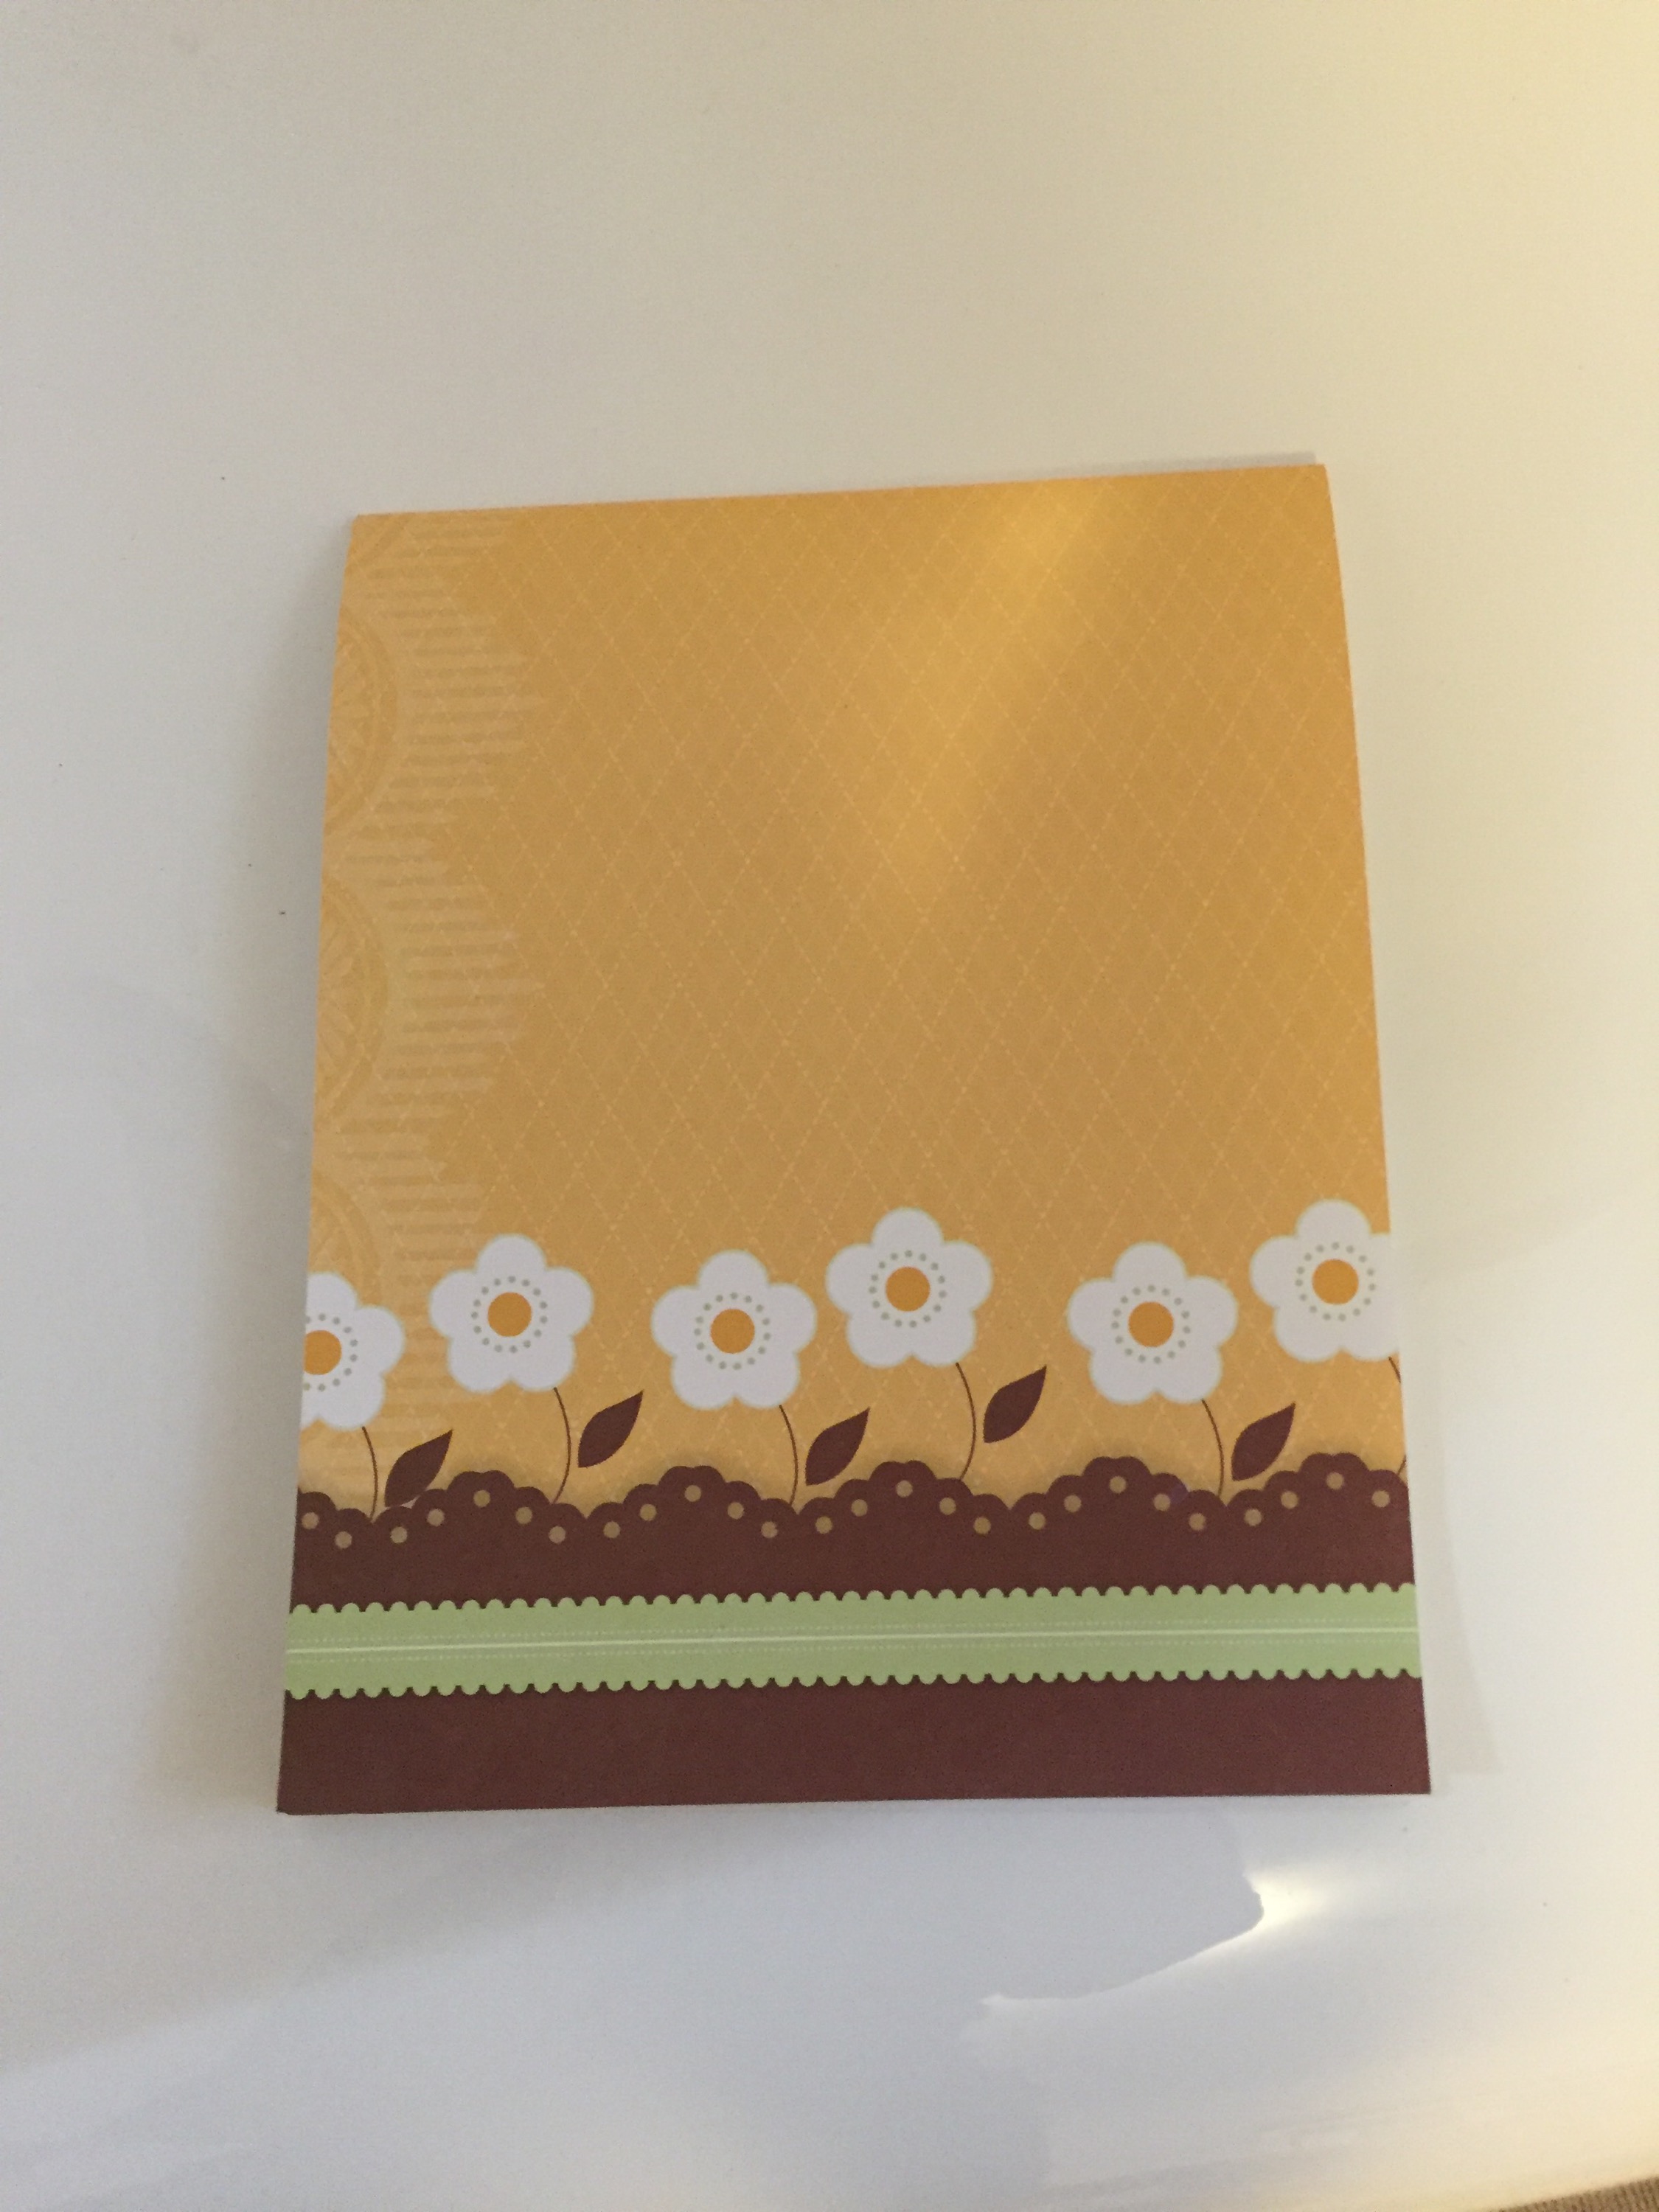
I play the piano, and have lots of music in those cheap plastic insert display/sleeve folders. Each time I play, I think they are very ugly and definitely could do with some “prettying up”.
A quick trip to office works and raiding my paper stash later, and look at the collection of pretty music books I now have!


Most of the papers come from The Sweet Stack paper stack I bought at Big W (I think!).
They were just very cheap notebooks, but ended up looking rather lovely!


Thanks for reading.
Caro
03 Tuesday Nov 2015
Posted in Home decorating, Notebooks, Using up scraps
Tags
See this cute little notebook?
Five minutes ago it looked like this:

I was making some notes on a boring old regular, cheap, plain writing pad then decided to pretty it up.
Five minutes with some scrap paper, a ruler, a paper cutter and some glue and my boring note pad was magically transformed into a cute notebook for my desk.

Just measure the width of the writing pad and cut the paper to size, then fold and glue excess paper at the back. It works better if you score the fold line and score another half cm further along for where it needs to create a spine, but a simple fold works fine too. This picture hopefully explains what I mean about the two scores half a can apart helping to create a “spine”
Now I can get back to work! (The joys of working from home!)
Thanks for reading
Caro
29 Thursday Oct 2015
Posted in 3D projects, Home decorating, Washi tape
Today I want to show you a “blinged up” tissue box holder I covered in Washi tape (Sellotape glitter tape to be precise!)
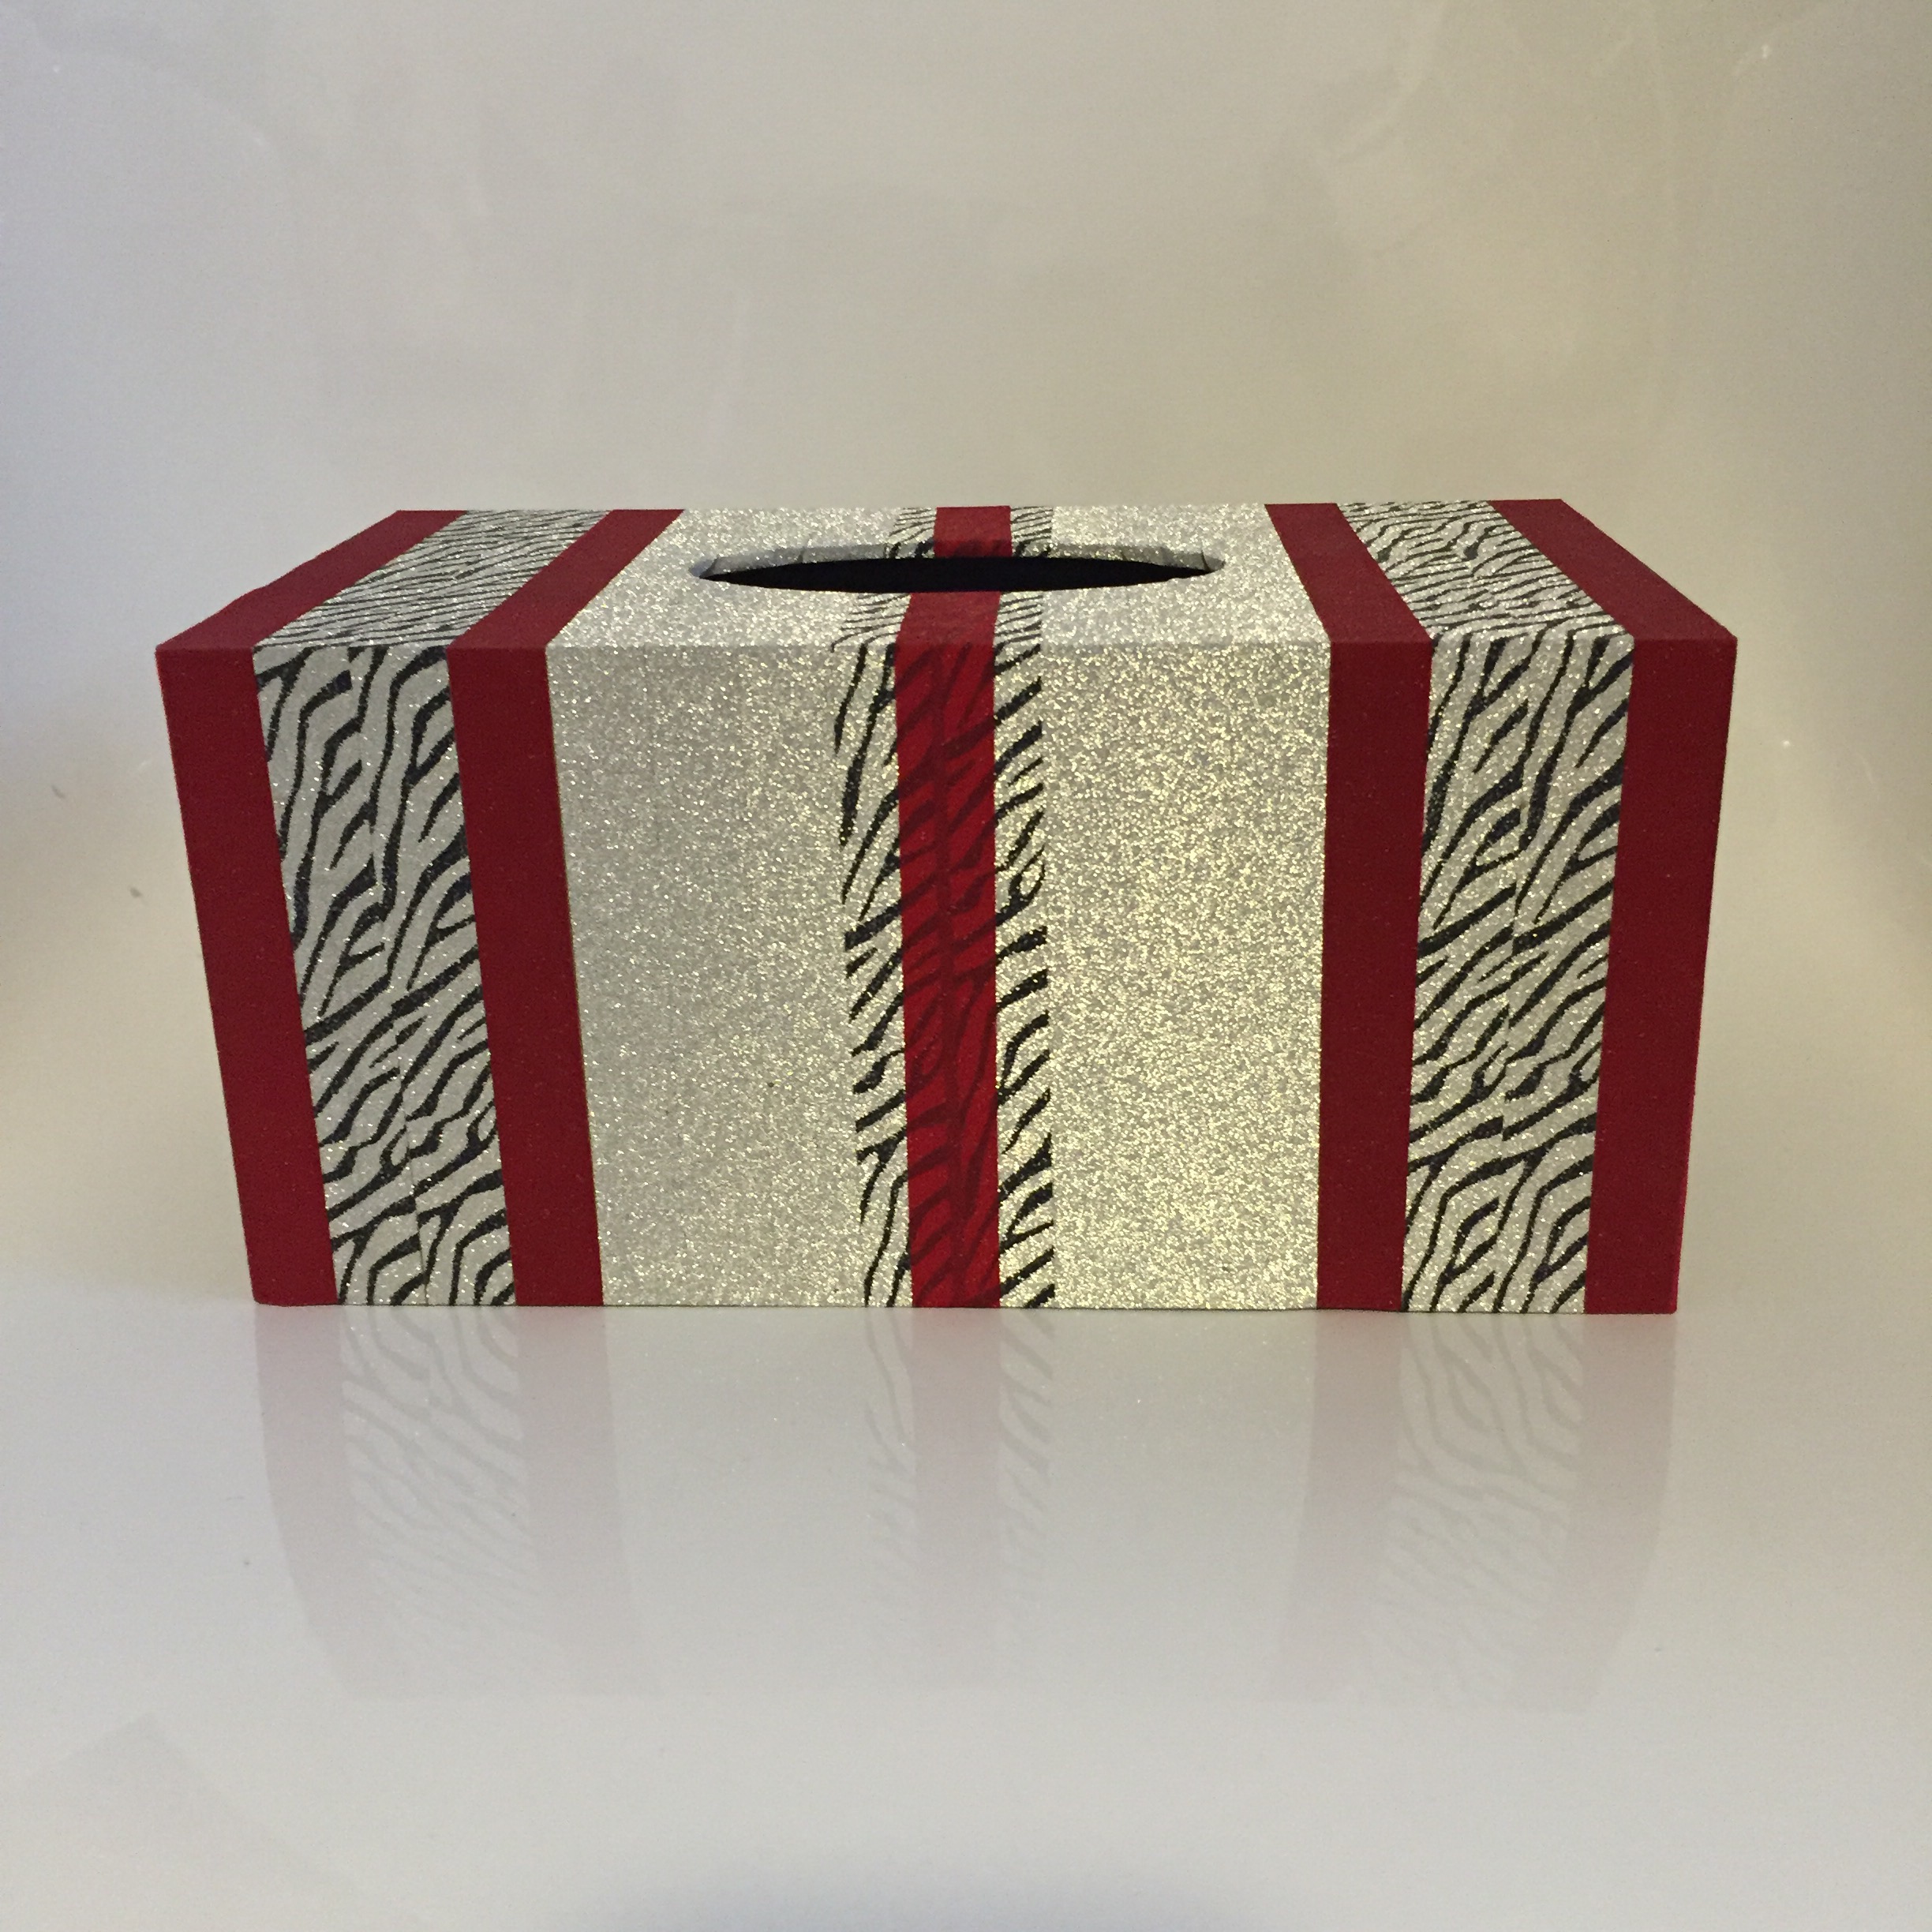


I have had a very boring wood tissue box holder sitting on my desk waiting for inspiration for a few months. Today I was stuck on a work document and looked up as was hit by the glitter urge!
Quite the contrast!


I’d love to say that this is for the upcoming festive season, but I have a feeling this may end up in my kitchen year round. We’ll see!
UPDATE: Now I’ve seen it in my kitchen I don’t think it’s moving anytime soon!
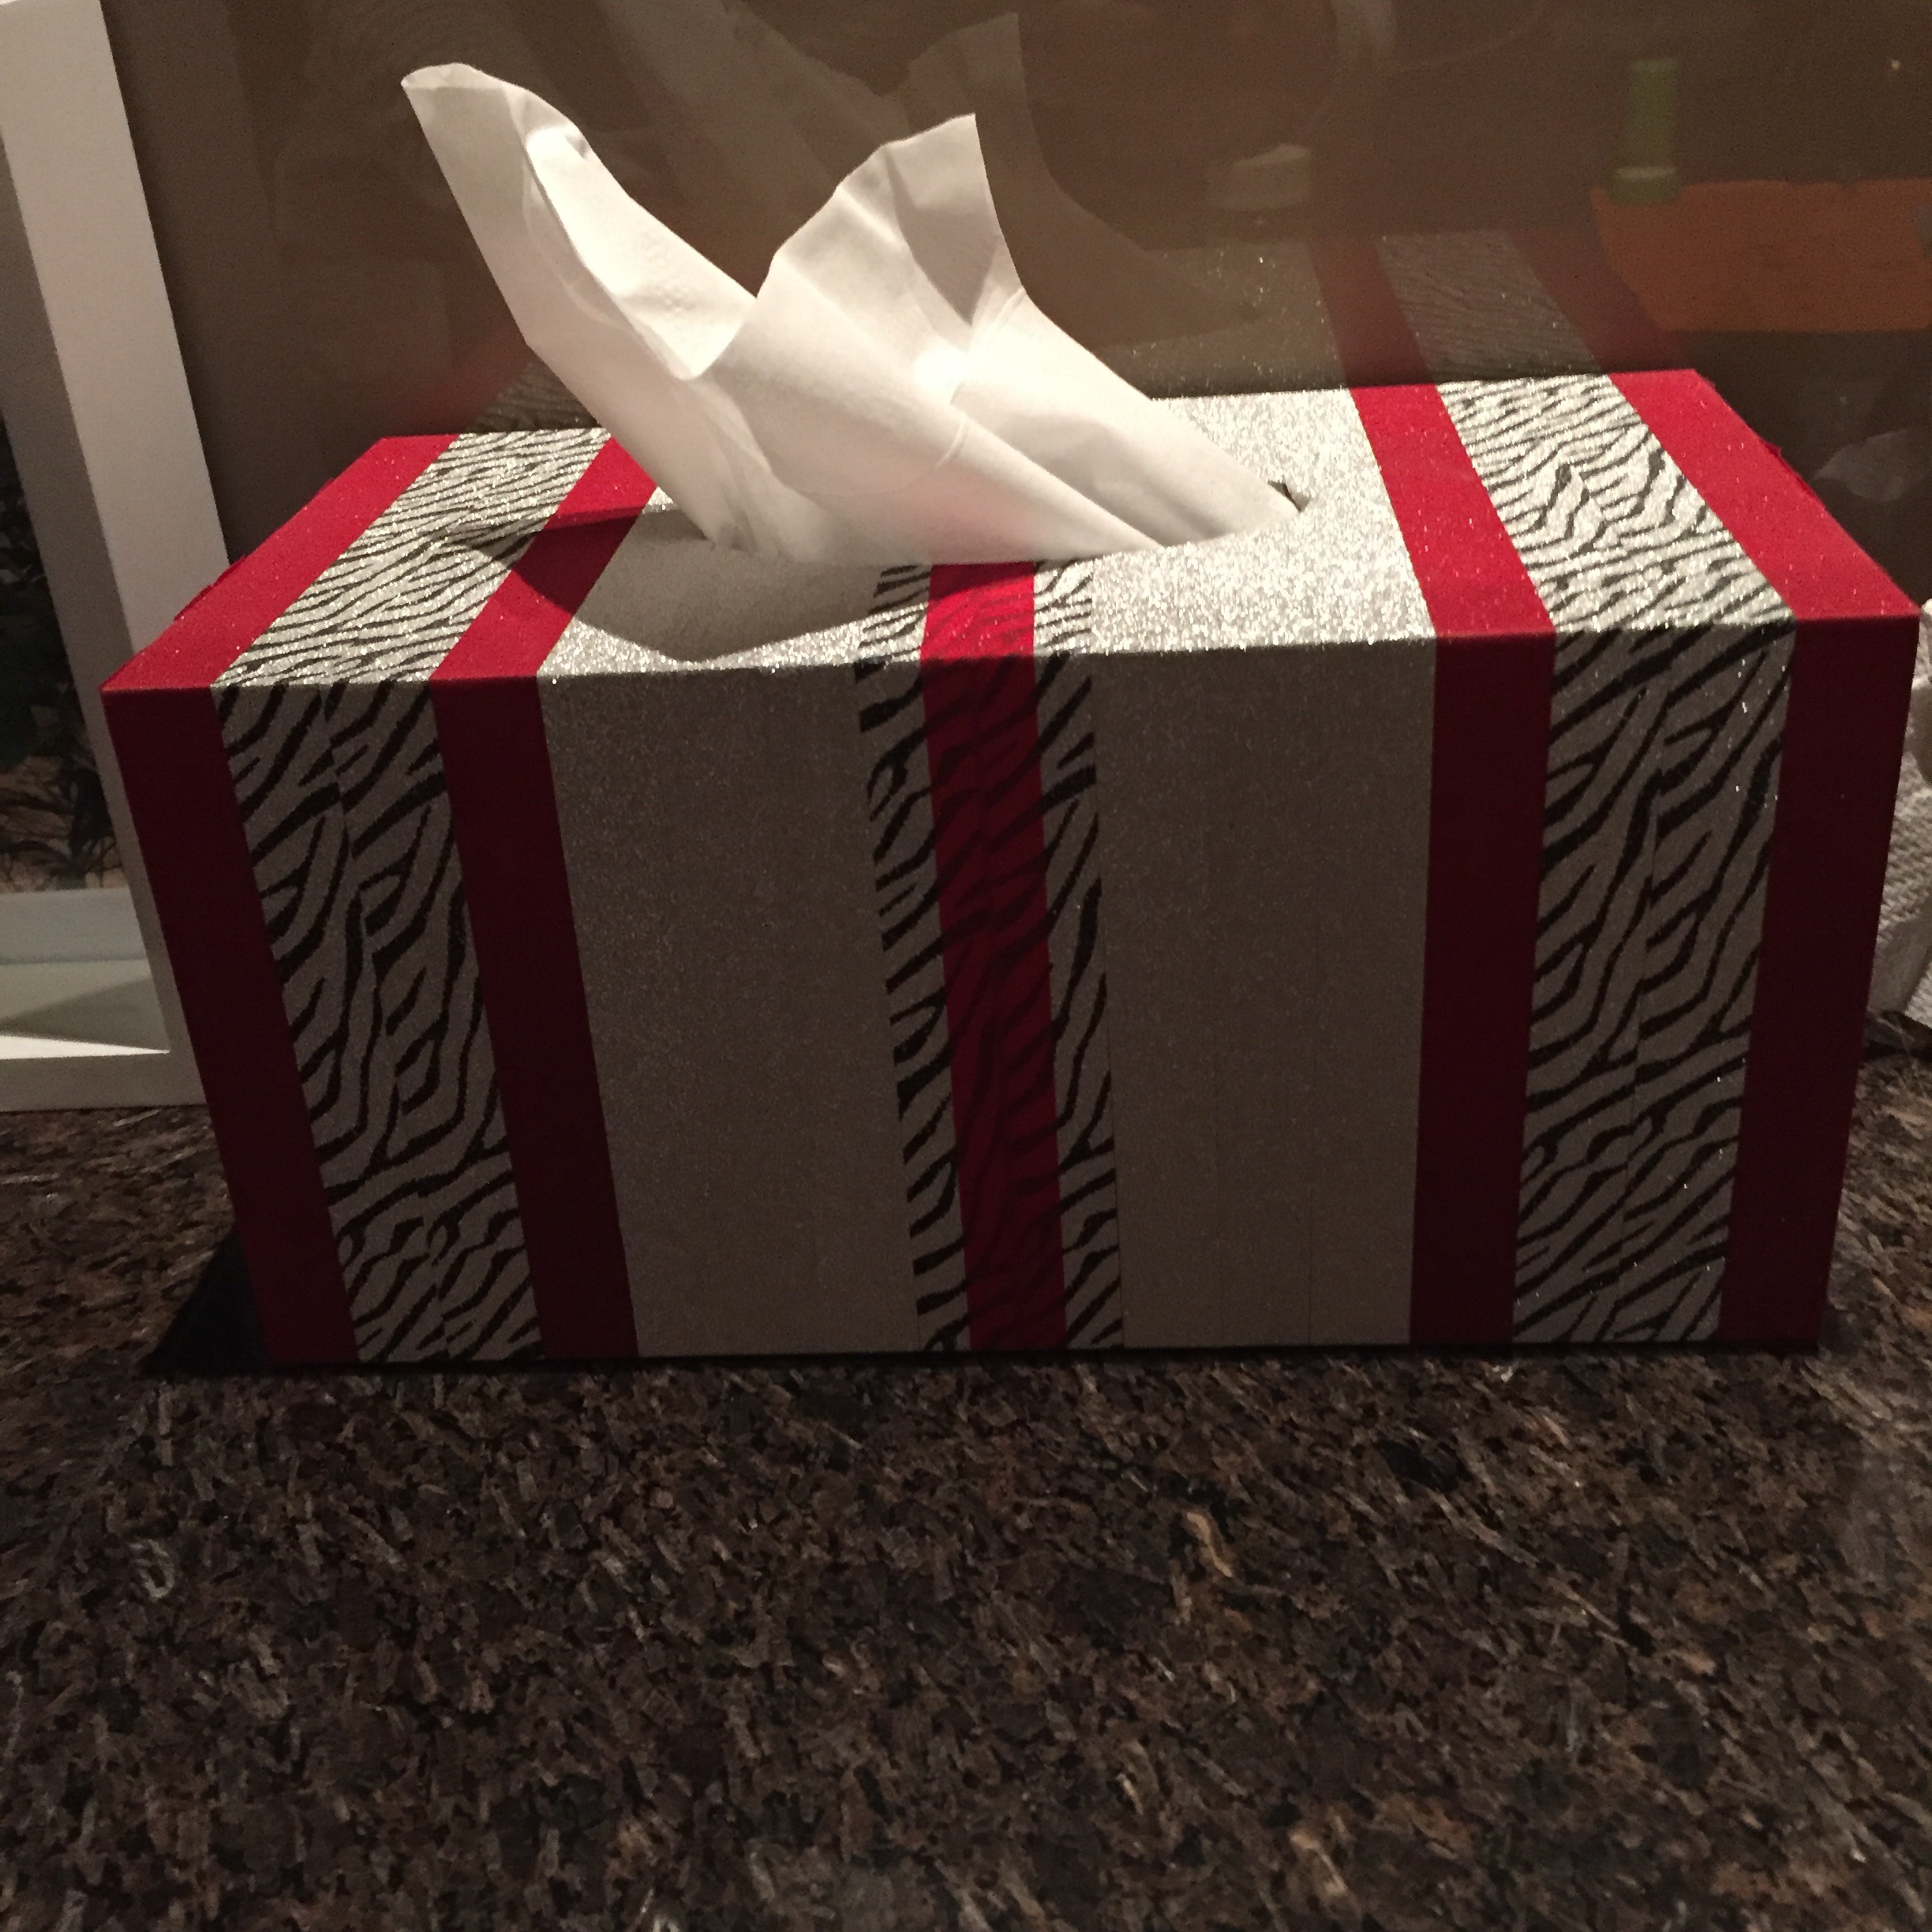
(I have a mostly white-walled house with splashes of red in accessories here and there, with stainless steel appliances in the kitchen. I’m loving the red/silver sparkly combo! This is the only touch of “bling” in the house, and a tissue box is small enough I think the bling can stay!)
Thanks for reading
Caro
24 Saturday Oct 2015
Hello!
Yesterday I showed you some quick Star Wars themed kids cards I made. Today I want to show you a simple Star Wars themed gift bag for that little Jedi in your life!
I decorated up a gift bag from the $2 shop: 

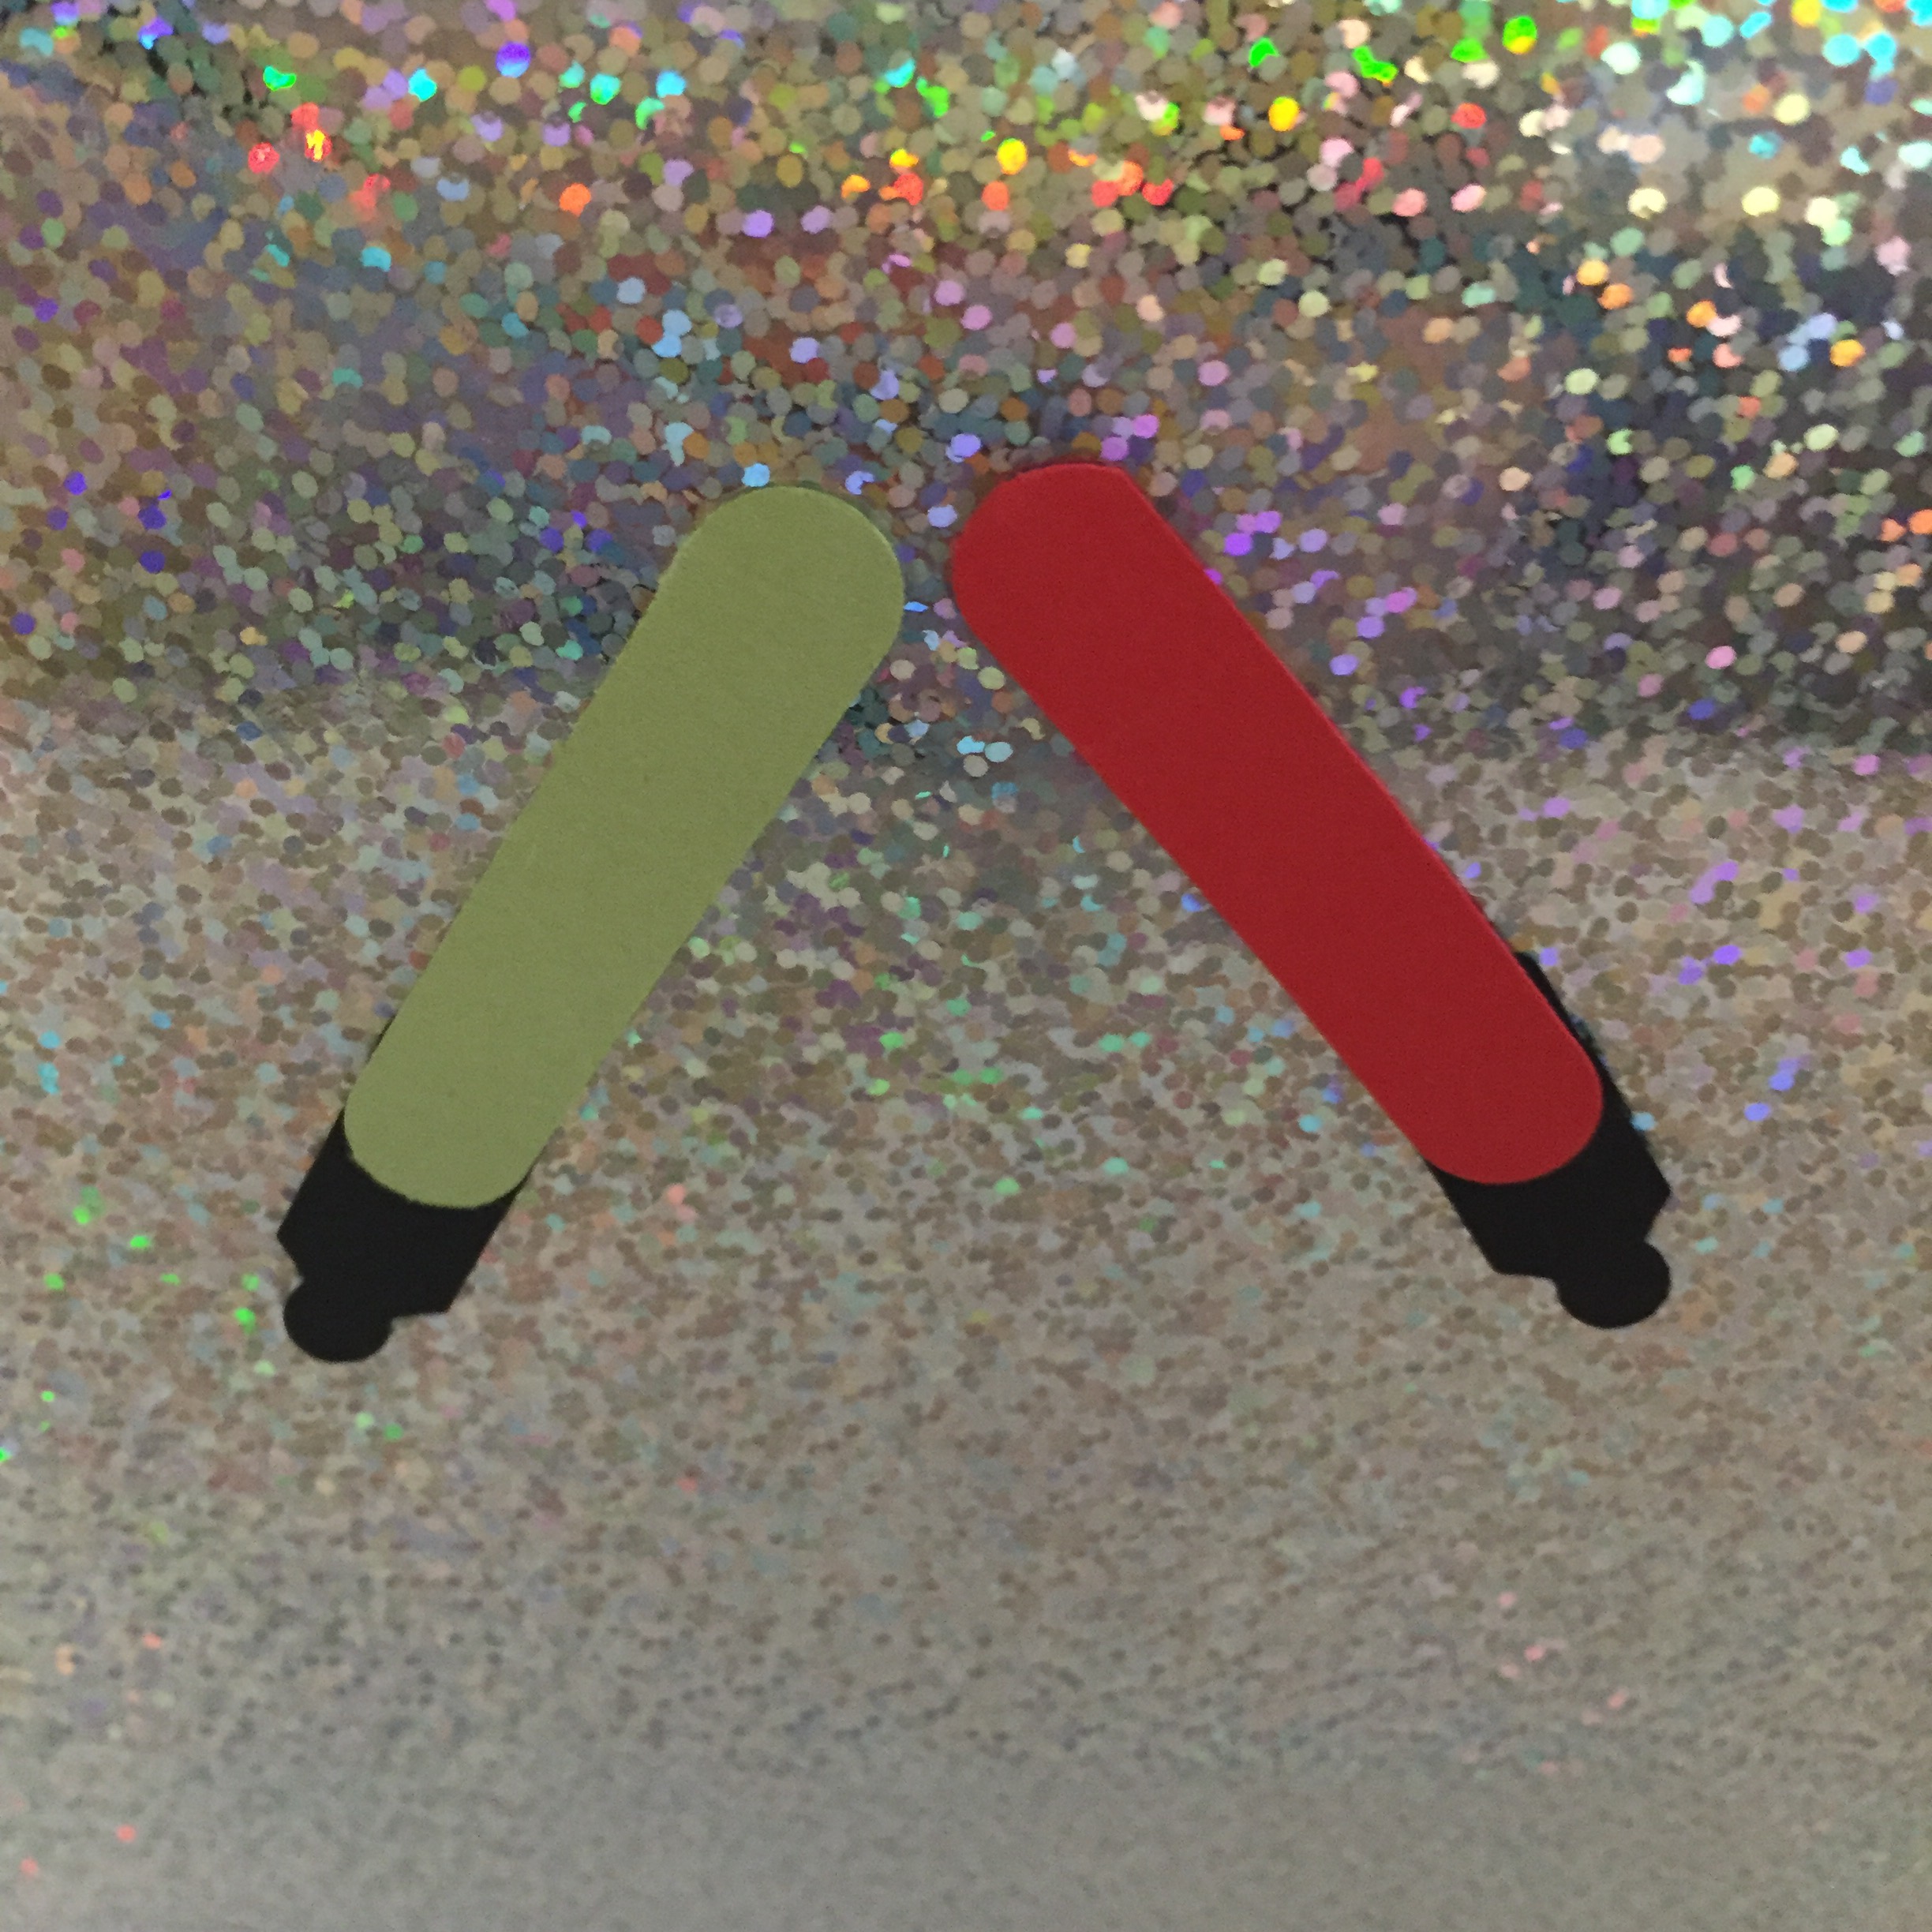
The picture of the Death Star is sized to fit my 1 3/4 circle punch. The lightsabers are made from the word window and jewellery tag punches.
I’m a little bit in love with this one!!!
Caro x
02 Wednesday Sep 2015
Posted in 3D projects, Home decorating, Notebooks, Using up scraps
I was well enough to get back to work yesterday and after being in such a crafty zone the last few days I looked at a notepad on my desk and had to do something about it before I could possibly start work 😉

There, that’s better!
Yet another piece of paper from my stash has found a good home 🙂
Caro
