• About

Caro's Pretty Things

~ My papercraft blog

Category Archives: Dies

A simple thank you card

09 Friday Aug 2013

Posted by Carolyn in Big Shot, Bird Builder, Dies, Kids party, Thank you, Top Note

≈ 1 Comment

You may have noticed a recurring theme on my blog is ‘simple’?  Simple cards, simple layouts, simple tricks.    As someone who works and looks after a family, I am usually pretty time poor.  So simple is good.  Simple works!

Here’s another idea for a simple thank you card.

IMG_1422

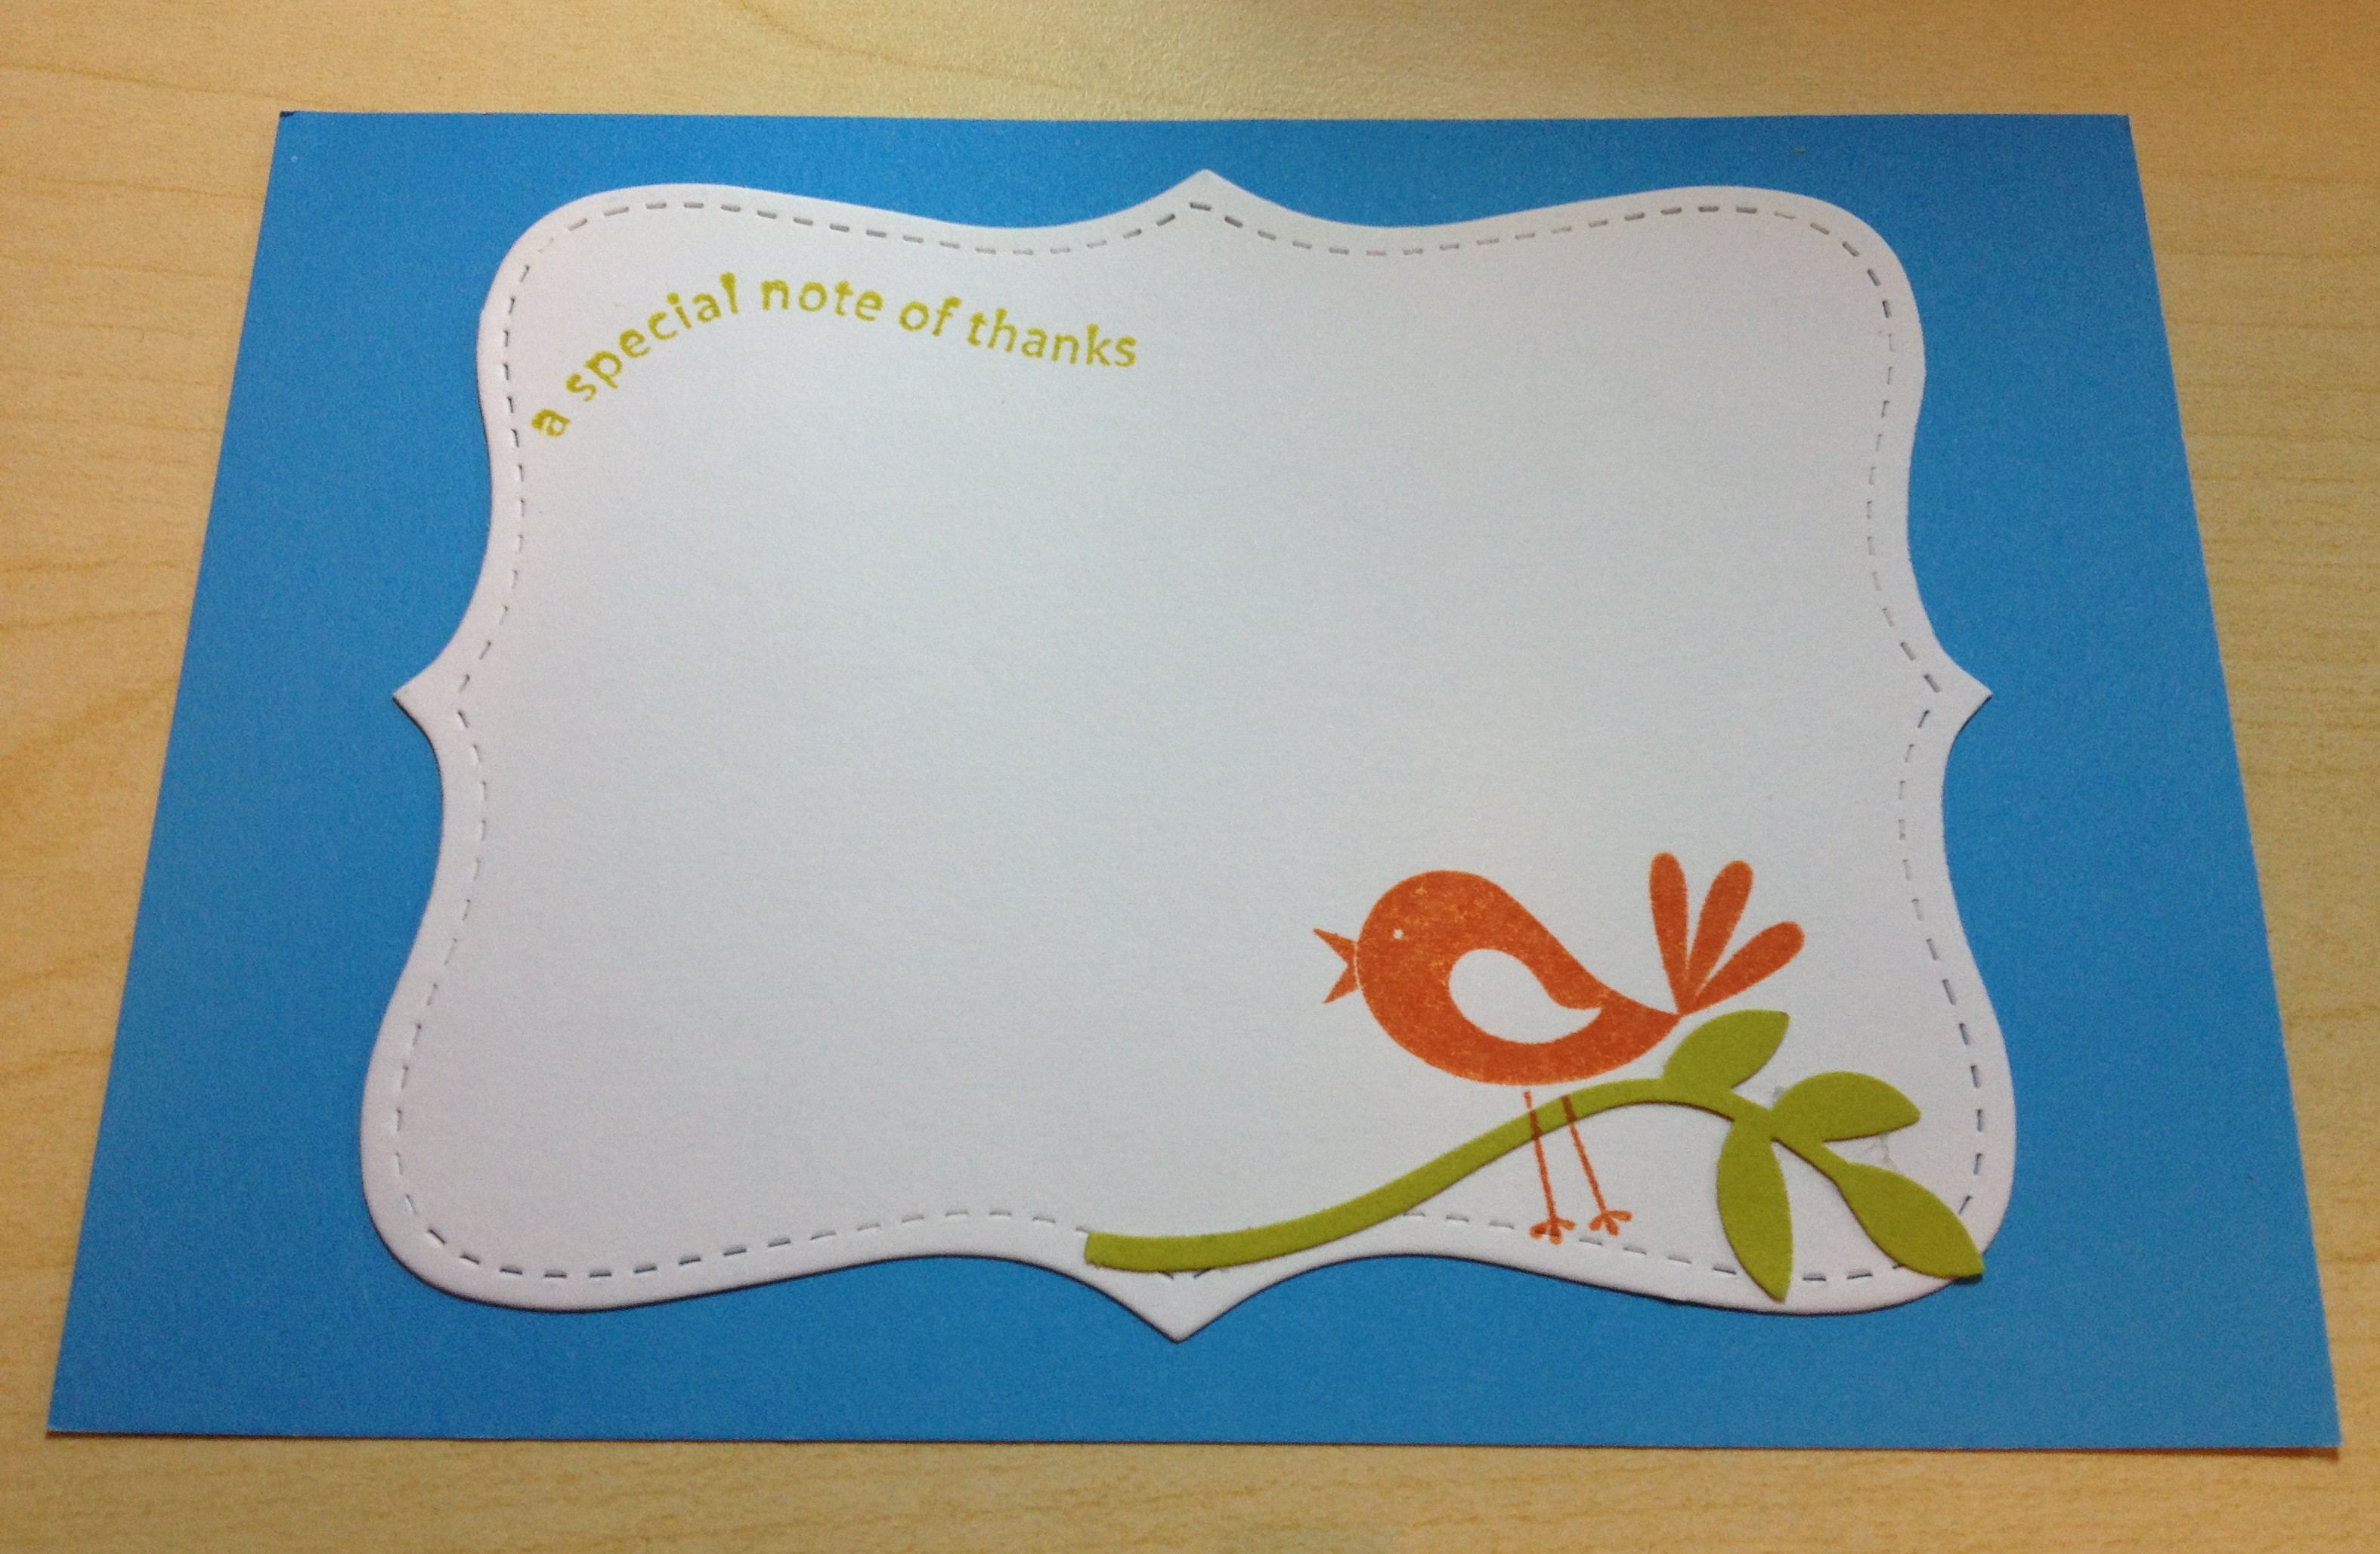
I made these a couple of years ago as thank you cards for my son’s birthday party.    I divided an A4 piece of card stock into 4 pieces (this is Pacific Point).  I then ran some white card stock through the BigShot using my TopNote die.  You can cut 3-4 at a time so it’s really fast.

I decorated this with the branch from the Bird Builder punch and a bird and thank you message from the Cheap Talk stamp set.    But pretty much any thank you stamp and decoration would work.

I need to come up with some thank you cards for my son’s birthday party this year (I’m running just a little late …)  I might use this idea again as it’s so simple.  I’ll show you what I come up with!

Thanks for dropping by 🙂

PS Most of my posts so far have been the result of me going through photos I’ve taken of cards I’ve made over the past few years.  I’ve been so busy lately I haven’t had much of a chance to do anything new – other than kids birthday cards!   I can’t wait to have some spare time and create some new stuff.   One day!

Share this:

  • Click to share on Pinterest (Opens in new window) Pinterest
  • Click to share on X (Opens in new window) X
  • Click to share on Facebook (Opens in new window) Facebook
  • Click to email a link to a friend (Opens in new window) Email
  • More
  • Click to share on Reddit (Opens in new window) Reddit
  • Click to share on Tumblr (Opens in new window) Tumblr
Like Loading...

Pirate birthday party card

05 Monday Aug 2013

Posted by Carolyn in Big Shot, Cards, Cupcake Builder, Decorative Label, Dies, Kids cards, Kids party, Modern Label, Owl, Punches, Top Note, Using up scraps, Word Window

≈ Leave a comment

Hi

It seems that lately the only crafting I get to do is with a 4 year old sitting on my lap being the artistic director!  (I’m not complaining, I love it!)  It does mean though that most of my craft time is spent thinking up fun ideas for cards for kid’s birthday parties! This past weekend’s challenge was a card for a pirate themed birthday party.

So off to my office/craft room we went and did a little Google searching for inspiration.   Mr 4 was most impressed by the idea of an owl pirate – and he thought we should make a pirate like this one on Lynn Starzi’s blog.

I’m not too sure about this card (remember Mr 4 was the artistic director!) but here it is:

photo


Most importantly, both my munchkin and the lucky recipient thought it was great – so I guess that’s what matters!

The waves were made from some scraps of Pacific Point.  I’d saved some off cuts from cutting out some Top Note shapes, and the edges of where I’d cut out the Top Note actually worked quite well as waves!

The rest was the card was a mix of free hand cutting and Stampin’ Up! punches.

The pirate was made from the owl punch.   The pirate’s shirt had to be “red and stripey” apparently, so I found an old bit of Poppy Parade DSP (now retired).   Please note the peg leg!   Made from the candle from the cupcake builder punch.  The eyes were cut from the owl punch with “goggly eyes” stuck on top with mini glue dots.

The pirate’s hat was the side of the decorative label punch, flipped horizontally.

The boat was a large oval punch cut off across the top (Soft Suede card stock).  I cut the mast, the sail and ‘the plank’ freehand.   And a white Signo pen was perfect for drawing on the crossbones (no skulls for me).

Mr Artistic Controller was most insistent that the card had to say “Ahoy, me heartie!”, not “Happy Birthday”.    Given that my stamp collection doesn’t quite stretch to pirate messages, I wrote in on in pen.  (I’m still not convinced I spelled ‘heartie’ correctly but what can you do?!?)

The frame for the message is a modern label punch and the white is a word window punch.

There you go – our owl pirate card!

Caro x


Share this:

  • Click to share on Pinterest (Opens in new window) Pinterest
  • Click to share on X (Opens in new window) X
  • Click to share on Facebook (Opens in new window) Facebook
  • Click to email a link to a friend (Opens in new window) Email
  • More
  • Click to share on Reddit (Opens in new window) Reddit
  • Click to share on Tumblr (Opens in new window) Tumblr
Like Loading...

Another favourite card layout

26 Friday Jul 2013

Posted by Carolyn in Beautiful Butterflies, Big Shot, General occasion, Tutorial, Using up scraps

≈ Leave a comment

Tags

butterflies, card layout, scraps

Hi

Just popping by for a quick post to show you another one of my favourite card layouts.   This one is also really simple – but because it’s a little different to the cards you usually see in the shops it can have a bit of a ‘wow’ factor.    But check out how easy it is to make!

IMG_1414

This is a gatefold card.   So when you untie the ribbon you get to open up the card to see the message inside.

IMG_1417

The dimensions will depend a bit on the size of your envelope!  My square envelope for this card was 14 cm square.  So I wanted to make a 13cm square card to fit inside.

This means I cut a piece of cardstock 26cm x 13cm.

To make a square card that opens the normal way you would just score and fold the long side at 13cm to make a 13cm square card.     To make a gate fold card you need to fold in from either side to make the ‘gates’.   So you score and fold at 6.5cm in from either end of the long side.

Here’s a little sketch to show you what I mean:

photo

And here’s another picture of the card showing a little more of the inside.   I’ve used some butterflies cut out with my Beautiful Butterflies die to decorate it.

IMG_1415

The strips of paper on the front are 12.5 cm x 6 cm.  And the strip at the bottom is 13cm wide – I can’t remember how high but it really doesn’t matter.    This layout is another good way to use up those little scraps of paper you can’t quite bring yourself to throw out because they are so pretty!

You can add the ribbon in a couple of different ways.  For this card I’ve just glued the ribbon across the back of the card.   You can also punch holes in the front of the card and thread ribbon through and tie a bow.

You can use this layout in so many ways.   I will try and post some more examples of cards I’ve made using this layout soon.

Thanks for reading!

Caro x

Share this:

  • Click to share on Pinterest (Opens in new window) Pinterest
  • Click to share on X (Opens in new window) X
  • Click to share on Facebook (Opens in new window) Facebook
  • Click to email a link to a friend (Opens in new window) Email
  • More
  • Click to share on Reddit (Opens in new window) Reddit
  • Click to share on Tumblr (Opens in new window) Tumblr
Like Loading...

Elmo invitation

29 Wednesday May 2013

Posted by Carolyn in Big Shot, Circles #2, Dies, Invitations, Kids cards, Large Oval, Scallop circle

≈ 1 Comment

The other day I showed you the invitations I made for my son’s 4th birthday party this year.   I’ve already had some great feedback about how excited the kids were to open the card and see a big ball pop up!

That all reminded me of an invitation I made for his birthday party when he was 2 and obsessed with Elmo from Sesame Street.

photo-2

I used the Stampin’ Up! Scallop Circle Die with my Big Shot to cut out all Riding Hood Red circles for the invitations.    The white eyes were cut from the Circles #2 die and I think I used my smallest circle punch for the black centres (you could also use the larger circles from the Stampin’ Up! Owl Builder punch).    The nose was cut from Tangerine Tango (but Pumpkin Pie or More Mustard would also work).    The black mouth was half of the largest circle from the Circles #2 die.

I stamped a basic invitation block on the back and I was done.

photo-3

Too easy – and the kids adored them!

Share this:

  • Click to share on Pinterest (Opens in new window) Pinterest
  • Click to share on X (Opens in new window) X
  • Click to share on Facebook (Opens in new window) Facebook
  • Click to email a link to a friend (Opens in new window) Email
  • More
  • Click to share on Reddit (Opens in new window) Reddit
  • Click to share on Tumblr (Opens in new window) Tumblr
Like Loading...

Peg magnets

28 Tuesday May 2013

Posted by Carolyn in 3D projects, Beautiful Butterflies, Blossom Builder, Gift tags & wrapping, Notebooks, Tutorial, Using up scraps

≈ Leave a comment

Tags

3D, DSP, gifts, pegs, scraps

Here is another idea I borrowed from the very talented Tanya Bell’s blog – this time, making magnets or paper holders out of pegs covered with DSP.

photo-4

These are so easy to do!  Step one, measure the size of your peg (cheap wooden pegs are the best).   Step 2, cut out lots of strips of DSP (this is such a great way to use up tiny little pieces you couldn’t figure out what to do with but couldn’t bear to throw away!).  Step 3, stick onto the peg!   Snail adhesive works well but starts to lose its “stick” after a few months so double sided tape like Sticky Strip is best.

I turned my pegs into magnets by sticking some magnets onto the back side of the peg.   One tip I learned here – if you want to use the peg as a magnet, either don’t decorate the reverse of the peg, or definitely use sticky strip to adhere the DSP to the paper.  Snail adhesive is not strong enough to keep the DSP stuck to the peg once it is stuck on the fridge with a magnet!

Here are a bunch of pegs with the DSP stuck on, waiting to be decorated.

20120605_161653

And here are a bunch more, after being decorated with butterflies, birds and flowers.  I’ve used die cut and punched butterflies, the bird from the Stampin’ Up! bird builder punch, and various flower punches.  Pearls and rhinestones can add some added ‘bling’.

20120605_161643

They can look quite cute packaged up in cellophane bags for a small gift for someone.

20121209_220144-1

photo

Adding some pegs with a little covered notebook (see yesterday’s post) can also look really cute.

20121209_220108So next time you finish a project and have a thin piece of DSP left over, why not turn it into a cute little peg fridge magnet?

Share this:

  • Click to share on Pinterest (Opens in new window) Pinterest
  • Click to share on X (Opens in new window) X
  • Click to share on Facebook (Opens in new window) Facebook
  • Click to email a link to a friend (Opens in new window) Email
  • More
  • Click to share on Reddit (Opens in new window) Reddit
  • Click to share on Tumblr (Opens in new window) Tumblr
Like Loading...
Newer posts →

Carolyn Dalton

Independent Stampin Up! Demonstrator

Recent Posts

  • Pretty butterfly birthday card 
  • Adding an extra touch to a homemade envelope
  • Quick and easy masculine card 
  • Quick and easy kids card
  • Butterfly soap card

Archives

  • March 2016
  • February 2016
  • January 2016
  • December 2015
  • November 2015
  • October 2015
  • September 2015
  • August 2015
  • July 2015
  • June 2015
  • May 2015
  • April 2015
  • September 2014
  • July 2014
  • April 2014
  • March 2014
  • February 2014
  • November 2013
  • October 2013
  • September 2013
  • August 2013
  • July 2013
  • June 2013
  • May 2013
  • May 2012

Categories

  • 1 1/4 inch circle
  • 1 3/4 circle
  • 1 3/4 inch scallop circle
  • 1 3/8 circle
  • 1 inch circle
  • 1 inch square
  • 2 3/8 inch scallop punch
  • 3/4 inch circle
  • 3D / pop up
  • 3D projects
  • Anniversary
  • Baby cards
  • Beautiful Butterflies
  • Big Shot
  • Bird Builder
  • Birthday
  • Bitty Butterfly
  • Blossom
  • Blossom Builder
  • Boho Blossoms
  • Boxes
  • Butterfly (retired)
  • Candy Wrapper
  • Card sets
  • Cards
  • Chalk Talk
  • Christmas
  • Circle Thinlits
  • Circle treat cups
  • Circles #2
  • Corner rounder
  • Cupcake Builder
  • Cupcakes and other tasty treats
  • Curly label
  • Decorative Label
  • Dies
  • Elegant Butterly
  • Embossing folders
  • Envelopes
  • Extra Large Oval
  • Fancy Flower
  • Framelits
  • Full heart
  • General occasion
  • Gift bags
  • Gift bow
  • Gift card holders
  • Gift tags & wrapping
  • Home decorating
  • Horizontal Slot
  • Invitations
  • Jewellery tag
  • Kids cards
  • Kids craft ideas
  • Kids party
  • Labels collection
  • Large Oval
  • Love notes
  • Masculine
  • Mini scallop
  • Modern Label
  • Music Notes
  • Notebooks
  • Owl
  • Perfect Polka Dots
  • Petite curly label
  • Pinwheel die
  • Punches
  • Scallop circle
  • Scallop edge
  • Scallop envelope
  • Scallop oval
  • Scallop Tag Topper
  • Small Heart
  • Square Lattice
  • Star
  • Sweet treat cups
  • Tag
  • Tasteful Trim
  • Thank you
  • Thoughts and comments
  • Top Note
  • Tutorial
  • Uncategorized
  • Using up scraps
  • Washi tape
  • Wedding cards
  • Wheels
  • Wildflower Meadow
  • Word Window

Pinterest

Follow Me on Pinterest

Follow me on Twitter

My Tweets

Enter your email address to follow this blog and receive notifications of new posts by email.

Join 26 other subscribers

Create a free website or blog at WordPress.com.

Privacy & Cookies: This site uses cookies. By continuing to use this website, you agree to their use.
To find out more, including how to control cookies, see here: Cookie Policy
  • Subscribe Subscribed
    • Caro's Pretty Things
    • Join 26 other subscribers
    • Already have a WordPress.com account? Log in now.
    • Caro's Pretty Things
    • Subscribe Subscribed
    • Sign up
    • Log in
    • Report this content
    • View site in Reader
    • Manage subscriptions
    • Collapse this bar
 

Loading Comments...
 

    %d